Tag Archives for " VOCs "

Sealing your Attached Garage

Sealing your Attached Garage

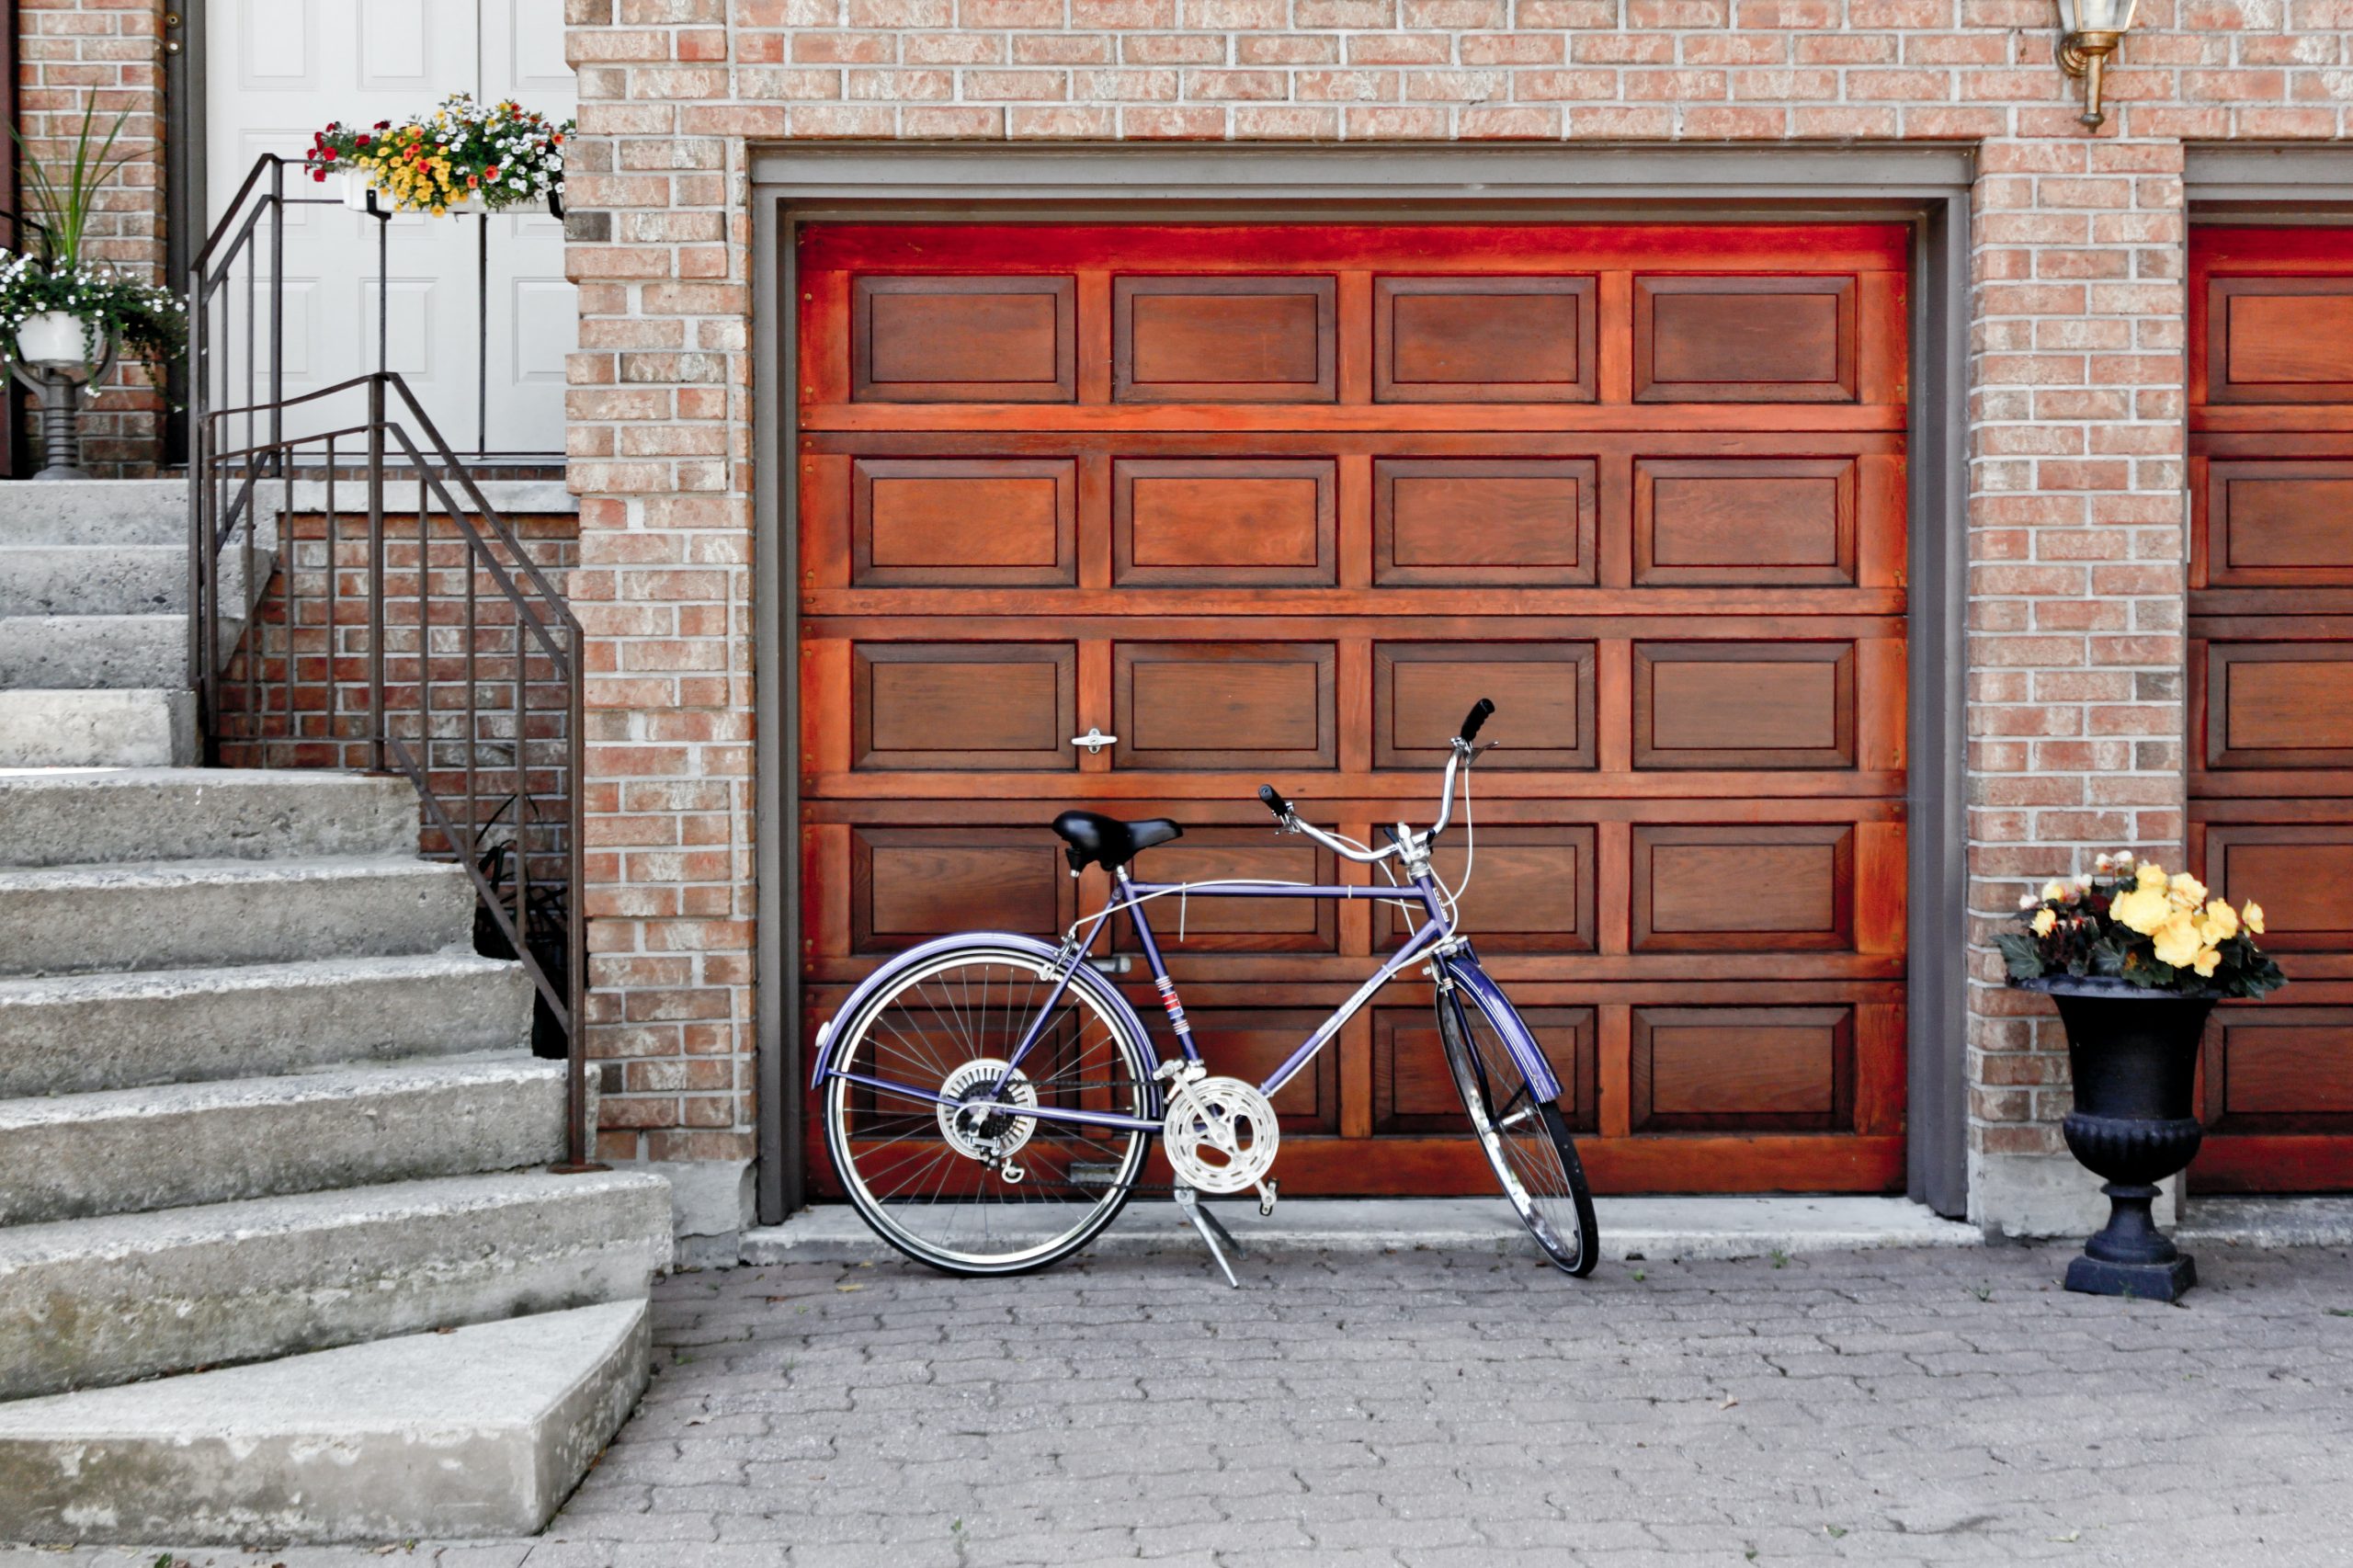
For many people an “attached garage” is an asset in a home: the convenience of parking and walking inside under cover is very attractive when there’s extreme weather outside!  However, from an air quality perspective, attached garages are actually a liability, unless the garage has been air-sealed from your house!

In our articles about negative air pressure here and here, we talked about how contaminants can enter your home from the garage.  The garage not only has car exhaust fumes, it can also have paint or chemical fumes from your hobby, VOCs from pesticides and insecticides stored there, and possibly even exhaust gases from your gas water heater, furnace or clothes dryer.  Need we  mention the mold and mildew spores when humidity and cardboard boxes create the perfect environment for mold?  It’s almost like having an unsanitary neighbor in the apartment next to you…now, does an attached garage still seem like an “asset” to your clean, healthy home?

If you are coming around to a healthier way of thinking about your garage, it’s essential to consider installing some boundaries with this unsanitary neighbor!  “Air sealing” is more than just a tight-closing door.  It goes from the ground (foundation), through walls and insulation and even into the attic.  That’s right–if the attic over your garage is not sealed from the attic over your home, you got it–there is shared airspace and the possibility of contaminants crossing over from the air that circulates there due to changing temperatures. 

As with most air-sealing projects, creating this boundary is easiest if it’s done during the building phase.  The easiest way is to build your attached garage as a “separate” building…as in this article.  Jake Bruton of Airow Building in Missouri does it this way: do all the framing for the house, install your air barrier, and only then, frame the garage on the other side of the air barrier.  Finally, any penetrations like electrical and ventilation must be properly sealed. 

Another way to airseal during construction is to hang drywall on the shared wall inside the garage, foam the penetrations like light switches and outlets on that wall, and also run plywood sheathing above it to the roofdeck, using sprayfoam to seal the entire barrier in the attic as in this video.  Sprayfoam really is the only way to effectively seal around ceiling joists, which often run straight over the wall from the home into the garage.     

This is all great...for new construction.  What if you are buying an existing home, or just now want to upgrade your home?  First of all, examine that shared wall from the garage side, from floor to ceiling. 

  • If the drywall is finished, that’s good.  Finished drywall can be an air barrier.  However, you’ll want to remove any trim like baseboards or trim around doors, faceplates like electrical plates, and uncover any penetrations.  Get some spray foam in a can and seal all of these cracks with spray foam.   You’ll want to cover the space from the sill plate to the drywall, the spaces around electrical boxes, and around any pipes sticking through the wall like gas pipes or hot water pipes if you have a hot water heater in the garage.  Make sure to seal around the door frame if there’s dead space there. 

  • If the drywall is not finished (no tape and mud or just insulation), that’s even better!  Consider removing the existing drywall on the garage side (you can install it again later if screws were used), as well as any fiberglass or rolled insulation, and sprayfoaming the entire wall.  Spray foam can be an excellent air barrier if it’s done by a pro.  Before you schedule the job, however, go to the next point and prep the attic space so that they can foam there as well.

  • If the attic space between the garage and home are shared, you’ll need to build a partition wall between them.  Of course this is not a fun job, because attics are typically low, cramped and have extreme temperatures, but it’s critical if you’re going to do a thorough job.  Then, the wall can be sprayfoamed on the attic or house side, or at least foamed around the roof, rafters and joists and taped where plywood sheets come together.  

  • Ventilation (air conditioning and heating) is something that should never be shared between a house and garage, because that is a sure way to pull those contaminants right in and distribute them around your home!  If you do have a shared system, consult with an HVAC company about terminating the vents to the garage and installing a dedicated mini-split.  For small garages, a window air conditioner and portable heater will do the trick!  

  • If flexible ventilation ducts go over the garage with no vents, it’s really hard to get an air seal around flex ducts.  If you can’t/don’t want to switch to metal ductwork, install a collar in the attic wall that separates the garage and house (the one you build as in bullet #3 above), and attach the ends of the flex duct to it, so the wall can still be adequately airsealed.  

  • The door between the house and garage, of course, is an area that needs to seal tightly.  Adjust the door so that no daylight shows around the perimeter (I know, this is easier said than done!) and use weatherstripping around the sides so that it seals when closed.  If necessary, install a “sweep” on the bottom or replace the rubber seal in the threshold so the bottom seals as well. 

Here are some product recommendations for air sealing the garage:  

  • Air-sealing tapes can be expensive, but don’t scrimp: don’t use duct-tape, vapor-barrier tape or anything less than a product that is for air-sealing.  ZIP System is a great brand and be sure to buy more than you think you will need, because there always seems to be another seam to seal!  Use this tape to seal plywood edges together, seal the door frame to the drywall (if you can’t foam it), etc. 

  • Spray foam cans come in lots of formulations: small cracks (less than ¼”), larger gaps and cracks ( ), pest block formula (who knows what kind of chemicals are in there), but just be sure to buy a good number of the small and large gap formulations before you start the job.  Wear gloves, safety goggles and old clothing (long hair safely tucked away) because this stuff is super sticky!  Also, if you use a can quickly, you can reuse the same straw on the next can, and save the extra straw in case one gets plugged or lost.  Unless you buy the “smart dispenser” version, the straws and remainder in the can cannot be reused after about 30-40 minutes, so be sure to have several spray areas ready when you start spraying!  After it hardens, you can use a utility knife or hacksaw blade to cut away excess foam.  Consider these different products:

    • Great Stuff Window and Door gently expands so that frames will not warp under pressure.

    • Great Stuff Gap and Cracks (use in gaps up to 1”)

    • Loctite Tite Foam, pack of 2 for $19

    • Great Stuff Pro (large cans, $14 each–a great tool for a large job because it’s easier to dispense and can be reused for up to 30 days); however it requires a special gun.  Users report that a can goes a LONG way (3-6 cans on a large home) but if you have more air-sealing to do, it’s worth having several more on hand.

    • And more…

Not only will your house smell better and stay cleaner after these airsealing improvements, you’ll probably notice less cold drafts in winter and hot air in summer, since most attached garages are not conditioned.  Finally, complete your sealed garage upgrade with a funny sign reminding everyone to “close the door”...after all, airsealing can only go so far when the door is open!!

Photo by Kevin Wolf on Unsplash

Fire and Smoke Recovery

Fire and Smoke Recovery

Wildfires have been very destructive in the western half of the US in the late 2010's and early 2020’s.  As for the future, a 2022 report by the UN Environment Programme (UNEP) and GRID-Arendal projects an increase in extreme fires by 14% by 2030, 30% by the end of 2050, and 50% by 2100, due to climate change and land-use change. (breezometer.com)  

Fire disasters, like natural disasters, do not just destroy what the fire touches.  They can disrupt major infrastructures like highways and railways, power and water, and most important, air quality.  Because fires may smolder for some time, try to prepare to deal with the effects for weeks. 

If you live in an area prone to wildfires or prevailing winds that may carry smoke, here are some ways to prepare:

  • Seal doors and windows with weatherstripping, caulk and door sweeps.  
  • Find out how to adjust your HVAC system accordingly: you’ll want to close the fresh air intake and change over to recirculation, no matter whether you have central AC, a window air conditioner or portable air conditioner.
  • Purchase extra MERV 13 or higher filters for your HVAC system, to be used on poor air quality days.
  • If you live in an apartment building or condo with little control over the HVAC, consider purchasing vent filter material so you can place them in the vents into your space. Carbon vent filter material will neutralize many VOCs as well.
  • Purchase a HEPA air cleaner (non-ozone producing type) and be sure to have an extra filter or two on hand.    
  • Keep a number of N95 respirator masks on hand.    
  • Keep canned food and bottled water on hand.
  • Stock up on essentials for cleaning smoke odor: baking soda, white vinegar, rags, TotalClean

During:

  • Try not to cook during a wildfire emergency, because cooking indoors increases small particulates and vapors in the air, and you won’t want to turn on your stove exhaust, as that will draw polluted outdoor air into the house.  Try to use just the canned food you have on hand.
  • Monitor the filters in your HVAC system and air purifiers and change them when you start to notice a color change on the front of the filter, or when the output air starts to smell like smoke. 
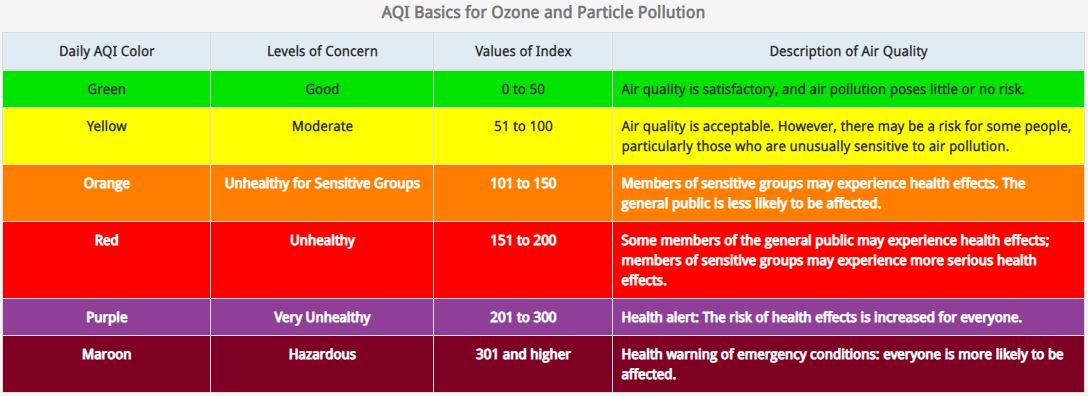
  • Check your local air quality and receive updates from airnow.gov . Fire and smoke maps are available under the heading fire.airnow.gov.  You can also register for a free 14-day trial of Breezometer’s Air Quality app.  Below is a diagram to understand air quality index values (airnow.gov).
  • Use N95 respirators to evacuate to a safer place if necessary.  

Source: airnow.gov

After:  

  • Don’t open windows and doors until the air quality index is less than 100.  When that happens, you can open windows fully to get more fresh air ventilation. 
  • Set up fans near doors and windows to “push” smoke odor and soot outside.

To remove smoke odor that infiltrated from outside, or if you had a fire in your home:

  • Run air purifier(s) continuously with charcoal filters. 
  • Sprinkle baking soda over carpets and rugs and leave it overnight.  Then using a vacuum with HEPA filter, vacuum out the carpets.  
  • Remove drapes, towels, and any hanging fabric exposed to smoke, and either launder it in your washing machine or send it for professional cleaning.  When washing it yourself, you can add a cup of distilled white vinegar to your regular laundry detergent to remove smoke.  Don’t machine dry the item until the odor has been removed; it may need an additional washing cycle.
  • Wipe down all hard surfaces, including walls, ceilings, floors and windows with TotalClean or a 1:1 mixture of warm water and white vinegar (TotalClean is more gentle than vinegar and can be used on stone, wood, etc.)  Dispose of rags or wash them out with mild detergent and water as you go.  

To clean fabric-upholstered items:

  • Try to remove any cushion covers that are washable.  
  • Clean bare foam cushions by using “air replacement”:  Place the cushion into a large vacuum-seal bag and sprinkle baking soda over it.  Seal the bag and use your HEPA vacuum to remove the air from inside the cushion.  Let the air back into the bag to re-inflate the cushion.   Repeat several times if necessary. 
  • Sprinkle baking soda over the piece and let it set overnight before vacuuming it off.
  • You can also move the piece outside to air it out in the sun.  
  • It’s difficult to remove smoke that’s settled into furniture, however, if it does not dissipate following using an ozone generator, you can contact a restoration company for their services if it’s a valuable piece to you.

Try an Ozone Generator to remove smoke odors:

  • Ozone generators should only be used once all surfaces that can be cleaned are thoroughly cleaned (walls, floors and ceilings too!).  
  • Ozone is not as effective in areas of high humidity, so running the air conditioner or a dehumidifier in the space to get the humidity down (60% or less) is advisable.  Central air conditioning and any exhaust fans must be shut down when using the ozone generator, though, because you’ll want the ozone to stay in the space. 
  • Use fan(s) within the space to circulate the ozone.
  • Ozone generators cannot be used in the presence of people, pets or plants, but once these are removed, they can be quite effective in removing smoke.  Follow all instructions to seal up the space and allow it to work for the full time advised before ventilating.  Contact HypoAir regarding rental of our ozone generators, or local restoration companies may rent ozone generators.    

For large areas with open walls and ceilings such as basements, garages or gutted homes, consider having them soda blasted by professionals to remove soot and smoke odor from the structure in hard-to-reach places.  Baking soda’s legendary cleaning and odor-absorption qualities can produce amazing results when combined with commercial equipment and a skilled contractor.

Don’t: 

  • Spray deodorizers or fresheners to “cover up” the smell of smoke, because they do nothing to remove the contaminants, and many have toxic ingredients in them.
  • Attempt to live in spaces with heavy smoke damage until they are cleaned.  “Third-hand smoke” is the term used for the way carbon and chemicals in the smoke react to the materials in your home, and it can make you very ill.
  • Neglect flood remediation if the smoke damage was part of a fire in your home and fire response crews extinguished it using water.  Building materials must be removed or dried thoroughly within 48 hours in order to prevent mold growth. 

Photo by Daniel Tausis on Unsplash

What’s in a chemical filter?

What’s in a chemical filter?

Current events certainly stimulate a lot of research, and the accidental release of toxic chemicals from storage and transportation units is no exception.  When a dangerous chemical is odorless and colorless, how can we possibly protect ourselves and the air in our homes?  Enter chemical filters, which are actually already available for purchase.

Many gas filtration media start with a base material and then add (impregnate) the base material with specialized materials.  Since all of these base materials have a multitude of miniature holes that can get “plugged up” with dust, it’s best to make sure the dust filter is clean and in place to preserve the life of the chemical filter.  The base material is incredibly light because of the vast amount of internal surface area it has in its many cavities and holes.  The way these materials  purify air is called “adsorption” (in contrast to absorption).  Adsorption and absorption both “suck up” liquids or contaminants, but there is a difference:  a sponge will absorb water, but eventually the water leaks out or evaporates.  Activated carbon, activated alumina and zeolites adsorb certain chemicals, some including water, but the adsorbed liquid or gas does not escape because a chemical bond is made, until the material is regenerated with high heat.  Since adsorption is a surface phenomenon, good adsorbents are those having large surface areas per unit mass and high attractive forces for the compounds to be adsorbed, called the solute. Although all molecules are adsorbed to a certain extent, those having high polarity are likely to be more strongly adsorbed than those having low polarity. Since water is a highly polar material, it is much more strongly adsorbed than hydrocarbons, for instance. (Air and Gas Drying with Activated Alumina)

Here are the most common base materials:

A main ingredient in these filters is activated carbon.  We’ve written about it here but when you have something more dangerous than sweaty socks or cat litter smells, we like to dig a bit deeper on its capabilities and limitations.  Activated carbon removes volatile organic compounds (VOCs) and acid gasses, which make them useful against a wide variety of pollutants.  To review, VOCs are compounds that have a high vapor pressure and low water solubility.  They are natural and human-made chemicals that are used and produced in the manufacture of paints, pharmaceuticals, and refrigerants. (EPA.gov)  An acid gas is any gaseous compound which, when dissolved in water, will form an acidic solution.  Many industrial compounds are acid gasses, but did you know that we actually exhale an acid gas?  Carbon dioxide (CO2) is an acid gas, and activated carbon is a method for removing excess CO2 in a space.  

Base Material

Activated Carbon: around $1150 per ton (coconut shell)

What it adsorbs

VOCs, acid gasses

Pros

Cons

Lightweight and large surface area

Adsorption is lowered in humid environments

Fairly inexpensive

Filters exposed to the air eventually “fill up” with CO2 and water

Filters available in many sizes and price points

Not many consumer-grade activated carbon filters are “recycled”; regeneration of the media may or may not be possible depending on the chemicals adsorbed

Activated alumina is another base.  It’s a porous, solid form of aluminum oxide, otherwise known as Al2O3 or alumina. This is the same mineral that makes up the precious gems ruby and sapphire, with impurities being the source of the stones’ bright colors. After activated alumina has been evacuated of existing moisture by heating it, the high surface area and many pores of the material allow for the uptake of water and other molecules through adsorption.  (What is Activated Alumina?) At about 1.5 to 3 times the cost of activated carbon, activated alumina is pricier but very attractive for adsorbing different chemicals.

Base Material

Activated Alumina: around $1800-3600 per ton

What it adsorbs

Water, acidic gasses including CO2, and others

Pros

Cons

Lightweight and large surface area

Smaller range of adsorbed chemicals

High crush strength

Since it has a high affinity for water, moisture can reduce the capacity for adsorbing chemicals

Can also act as a catalyst for some chemical processes

Not many consumer air purifiers use this material 

Zeolites are another base material for chemical adsorbents.  They can be naturally occurring or man-made.  Zeolite has an aluminosilicate framework. Which simply means minerals composed of aluminum, silicon, and oxygen, plus countercations. This framework provides exceptional strength and stability to the honeycomb structure. It also makes it very difficult for the positively charged atoms (cations) to leach from Zeolite. (What is Zeolite?)   Molecular sieves are a type of zeolite that are manufactured to precise frameworks and pore sizes for specific applications.

Base Material

Zeolite: $1600-2200 per ton

What it adsorbs

Water, manufactured zeolite may adsorb VOCs if alumina is removed, molecular sieves can be even more chemical-specific

Pros

Cons

Lightweight and large surface area

Manufactured zeolites can be expensive

Less sensitive to water than activated carbon

Not many consumer air purifiers use this material but Austin Air is one

Higher crush strength than activated carbon

Well suited to low concentrations of VOCs

Molecular sieves can be tailored to the molecules they adsorb

Now that you know some of the base materials, additives (also called “doping”) can enhance capture/filtration of specific contaminants.  

  • Potassium Permanganate is added when sulfurous compounds may be present (such as hydrogen sulfide and sulfur dioxide).   According to this filter company, their molecular sieve impregnated with potassium permanganate oxidizes gaseous pollutants such as hydrogen sulfide, sulfur dioxide, formaldehyde, ethylene, mercaptans, and various aldehydes and alcohols.   Do you know what mercaptans are?  They are the sulfurous, rotten-egg smelling additives that are added to natural gas to help you know that there is a leak.

  • Potassium Iodide:  some AustinAir filters are impregnated with potassium iodide, for increased removal of formaldehyde and ammonia.  They are best used in places like new homes, laboratories, beauty salons, funeral homes, etc. Sources of formaldehyde in homes can be carpets, wood panel, construction materials and furniture upholstery, if not an outright chemical leak. (achooallergy.com)

  • Magnesium Dioxide and Copper Oxide: The air filter company Blueair adds these compounds in their activated carbon filters to remove carbon monoxide, ethylene oxide, and ozone.

So which filter is best for me?  It’s hard to plan for every scenario, but you may take into consideration the following:

  • This article/table by the California Air Resource Board (CARB) in response to the Aliso Canyon gas leak (California, 2015) describes what types of filters are in a number of high-end air purifiers.  The models may have changed slightly but it can give you an idea of how air purifiers can be used to reduce specific chemicals (mercaptans were judged to be the source of most peoples’ health issues).

  • If you live very close to a refinery or manufacturer of specific chemical products, you may want to find out what chemicals they manufacture, store and load, what VOCs/fumes are produced and what air filter is best to remove those VOCs. 

  • If you are interested in a particular type of filter, look for (or ask for) test data that verifies it removes what it’s designed to remove.  In an MIT study of 4 consumer-grade air cleaners, only 2 of them removed the VOCs toluene and limonene effectively.  

  • In the case of radon, activated carbon filters (and the others mentioned above) will not adsorb radon gas, but they will adsorb most of the radon decay products (termed “radon daughters or progeny”), which are actually the source of health issues associated with radon. (Reduction of Radon Working Level by a Room Air Cleaner).   Therefore, activated carbon is not recommended for first-line defense against radon infiltration into your home; a venting system is more appropriate and you should contact a professional if you have radon in your home.

  • In the end, activated carbon is widely used for a reason: it removes a lot of VOCs!  If you don’t have a specific chemical that you’re concerned about, this type of filter is a readily available, broad spectrum weapon against many pollutants.  If your air is particularly dusty, you’ll want to make sure that it also has a HEPA pre-filter to protect the activated carbon from getting clogged with dust.

Photo by Paul Teysen on Unsplash

Measure it so you can improve it!

Measure it so you can improve it!

There are several great old quotes that still hold true today:

“You can’t improve what you don’t measure.” (often attributed to Peter Drucker, “father of management thinking”, Forbes.com

“When you can measure what you are speaking about, and express it in numbers, you know something about it; but when you cannot measure it, when you cannot express it in numbers, your knowledge is of a meagre and unsatisfactory kind: it may be the beginning of knowledge, but you have scarcely, in your thoughts, advanced to the stage of science, whatever the matter may be.”  (Lord Kelvin, British scientist, oxfordreference.com)

Ok, so we need to measure if we really want to know what is going on.  When you’re talking about air quality, sensors are the key!  Whether you are a homeowner or a professional, an economical sensor is a valuable thing.  Here are some of the best and their many uses.

Air Flow 

There are several instruments that can be used to measure airflow.  HVAC techs use manometers or anemometers  to verify whether the installed ductwork and fans are performing as designed.  There are also many uses for these around the house!  Here are a few:

  • Hold it below your kitchen exhaust vent fan to see if it is moving enough air out of the kitchen (you can do the same for the bathroom exhaust fan)
  • Hold it below your return air intake when the filter is clean, and when it is dirty, to see how much a dirty filter impacts your air flow.
  • Install a pollution-filtering window screen and window fan, and check the fresh airflow in and out of the room (see our post here). 

Here’s an inexpensive anemometer that not only measures wind speed, it also measures the temperature.  In order to get a volume air flow measurement in cubic feet per minute (CFM), set the output to read feet per minute and then multiply it by the square footage of the duct or window you’re measuring (width in inches x length in inches divided by 144). 

Air Pressure

We’ve written quite a bit about the “pressure” of your home; ideally it will be “balanced” so that outside air is not being pulled in through cracks and crevices (other than fresh air ventilation).  How do you really know, though, without measuring?  Air pressure sensors are called manometers and here are some other uses for them:

  • Checking the pressure drop across a new higher MERV filter (we recommend MERV 13 for the best home filtration).  You can make a small hole in the filter in order to feed one of the ported tubes through, and seal it later with some tape.
  • Check the negative pressure in rooms with the door closed, to see if the HVAC returns are getting proper air flow.  In this post we discuss tackling the problem of getting enough air movement with closed doors.  

Here’s an inexpensive manometer that detects pressure or differential pressure (with two ports) and has readouts in several different common units. 

CO2 

If you’ve read our post on CO2, then you know how important this pollutant can be to your wellbeing.  Too much CO2 comes from not having enough fresh air ventilation, and can be a big factor in feeling groggy, less energetic, and causing brain fog and poor mental performance.  Of course, then, you’ll want to measure it in your home and workplace, your car, and maybe even in your classroom, church or other public meeting place.  Here are some sensors that will help you do that:

  • To get the most bang for your buck, AirThings 2930 WavePlus combines 6 sensors in one unit: Radon, CO2, VOC, Humidity, Temp, Pressure (Barometric pressure) for about $200.
  • InkBirdPlus makes a unit that tells CO2, temperature and humidity, which are 3 key measurements for home use.  It can be hung on the wall or be portable.  This unit is about $69.

PM and VOCs

Particulate Matter (PM) is not only dust–it’s smaller than that!  Dust ranges in the 2.5-10 micron range (check out the following diagram), but when there’s smoke or cooking involved (which happen in the home all the time), particles can be less than 1 micron.  That’s where you can really see what’s going on when the toaster burns your bread!  

Source: visualcapitalist.com

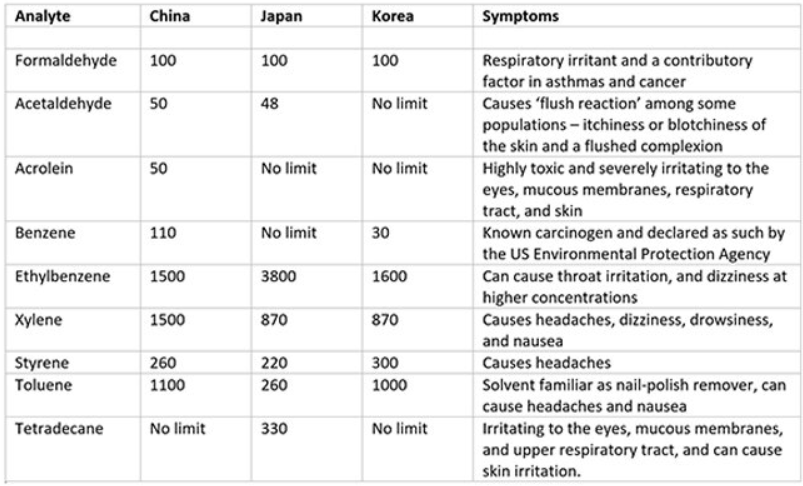
Formaldehyde is a toxic VOC that is a common “off-gas” component of new furniture, flooring and pressed-wood cabinets.  It can be measured separately or as a part of Total VOCs (TVOCs).  Those who like to have their nails manicured and painted may or may not be in shock if they took a VOC meter into the salon…the same could happen in a busy restaurant with “open kitchen” concept.  Here are some sensors that you can use in the home or business (gasp!) to make sure you’re ventilating or wearing a mask when appropriate.

  • This model by Temtop has a sleek design for your desk and measures PM2.5, Formaldehyde and Total VOCs ($90).
  • Temtop Air Quality Monitor measures PM2.5, PM10, Formaldehyde, temperature and humidity, TVOC and AQI, with solid ratings on Amazon ($149).

Some sensors look like a sleek medical device and some look like a machine from Inspector Gadget, but remember, they will give you information your nose alone can’t tell you.  If you take out your sensor in a public place and someone asks you about it, you may be able to impart some timely wisdom that will help them, too!

Photo by Jorge Ramirez on Unsplash

Air-Purifying Paint? Yes Please!

Air-Purifying Paint?  Yes Please!

Every little bit helps.  Even if you haven’t changed your furniture or decor in years, most of us are constantly bringing chemicals and VOCs into our homes that come with food packaging and toiletries, new clothing and shoes, electronics and consumables like filters, printer ink and cat litter.  It’s a revolving door–even the garbage bags we use to take the garbage out (ie. scented or unscented “odor control” garbage bags) unleash a lot of VOCs into the air when we shake them out and every time we open the garbage can. (cleanlivingpodcast.com)

These are the reasons I was elated to find that something as simple as paint can purify the air in your home.  It’s brilliant, really, after all the years that paint added VOCs to the air, that now it can take them out of the rest of our homes.  And, it can deal not just with VOCs but microbes like germs and mold.  These really are super-paints, and although their cost is premium, if you can afford it, why not?  Here are some of the ones that stand out.

ECOS Paints (ecospaints.net) are marketed as “paints that you can feel good about”.  I feel that way about most no-VOC paints, but these are special.  They have categories like “Air-Purifying”, “Anti-formaldehyde”, “EMF-Shielding”, “Pet Dwelling”, and “Lullaby” (for nurseries and nursery furniture).   All formulas are water-based, are non-toxic and emit zero VOCs.  Primers, stains, varnishes, concrete and stone coatings are included.   My main fascination, however, was with the Air Purifying Paint.  At $120 per gallon, it’s quite pricey, but you can justify the price over the lifetime of the paint.  It “absorbs and neutralizes chemicals, pollutants and VOCs for improved indoor air quality.”  Their Air Purifying Paints contain a molecular sieve which is designed to both stop harmful volatile organic compounds (VOCs) from being released into the air and to trap them as they float through a room.  (What is Air-Purifying Paint)  This sieve is zeolite, which is used in water purification, similar to activated carbon.  Over time, the pores in the zeolite will become less active (the website does not say how long this takes), but considering that most people repaint every 3-5 years, renewing the paint is like changing a filter on your air purifier. 

Gush Paints contain a proprietary catalyst that constantly breaks down VOCs in the room.   Their research indicates that the gush proprietary catalyst (GPC) is proven to be effective for at least 5 - 8 years under real-life conditions, which is a considerable length of time to enjoy cleaner air.  The literature is quite technical; GPC uses the principle of lattice doping and electron hole positioning, to interact with oxygen and water vapour in the air to form radical agents on the surface of the paint.  (This is not unlike the way bipolar ions attack VOCs through hydroxl radicals.)  It claims that VOCs are broken down at the rate of 99% in 21 hours.  They also stop mold and 99.9% of infection-causing bacteria.  At $70-75 per gallon, it has air-purifying and washable versions, which the air-purifying capability also somewhat regulate humidity.   Gush paints are GreenGuard Gold certified.  The colors are very hip with names like “boogie board” and “coffee beam”... perfectly named for the area they are manufactured, southern California. 

Smog Armor is made in Florida and uses zeolite (similar to ECOS Paints), which adsorbs VOCs and carbon dioxide, too.  It does not release them back into the environment and remains active for about 5 years.  It’s currently only available for commercial projects, but we can see the market for these types of paints expanding. 

Even Sherwin-Williams has picked up on this market.  Its SuperPaint with Air Purifying Technology ($75 per gallon) is mold and mildew inhibiting, zero VOCs, and helps reduce V.O.C. levels from potential sources like carpet, cabinets and fabrics and works to reduce unwanted household odors.  It’s also GreenGuard Gold Certified, but it is a latex paint, so those with latex allergies should be advised. 

Paints that incorporate Corning Guardiant, a finely milled glass-copper powder, harness the power of copper as an antimicrobial shield for their walls.  These include PPG Copper Armor (starting at $47/gallon) and Behr Copper Force (starting at $35/gallon), both available at Home Depot in a wide selection of colors.  Copper Force is Greenguard Certified, works to continuously kill 99.9% of viruses (SARS CoV-2 and Feline calicivirus) and bacteria (Staphylococcus aureus and Pseudomonas aeruginosa) on your painted surfaces within 2 hours of exposure, for up to 6 years as long as the paint film integrity is maintained.   Copper Armor “kills 99.9% of S. aureus (staph), P. aeruginosa, K. aerogenes as well as MRSA, Enterococcus faecium, E. coli O157: H7, Salmonella enterica and viruses norovirus (feline calicivirus) and SARS CoV-2 within 2-hours of exposure when used as part of a comprehensive infection control program for up to 5-years.”

Although Airlite is an Italian company and mostly available overseas, I thought I would tell you a little about their technology, because it seems different than the other paints presented.  “Airlite uses the energy of light to generate a small concentration of electrons on the surface on which it is applied. These electrons interact with water and oxygen present in the air to generate negative ions. When the air comes into contact with the wall on which Airlite is applied, the ions present near the surface interact with the polluting molecules and transform them into water-soluble, invisible and harmless mineral salts.”  The company has partnered with a number of artists and organizations to refresh and create outdoor murals, in order to reduce outdoor pollution as well.  The efficiency of the Airlite properties are guaranteed for 10 years; as long as there is light and humidity in the air, the benefits of Airlite will be active.  With its negative ions, Airlite also destroys viruses, bacteria, and mold at its surface, and repels dust and dirt. It’s a radiant reflector, with a saving of electricity for air conditioning between 15 and 30%.  Brilliant!

A fresh coat of paint has long been uplifting to our eyes and moods, but with these added technologies, these benefits are going beyond aesthetics to better health…making it easier to live in a polluted world.  Every little bit helps!

What’s hiding in that pallet wall?

What’s hiding in that pallet wall?

Another embarrassing but true story:  

Once upon a time in New Orleans, I rehabbed a house that was gutted post-Katrina.  In a neighborhood built in the 1950’s, I took down a few walls and set about making this little 1500 square foot home into my Pinterest dream.  No matter that the sloping floors would make a soup can roll from front door to back with no effort and amazing speed; all of the reclaimed furniture and materials available at that time were more than sufficient to supply the ideas that came into my head.  Some of my favorite places to go were the local “Green Project” or Habitat for Humanity stores.  Green Project had a small lumber yard of reclaimed wood and salvaged architectural pieces.  I don’t know whether I found this particular piece of wood there, or from the side of the road, but it looked perfect. 

My carpenter had framed in split-level bar countertops on either side of the newly opened-up kitchen, and to keep the cost of countertops low, I decided that the top of the bar would be reclaimed wood.  The chunk of wood I found was long enough for both tops, and the color of dark chocolate, a perfect contrast to the cream-colored kitchen.  I cut the pieces, sanded the edges, coated them with a few layers of varnish and set them outside to dry for a week or so.  Time to install!  They looked beautiful.

Throughout processing this wood, I did notice a “smell”.  It didn’t seem too strong, probably because I was doing the cutting, sanding and painting outside.  But soon after I installed it inside, the headaches started.  I had a constant strong headache most days for a week, until I made the connection and removed the wood.  Bingo!  Problem solved.  This was probably a decade before home VOC-testing equipment was available, but my brain and respiratory system was telling me that this wood was poisonous. Looking back, it was probably treated with creosote, which gave it the (beautiful!) dark brown color.  Creosote is derived from the distillation of tar from wood or coal and is used as a wood preservative. Pesticide products containing creosote as the active ingredient are used to protect wood used outdoors (such as railroad ties and utility poles) against termites, fungi, mites and other pests. (epa.gov) The EPA has also determined that coal tar creosote is a probable human carcinogen (over longer exposure periods).  Thankfully, I was the only one in the household who seemed to be affected.  

I’m still a fan of reclaiming wood and other materials, but I’m a little more cautious nowadays.  That’s the major drawback to most reclaimed wood: you just don’t know its history.  Whether it’s been soaked in smelly chemicals like creosote, or sprayed with non-odorous pesticides, or just sitting outside accumulating mold and insect droppings, it has a mysterious history that you may or may not be able to neutralize when you “reclaim” it.  Following are the main dangers of using some (not all) reclaimed wood (cdawood.com) indoors.  

  • Like my experience above, reclaimed wood that has been treated with harsh chemicals, like paints or stains, or contains VOCs (volatile organic compounds), can release toxins into the air.  Unlike my experience, you may not always smell these VOCs or toxins, which is a “silent” risk.

  • Wood is quite a porous material.  Mold and mildew can be hiding in the crevices of the wood, especially reclaimed wood that has a lot of “character” (read: cracks, knots and grains).  Mold and its toxic byproducts, mycotoxins and MVOCs, can make you quite sick and even spread to other parts of your home via dust and spores.  

  • You could bring pests inside.  Anyone who’s lived in the southeastern US would be familiar with termites, possibly carpenter bees, and maybe carpenter ants.  These are all wood-loving pests that can hitch a ride into your home inside of the lovely reclaimed wood.  They generally exit or die when the wood is agitated or dried out.  But have you heard of powder-post beetles?  These tiny pests can spread to other wood furniture and even the framing of your home, reducing the wood to “powder”.  Imagine losing your grandma’s precious antique dresser, or your kitchen floor joists, to these destructive pests because you decided to “reclaim” some wood for a table top: not a good trade-off!

If part of the reason to use reclaimed wood is “saving money” (one of my original reasons for creating those bar tops), are you really saving if one or more of these problems surfaces because of using it?  Here are a few ways to be more cautious with reclaimed wood: (Brunsell.com)

  • Consider the source: Grocery store palettes are likely to have been in close contact with food, so they run a higher risk of having bacteria (from spills), so don’t use them indoors.

  • Check for signs of how the wood has been treated: Know if and how the wood’s been treated. Heat-treated wood, also known as kiln-dried wood, is generally marked with an “HT.” In terms of your health, HT wood is preferable to chemically treated wood. You forgo the chemicals, and the heating kills off bugs. 

  • Consider the end-use of the wood:  If it will be in close contact with children, pets or food, it’s best to use new, untreated wood and opt for non-toxic finishes (like the paints and stains we mention in this article). 

If your gut says, I don’t know about this piece of wood, it might be best to listen to your gut!   Manufacturers have honed in on the reclaimed trend and created vintage looking wood and furniture from new materials.  

  • CdA Wood in Coeur d’Alene, Idaho is one such company that has the slogan “Barn wood but better”.  They take new untreated wood and make it look like old barn wood without paints or stains, using a patented “Xcelerated” process.  In the words of the VP, they “age wood indoors without using paints or stains”.  

  • Another company that values indoor air quality is EarthPaint.net.   All of their coatings are non-toxic, so you can start with new wood and get a fabulous aged finish without VOCs, mold, toxins or pests.   

  • Here’s a slew of ways you can add “character” to new wood with tools and a little elbow grease; just substitute non-toxic finishes for the stains used in the last few slides.

  • Did you know that charred wood naturally resists water, pests and further aging?  Developed by the  Japanese, Shou sugi ban is the art of preserving and finishing wood using fire.  Cedar wood works best for shou sugi ban because of its natural chemical properties, but you can also use shou sugi ban on pine, hemlock, maple, or oak.  This article tells you a little about the history and how to DIY your own burnt wood!  EarthPaint.net also has “Special Linseed Oil” similar to what is used in the article.  I’ve personally used shou sugi ban on some wood supports for my shower curtain, as well as an outdoor table. 

At HypoAir, we aim to bring the best of the outdoors inside.  We’re very selective, though, to make sure that hidden pollutants or pests don’t slip in with the good stuff…and with vigilance you can be too.  It’s time to raise the bar on reclaimed wood, to make it as healthy as it is beautiful!

How to equip your college student with better air quality

How to equip your college student with better air quality

If you’re a parent with a son or daughter in college, of course you want to see them succeed!  It can get costly, though.  From helping with tuition, room and board and everything else, it seems like “clean, fresh air” should be a free part of the package. Unfortunately, that may not be the case.  Many colleges and universities are housed in old buildings that did not give thorough consideration to air quality when they were designed, built, or renovated.  In many cases, you are paying for the privilege of  studying there, with living as only an afterthought!  

The problem with poor air quality in the university setting is that it affects the very thing young adults go there to do: learn.  Contaminants in the air work against their body in the following ways.

High CO2 due to inadequate fresh-air ventilation decreases the ability of the brain to metabolize oxygen.  In other words, the brain becomes oxygen deprived!  This can affect learning in terrible ways.  In a Havard study in 2015, 24 participants spent 6 days in simulated offices to control for CO2 and VOCs.  Days were designated by the research team, but blinded to the participants and analysts, to be one “High CO2” day of 1400 ppm CO2, two “Conventional” days representing the average office building conditions of about 940 ppm CO2, one “Green” day representing better ventilation with conditions of approximately 740-750 ppm CO2, and two “Green +” days representing 100% outdoor ventilation (approximately 550 ppm CO2). Cognitive scores were 61% higher on the Green building day and 101% higher on the two Green+ building days than on the Conventional building day. On average, a 400-ppm increase in CO2 was associated with a 21% decrease in a typical participant’s cognitive scores across all domains after adjusting for participant (data not shown), and a 20-cfm increase in outdoor air per person was associated with an 18% increase in these scores.  This shows that for lack of fresh air in their dorm room or classroom, your student could be missing out on their chance to absorb all the material presented, with lower test scores as a result!  Here are some ways to “open the windows”, so to speak:

  • Add a Window Ventilation Filter to their dorm room.  It’s easy to install and remove, and filters out pollution, pollen and dust. 

  • For more info on how to measure CO2 in your dorm or classroom, check out our post.  If the classroom or lecture halls turn out to be high in CO2, advise students to check with their student advisor on advocating for more ventilation.  

VOCs: Most dorm rooms come equipped strictly with the basics -- a bed, desk, chair, light and garbage can, plus a small amount of storage space in the form of a dresser and/or closet. (howstuffworks.com) Therefore, moving into a new dorm room usually means getting new bedding and new accessories like rugs, wall hangings, and more storage like dressers or bookshelves.  When these things are purchased new, VOCs from off gassing can increase dramatically if the doors and windows are kept closed for most of the day.  In the study discussed previously,  a 500-μg/m3 increase in TVOCs was associated with a 13% decrease in the cognitive scores.  Once again, fresh air ventilation is really important to keep VOC levels in check. 

  • Use a portable VOC sensor to check for levels in the dorm room or wherever it’s suspected that VOCs may be high (like a newly renovated area).  

  • Install a  Window Ventilation Filter in the dorm room to get fresh air dilution. 

  • The Air Angel neutralizes VOCs with the catalytic molecules emitted by its AHPCO cell. Being portable and requiring very little maintenance, it can travel anywhere they go: on weekend sports events, home, and on vacation.

  • The Germ Defender/Mold Guard's optional carbon filter adsorbs VOCs emitted by newer items as they off-gas.

Indoor humidity plays a major role in our health: when it’s too low, disease transmissions are more likely, and when it’s too high, mold growth occurs and different mold-related conditions spike.  We can think of many reasons to keep humidity in the recommended range of 40-60% so that your loved one’s health is not at risk!  Sadly, sometimes it takes severe illness and even death to prompt renovation of problem buildings (see this article about the University of Maryland).  Here’s how to equip your student against high humidity and the risk of bacteria, viruses, and mold-related illness.

  • It’s super inexpensive to put a portable humidity sensor in their suitcase or next care package.  Ask them to message you with a photo of the sensor when you’re talking with them in the dorm room, or whenever else it seems to be high.  

  • If the humidity remains high, you can speak to the dorm manager, but also equip your student with a dehumidifier.  Amazon and big box stores can even deliver one from an online purchase.  Since the average dorm room is only about 228 square feet, and larger dehumidifiers come with complaints of extra noise and heat, you’ll want to keep it small.  This economical one by Eva-Dry only covers about 150 square feet (1200 cubic feet), but two of them plugged into different areas will help keep moisture under control.  Here is a review of other models that work great for dorm rooms. 

  • The Germ Defender/Mold Guard is perfect for small, humid spaces, and does triple-duty in a dorm room: 1) Even though the bathroom is typically always humid, mold doesn’t have to grow there… I can testify that one Mold Guard stopped mold growth when I couldn’t get a leaky shower valve repaired right away.  2) This unit also deactivates viruses and bacteria in the air and on surfaces across the room with polarized ions. 3)  Finally, it has an option for a carbon filter to adsorb stinky odors like running shoes and sweaty clothing!

  • Use an Air Angel to prevent transmission of germs and mold growth. This unit is portable and requires very little maintenance, in fact only a replacement AHPCO cell once a year.

Finally, if your college student has not adopted good cleaning habits by now, we can’t help you! (just kidding, but we can supply you with the right goods, read on!)  Statistics on bacteria in dorm rooms are pretty gross: the average women’s dorm rooms had over 1.5 million colony-forming units (CFU)/sq. in. of bacteria, while men’s dorm rooms had an average of over 6 million CFU/sq. in. (collegestats.org).  The same article breaks down the types of bacteria and where they are most concentrated, and while not all of them were bad, most of them were.  It’s time to clean up, because it’s hard to know which is worse: being sick in college or having a sick roommate who will soon infect you.  For those who do clean, equip them: 

  • Once again, Germ Defenders and Air Angels are passive sanitizers that help in activate germs between active cleaning.

  • A bottle of TotalClean goes a long way!  Since dorm rooms are small, heavy-scented chemical cleaners can be super-irritating and not always welcome to their roommates’ sense of smell.  TotalClean is unscented, non-toxic and very effective against dust, dirt, and germs on many different surfaces, even windows and mirrors. 

  • Small pump bottles of non-toxic hand sanitizer and sanitizing wipes stationed around the room and on desks help between hand-washings. 

Of course, similar to sending them off to grade school, you can’t be there 24/7 to help your college student make smart choices, but at least by this point you can give them tools to monitor and correct their own air quality for the healthiest and most productive school year.  Viva la college!