Monthly Archives: January 2023

How to choose the right ceiling fan (other than the color)

How to choose the right ceiling fan (other than the color)

Everyone has a “style” in their home, and glancing at the number of pages of ceiling fan choices in any online hardware or home decor store, there is a ceiling fan for every style!   You’ve got modern, traditional, glam, rustic, minimalist, and everything in-between.  Knowing the characteristics of the best-performing ceiling fans will make your choices easier within the style and color you like, so take a minute to check out these tips.

The object of a ceiling fan is to circulate air, so air flow should be near the top of your list.  Airflow is measured in cubic feet per minute, and although some manufacturers like to give measurements of velocity (feet per second or meters per second), they are not the same.  Airflow is what “mixes up” the air in a room and breaks up stratified air (thermal layers) so that your air conditioning system becomes more efficient.    The most efficient ceiling fans are High Velocity Low Speed (HVLS) types; these are the ginormous fans that you may see in a warehouse store or sports arena.  They typically measure 6 feet in diameter and larger, many topping 20 feet or more.  Surprisingly, they move the most air with the least amount of energy, but you do need a high ceiling so that each fan is between 20-25 feet above the floor.  If you aren’t looking for such an industrial size fan, Aeratron makes the most efficient ceiling fan in normal sizes.  Their fans incorporate several designs that help them to achieve this efficiency:

  • Blade shape: Blades can get super-fancy, but the most efficient are oar-shaped, or in Aeratron’s case, with a “winglet” to reduce drag.

  • Motors: the more powerful the motor, the more efficient the fan.  The most recent developments are “DC” or direct current motors, which can be adjusted to an infinite number of speeds.  These are electronically controlled and are typically quieter, smaller and lighter than AC (alternating current) motors.  

  • Number of blades (Less is More): Did you know that the lower the number of blades, the better the efficiency?  More than two blades just cause more turbulence and do not move more air.  

  • Slower is better:  Operating a ceiling fan at a slow speed continuously is better than higher speeds.

  • Having a downrod (an extension that lowers the body and blades of a fan away from the ceiling) is critical to a fan’s ability to move air.  Even a 3” to 4” downrod increases efficiency by approximately 40% over a flush-mount fan (one that hugs the ceiling).  Check out downrod specifications below. 

So, after giving all this information, there is one number that could guide you to the most efficient fan in your style preference.  It’s called cubic feet per minute per watt (CFM/W).  Basically, it’s analogous to gas mileage for fans–how much air it can move per watt of energy expended.  Although 75 is the minimum to make a fan efficient, the higher the better, and the most efficient fans have a CFM/W over 400.   Here’s a list of the most efficient as compiled by EnergyStar.gov.

So, now that you think you have found the most efficient, stylish fan in your budget, we just wanted to make sure you know the following interesting information:

Ceiling fans don’t actually cool a room.  Say whaaat?  That’s right, ceiling fans don’t cool a room because they can’t remove heat, the way an air conditioner can.  In fact, because ceiling fans expend energy and a portion of that energy produces heat, they actually add heat to a room.  The cooling effect you feel is the wind chill effect, which is the temperature which a person feels with respect to the wind.  (cielowigle.com)  According to Consumer Reports, using a ceiling fan, can make you feel up to 4° F cooler, and you can save 3 to 5 percent on air-conditioning costs for each degree you raise the thermostat, so using ceiling fans and raising the thermostat setpoint can theoretically save you 12-20% in air conditioning costs.  Pretty cool!

Remember the rule above about the less blades, the better?  Well, an improvement on a two-bladed ceiling fan might just be a ceiling fan without blades.  There are actually quite a few products that advertise to be “bladeless”, but in reality, the blades are enclosed in a casing (enclosed fans, by the way, are great choices for kids’ rooms and near bunkbeds, to avoid the chance of getting fingers or toys caught in them).  One of the true “bladeless” fans is the Exhale Fan, which features a stack of spinning discs modeled after Nikola Tesla’s bladeless turbine.  Instead of shooting the air straight downwards like traditional fans, Exhale fans move air at a 45 degree angle, which accomplishes a lot: it creates a vortex and de-stratifies the temperature layers of the room, more effectively mixing the air.  The fans themselves move over 5,000 cfm of air, which is pretty amazing since they have no “blades”!  No blades also means very little noise.  In addition, they are preferably mounted directly to the ceiling, eliminating the use of downrods.

Sizing your fan is very important.  The larger your room, the greater the diameter of the ceiling fan you need to circulate air effectively.  This sizing guide is very simple to use, and when in doubt, it’s best to go one size larger!   The reason for this is that it’s more efficient to operate a large fan on lower speed, than to operate a smaller fan on its highest setting.    

Choosing the correct downrod length is very important.  It’s not common knowledge, but if you have a standard 8’ ceiling, you should have a short downrod on your fan (3”).  When I purchased my home, even though all of the ceilings are 8’ or more, 6 out of 7 ceiling fans were flush-mounted (mounted directly to the ceiling).  Flush-mounting is only recommended for ceilings lower than 8’, and a flush-mounted fan moves approximately 40% less air!   So, before purchasing a ceiling fan, measure your ceiling height and check this handy guide.  If a fan accommodates a downrod, you can always adjust the length by purchasing the right downrod separately.  Basically, you’ll want the fan to be at least 7’ from the floor and 8-9’ for optimal airflow.

LED lights continue the savings.  If you are going for efficiency, it makes sense not to squander savings from the fan by using incandescent light bulbs.  Many high-end fans now have permanent LED bulbs and LEDs that can be adjusted for color in cooler or warmer tones. 

Photo by Sidekix Media on Unsplash

Do you have a sixth sense? Maybe you need one!

Do you have a sixth sense?  Maybe you need one!

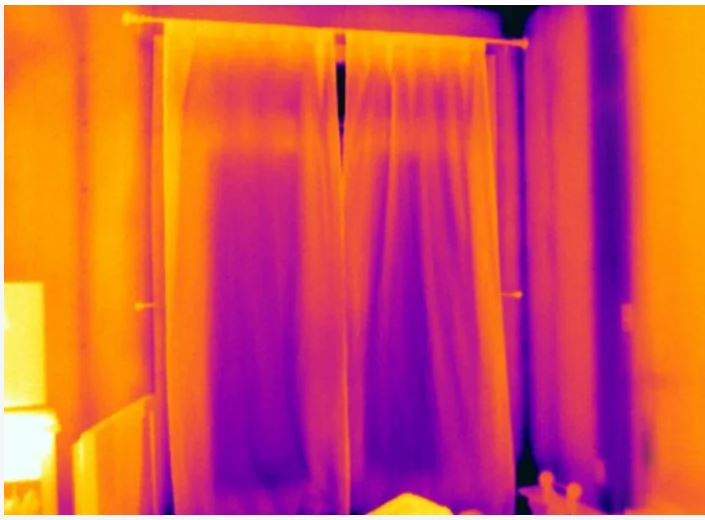
One of the top thermal camera manufacturers, Teledyne FLIR (which stand for “Forward Looking InfraRed”) uses the term “The World’s Sixth Sense” to describe the images they are able to capture with their cameras.  For sure, infrared is a totally different way of viewing the world than what we are used to seeing.  Infrared does not rely on light to capture images, but rather senses heat and generates an image based on relative differences in heat energy.  With an infrared (IR) camera, you could see your cat hiding in the corner of a pitch dark room, which is something “night vision” may or may not pick up, depending on the true ambient light level.   

But beyond avoiding cat attacks, is it useful to the average homeowner?  Oh, very!  There are some gadgets, like a cake pop maker, that have extremely limited use and seem to sit in your junk drawer more than they get used.  A thermal imaging camera doesn’t fall into that category.  Here are some of the varied uses from different industries that might be applied to your own home:

  • Electrical Wiring maintenance: why does that breaker keep tripping?  Are any wall switches or plugs excessively hot?

These are thermal and visual images of a damaged electrical plug (Fluke.com)


  • Security: who or what made that noise outside the window?

  • Animal Health: where is your pet experiencing “hot spots” or possible infection?

  • Lost pets: A pet hamster or lizard can be found much faster with a thermal camera (if it’s still alive).

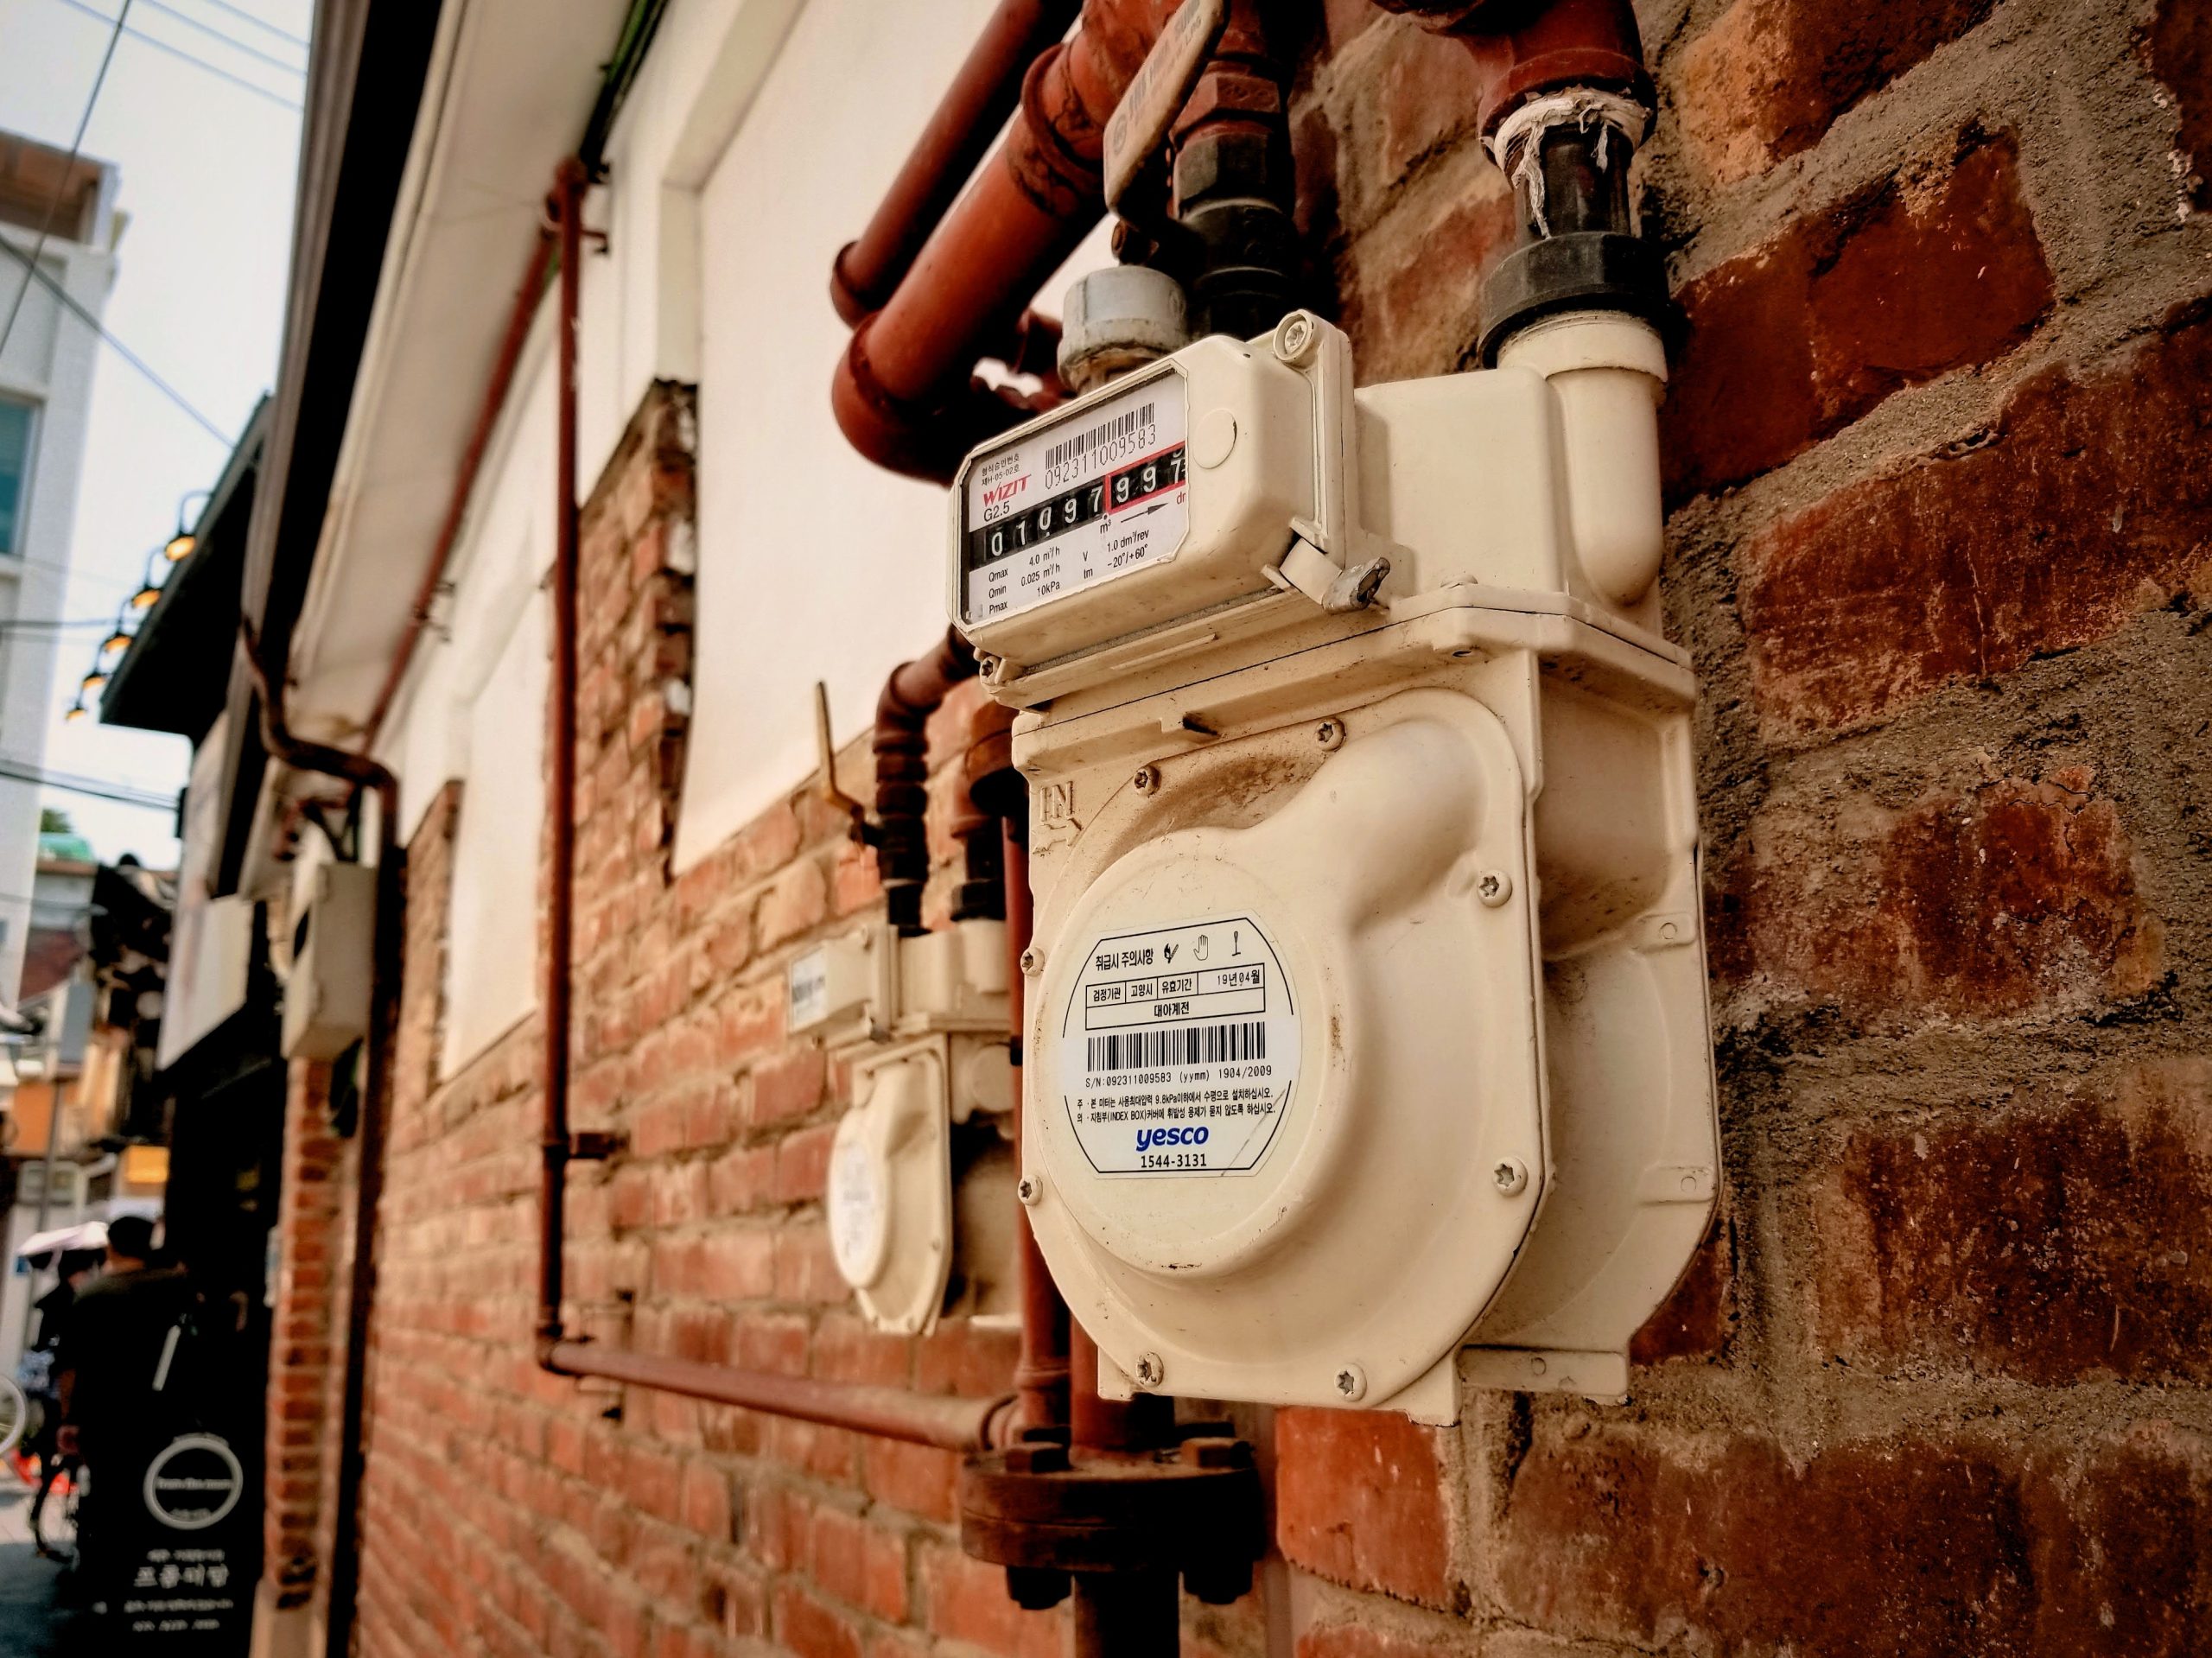
  • Gas Detection:  when an infrared camera is pointed at a surface having a gas leak, it shows the temperature difference at the point of a leak caused by the pressure variance. (Top Applications of Thermal Imaging Cameras)

  • Water Heater or water line maintenance: a temperature difference can show where corrosion may be progressing on an older tank, just as oil industry professionals can use them to “see” corrosion.

  • Heat loss in common appliances like stoves, refrigerators, dryers and vent lines, etc.

  • Insulation: check for air sealing problems in your attic, walls, basement and crawlspace (check this video on how to “see” duct leaks)

  • Roof inspection: see where water may be leaking through your roof

  • Water leaks: spot the leak inside walls or ceilings without ripping them up. 

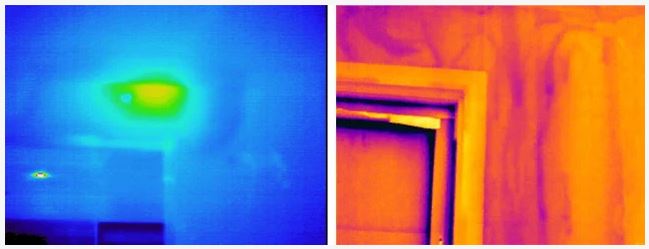
  • Pests:  Locate mice, bats, squirrels, termites, hornets and all sorts of warm-bodied creatures in and around your home.  Snakes, unfortunately, will not show up on an infrared camera because their body temperature is too close to their surroundings. The following images are of a termite’s nest (left) and streaks that indicate termite tunnels (right) (Detecting Pests with Thermal Imaging).  The slightly higher moisture content associated with termite tunnels needs a camera with a higher sensitivity.

  • House hunting: take your thermal camera to reveal hidden insulation and wiring problems. 

  • Car maintenance:  see if any components are overheating, and possibly spot leaks, as in brakes, tires, radiators, coolant lines, and exhaust systems.  

  • Gardening: You can possibly spot sprinkler line leaks, and underground gas leaks in your yard.

This video shows a plethora of ways to use a FLIR camera.  Although you may not need to locate enemy forces in your backyard, finding a lost pet, hidden water leaks and missing insulation could be well worth its price. 

Now that your interest is piqued, it’s best to shop around to find the camera that suits your needs within your budget.  Here are some of the main characteristics you’ll want to check out:

Resolution:  This is the number of pixels per inch, or PPI.  The resolution is usually given in two numbers, which are (Width X Height).  Higher resolution numbers give more information in each image, with less grainy edges.  Don’t try to compare the resolution of a thermal camera to a regular digital camera, however, because the role of the thermal camera is more of a sensor to detect heat differences.  Resolution is not incredibly important if you are mainly using your camera to view large areas like walls and windows, but if you are going to use it to troubleshoot electronic components (much smaller area), you’ll want higher resolution. 

Sensitivity: Thermal sensitivity is the ability of a thermal device to distinguish between temperature differences, measured in milliKelvins (mK).  (Thermal Sensitivity – Understanding Millikelvins)  The lower the number, the higher the sensitivity. For example, 150mK sensitivity means each pixel takes readings to the nearest 0.15˚C. 

Sensitivity Range:  The range of temperatures the device can sense, for example from -4 deg F to 248 deg F. 

Battery Life:  Some thermal cameras have an independent, rechargeable battery, while some run off of the battery of the phone they’re attached to.  Either way, you’ll need to make sure you have enough battery life to get the job done!

Photo by Teledyne FLIR

Detecting Gas Leaks in the Home

Detecting Gas Leaks in the Home

As we pointed out in our article on Propane and Natural Gas, gas leaks outside the home are very common, especially in older neighborhoods.  Gas leaks in the home are rare, but they sure can be dangerous!  Even if you have no piped gas coming into your home, there is still the risk of radon (a naturally-occuring, cancer-causing gas in the ground), and carbon monoxide from any combustion engines or appliances operating closeby.  Here are some of the detectors and monitors you will want to consider adding to your home.

Radon: Your home is most at risk for radon accumulation if you have a basement or a crawlspace.  It’s a colorless, odorless gas that is heavier than air, so it can sit undetected in these areas.  Here are two sites you can use to find a professional in your area: NRSB.org, CertifiedRadonPros.org, or you can test your home yourself and send the results to a lab for interpretation using this popular home test kit by First Alert, $16.  If you do live in an area with high radon content, you may opt to get a monitor so that you’re always aware of the radon level in your home.  The following monitors will help you stay on top of Radon:

  • AirThings Corentium Home Radon Detector, $99, is portable so that you can occasionally move it to different locations in your home to check levels.  It has a long-term history (for trends) as well as a short-term weekly view; both be displayed at the same time.  Other devices by AirThings offer Radon plus more points of measurements like PM2.5, CO2, etc. 
  • EcoSense’s RD200 RadonEye is $175 and offers bluetooth and an app so that you can monitor radon levels remotely.

Carbon Monoxide (CO) can be easily confused with Carbon Dioxide, but they are very different and you must know why: CO in your home is deadly,  while CO2 is a sign that people are living there!  CO is a byproduct of combustion (incomplete combustion, actually), and when too much of it lingers in your home, your body will start to replace oxygen in your bloodstream with CO.  This can result in tissue damage or death, in a short amount of time. (Mayo Clinic)  For this reason, it’s imperative that all of your gas appliances are vented correctly, that your attached garage has air barriers between the garage and house, that you use a fireplace correctly, and that any running generators are located a safe distance from the house (6 feet or more).   If you have any of these (gas appliances, attached garage, working fireplace or generator), it’s great to have a CO monitor installed that will alert you to the presence of this dangerous gas.  Check out these options, all of which would get installed high on the wall or on the ceiling (as CO is slightly lighter than air and tends to go up in your home):

  • First Alert Smoke and Carbon Monoxide Detector with 9V Battery, $27:  This is a good, old fashioned wall-mounted detector that gets 1 9V battery (included!)  You don’t have to have wifi to monitor it.  Just change the batteries once a year and try the “test” button to make sure all is in working order.
  • This Combination Smoke and CO alarm by X-Sense, $40, is popular because it has a 10-year battery, allowing you to skip those battery changes for a while (focus on changing your air filters on time instead!)
  • A Plug-in Carbon Monoxide Detector by Kidde makes sense if you are renting and aren’t provided with a detector, or don’t want permanent installation but want the peace of mind of your family’s safety.  It has battery backup and does include 2 AA batteries (nice!).  Since plugs are often within reach of children, it has a “tamper-resist” mode to alert if it is accidentally unplugged.  It’s recommended to have at least one of these on each floor of your home.

You may be under the impression that these monitors may also protect you from all invisible gasses, like natural gas and propane, but that’s not the case!   Each gas has a different chemical makeup, and the detectors that find them use different technology.   So, if you have natural gas or propane piped into your home, it’s a great idea to also have the appropriate detector ready to sound the alarm if there’s a leak inside.  Here’s where you need to know which gas you have, because propane is heavier than air, so it tends to hang around at floor level, which can be a danger for children or pets who spend more time on or near  the floor.  Natural gas, on the other hand, is lighter than air so it will float up near the ceiling.  We definitely recommend reading the installation instructions thoroughly for any of these monitors, to make sure you place them correctly!  You’ll also want to know the term “LEL”.  These gasses are combustible, but only in the right mixture of fuel gas and air.  The range of combustible mixture is called the “explosive limits”, of which the least amount of gas mixed with the atmosphere is called the “Lower Explosive Limit” (LEL, which is the lean ratio) and the most amount of gas mixed with the atmosphere is called “Upper Explosive Limit” or UEL, also called the rich ratio.  Since the air is a home usually just has traces of such gasses when a leak forms, a detector may only use the LEL, and show “percentage of LEL”.  That means the alarm should go off way before the concentration of fuel gas is strong enough to ignite, like at 5 percent of LEL.  

  • Nighthawk Carbon Monoxide & Combustible Gas Detector, $44, by Kidde does double duty, and comes with a 6 foot extension cord so that it can be properly positioned to detect the correct gas.  It’s plug-in and comes with a 9V battery for backup.  The CO levels read in ppm, and the gas detector simply sounds the alarm with visible “GAS” on the LCD readout.
  • EG’s Natural Gas Detector and Propane Detector, $32, has a clear, easily read display that reads in % of LEL, where the alarm sounds at 5% LEL and you can watch the levels go up or down.  

Since I live in the country, I have a propane tank that is periodically refilled by a propane company.  Recently, while thinking about getting the gas tank in my backyard refilled, I had a thought: what if my piping is leaking in the yard?   How would I know?  Of course, I could call the propane company to come out and “sniff” the connections and ground, but if they are not quickly available, or I just want to make sure I connected my grill correctly to a small propane bottle, it’s not an ideal option.  Here are the portable detectors I thought would be especially good to have for this purpose, and while professionals use instruments that cost hundreds, serviceable home use detectors can be significantly less.

  • TOPTES PT199, $17, is suitable for LPG, methane, ethane, propane, butane, natural gas, coal gas, gas fuel, sewer gas, liquefied natural gas, etc.  Since it’s shaped like a pen, it’s easy to move it around in tight spaces to find leaks (like the back of your stove or at a wall valve).  The alarm will go off at 5% LEL and stay on until the gas clears to a lower level, and it also has an LCD readout of PPM (parts per million). 
  • You can get a professional gas detector at a reasonable price now too:  Klein Tools ET120 Gas Leak Detector, Combustible Gas Leak Tester, $102, has an 18” gooseneck that allows you to hold the instrument with one hand and move the “sniffer” around to probe for a leak.  It will detect methane, propane and other combustible gases at concentrations as low as 50 ppm, but could be used at lower sensitivity to detect concentrations as high as 10,000 ppm.
  • For added functionability, the Gas Leak Detector, Protmex HT609 Natural Gas Detector has temperature and humidity and is suitable for detecting LPG, methane, ethane, propane, butane, natural gas, coal gas, gas fuel, sewer gas and liquefied natural gas. The backlit screen aids in low light.   It has low, medium and high sensitivity selection modes.

Photo by Sugarman Joe on Unsplash

Sealing Air Channels in Your Attic

Sealing Air Channels in Your Attic

Anytime there is a significant temperature difference between the inside and outside of your home, good air-sealing and insulation will pay dividends in energy savings, air quality and avoiding damage to your home.  If you don’t understand what an attic bypass is, this video gives a number of great examples.  The host discourages homeowners from doing their own air sealing, but the fact is that not all states require attics to be air sealed before adding insulation to the attic (unlike Minnesota).  Therefore, you may be hard-pressed to find a contractor in your area who is knowledgeable about doing this.  However, if you are physically agile and willing to put in some time and effort, it’s achievable!  

The best times to get up there and tackle air sealing in your attic is during a swing season when you’re not using your heater or air conditioner (it’s a comfortable temperature in the attic).  Also, do it BEFORE adding any more insulation (you don’t want to be digging through your new insulation to find these gaps!)

Don’t forget to dress appropriately!  You’ll need:

  • Old clothes that can be laundered or thrown away, and a hat
  • Vinyl gloves to keep the sprayfoam off your hands (it’s sticky and stains!)
  • A headlamp if there’s not adequate lighting everywhere 
  • A respirator to prevent inhalation of fiberglass and dust (it’s good to keep extra cartridges on hand)
  • Safety glasses (because spray foam gets everywhere, trust me!) 
  • Knee pads (because low attics require a lot of crawling!)
  • Seal your cellphone in a ziploc plastic bag if you bring it with you (because spray foam gets everywhere, trust me!)

Here are some typical areas you will want to address:

Sealing Duct Shafts

According to Building America, a government program for testing and education about energy-efficient homebuilding, the proper way to seal duct shafts involves cutting a piece of plywood, rigid foam, or drywall to fit around the ducts, applying a bead of sealant like caulk to the supporting surface, fitting and securing the board with screws or nails, and applying more sealant around the inner and outer edges.  This is a great idea, except that caulk doesn’t usually cut it.  With the advent of spray foam in a can, it’s easier to get a good seal with spray foam than with caulk because the foam continues to expand for some time and will fill any voids.  

To seal gaps in and around ductwork, this video is great.  It shows several different types of repairs.  If you’re a novice, it might seem like you could just use “duct tape” on ducts, right?  Wrong!  Regular duct tape does not work well long-term on HVAC ducts.  It does not form an air-tight seal and over time, dries out and disintegrates.  That’s why you’ll want to use the following sealants instead:

  • Using Air Duct Sealant (paste, also called mastic) and fiberglass tape or fiberglass cloth to patch small holes and larger gaps in ductwork (for a small kit, check here)
  • Using spray foam to seal around ducts where they penetrate walls or unconditioned space like the attic or crawlspace.  There are different formulations in spray foam:
  • Use foil tape to seal around loose ends of insulation.  If there are any leaks in the ductwork, this will minimize air leakage in/out of the duct.  
  • Check out our article on sealing your registers: you’ll want to do this to prevent condensation on the grilles and registers in your rooms!

I had an idea that my attic was leaky; I just didn’t know the extent of it until renovating for a new HVAC system.  I found a shaft used to hold ductwork that was open to the attic, but plunged down one floor and shared a wall with my bedroom.  This air space channeled hot/cold dusty air from my unconditioned attic right down the wall and it was NOT insulated.  

Because the shaft was rectangular and housed 2 round ducts in it, I decided to stuff some loose fiberglass around the ducts at the top and spray foam over them; the fiberglass only acted to plug large gaps and keep the foam from falling down the shaft before it hardened.  The only thing to remember is that the foam must contact solid surfaces, like foil-covered insulation, wood, or foam board, in order to make a continuous seal.  If I had left loose fiberglass sticking up out of the shaft, the air could pass right through it. 

Insulating Electrical Boxes and Can Lights

Here is something I’ve been wondering about for quite a while.  I have a number of electrical boxes for ceiling fans, lights and even the bathroom vent which are not sealed.  What kind of sealant should I use?  According to this short video (with happy music) by the EPA, spray foam comes to the rescue again!  As long as your fixture box doesn’t generate heat, you are fine with spray foam.  This brings us to can lights.  Foam and insulation must not come into contact with older style can lights (which use incandescent, halogen or another heat-generating bulb) because of fire risk.  In this case, you’ll want to purchase a can light cover with fire rating specs in order to safely insulate the area around the light.  It can be sealed with spray foam around the bottom perimeter of the cover to the sheetrock.  Again, you do not want to let the spray foam contact any part of the can light, which can get very hot, so be sure to hold it down to the sheetrock when spraying, and minimize any holes necessary to accomodate electrical wires going to the light.  

It’s also recommended to plug holes drilled for electrical wires through the top plates of your walls (typically these are wood 2x4’s or 2x6’s).  If your local code requires that these penetrations be sealed with a fire retardant sprayfoam, then Great Stuff Fireblock with smart dispenser ($10) will work. 

If you want to keep your heating and air conditioning system working well, prevent mold and moisture damage, lower humidity in your home as well as lower energy costs, tackling air sealing in your attic is a must!

Photo by Will Francis on Unsplash