Tag Archives for " basement "

How to make your home less susceptible to flooding

How to make your home less susceptible to flooding

Weather forecasts for rain can strike fear in homeowners.  Different parts of the world are experiencing rainfalls that surpass a year’s average within just a few days, or even a few hours.  What can we do to lessen the chance of having to use mops, pumps, demolition and expensive contractors in the aftermath?  

There’s nothing like firsthand experience.  There is an area in Laval, Montreal that historically never flooded, yet in recent years received two “one-hundred year” floods from the Ottawa river.  Andrew Henry is a homeowner who fought very hard to keep his home from flooding for the 2nd time in April/May 2019.  He described his flood prevention/mitigation steps in a series of videos, categorizing them into three main parts:

  1. Keeping the river out of your house:  Sandbags and plastic sheeting are the primary defense for this, adding reinforcements to the back of the sandbag wall where necessary (sadly, they can fail if the water gets too deep).   You may want to keep plastic sheeting and tape on hand at the minimum if authorities in your area supply sandbags.
  2. High water table: Super-saturated soil around your foundation will seep in any cracks in the walls.  
    • In an emergency, you can dig down outside your foundation and set up sump pumps to act as temporary “french drains”.
    • You can also break the floor inside your lowest level at strategic points to install sump-pumps.   This involves a concrete saw and/or jack hammer in most cases, so preparation is key!  If you live in an area prone to flooding, it’s also wise to have spare sump-pumps on hand, along with tubing/piping for expelling the water away from the house, and plenty of extension cords. 
    • Have an emergency power source (small generator) to keep your sump pumps going even if the power fails!
  3. Drains inside the home: you can sand-bag them closed but ideally have sump pumps at the ready or installed in the drains.  For toilets, the best thing you can do is remove the toilet and install a toilet plug (see minute 1:00 in this video).  Andrew did not say it, but chances are that he immediately removed all carpeting/rugs from the ground floor (if he had rugs) in order to clearly see where any water comes in.

There are a lot of great tips in the videos of what he learns as he goes, and his determination pays off, and one month later he can remove the 8 tons of sandbags.  Other seriously flooded homes survived also!  See this house at minute 3:45

City planners and inspectors sometimes have good advice too.  Here is a helpful video from the City of Toronto that suggests the following:

  • If you have any trees running near your sewer line, it may be worth getting a plumber to scope the sewer line to see if tree roots have infiltrated or broken the line, which can cause backups of sewage into your home, even without flooding.  If you don’t have a sewer cleanout, this is also the time to have a licensed plumber to install one.
  • Foundations need to be maintained.  This kind of work includes:
    • Repairing cracks and gaps promptly.  If you have never used it, hydraulic cement is a great product.  You can use it to patch any visible cracks when the walls are dry, and keep the rest of the tub for emergencies, because it even works to seal water out when wet.  It sets extraordinarily fast (3-5 minutes) so you should only mix and use a small amount at a time. 
    • Regrading the soil around your home so it slopes away, not toward the foundation
    • Get a licensed foundation contractor to upgrade your foundation flood protection (see below)
  • Declutter your gutters:  Gutters are important because they direct water off the roof and through the downspout, away from the home.  If they are blocked by leaves and debris, water will pour over them and down the walls of your house.
  • Make sure that downspouts are directed away from the foundation, and discharge at least 2 meters (about 6 feet) from the foundation.

According to the Natural Resources Defense Council (NRDC), some ways to flood-proof your house involve researching flood plain maps before you buy your home (but with storms that break historic precedents, even that doesn’t always work), buying flood insurance, and considering relocating.  Of course, if you really like where you live or can’t move, they also suggest the following:

  • Install a sewage water backstop:  If your basement floor drain backs up after heavy rains, consider getting help from a licensed plumber to install backflow prevention valve(s) and other devices to keep overtaxed sewer mains from backing up into basements.
  • Changing your landscaping includes the following: 
    • Digging depressions known as swales to channel stormwater runoff away from your foundation.  Swales carry water in a non-erosive way.  They can have river rocks or water-loving plants.  
    • Converting concrete or asphalt driveways to gravel or brick
    • Using absorbent mulch can help manage heavy rain and reduce potential flood damage. 
    • Placing a rain barrel beneath a gutter downspout 

Although rain gardens can be used in dry areas to manage water runoff, they can also be used in flood prone areas to lessen the chance that storm drains will become clogged and overflow, leading to flooded properties.  They are depressions made and planted with water loving plants that can absorb large amounts of water and drain it slowly.  If you are able to motivate your neighbors to do the same, the effects are multiplied and can save thousands of gallons of water from pooling or flooding the neighborhood.  Here is a great video showing where and how to make a rain garden.

If grading your lawn and maintaining the gutters and downspouts is not enough to keep your ground floor or basement dry, you may need to have foundation work done.  This can involve setting french drains inside or outside the basement or ground floor, applying a sealant to the exterior of the basement walls, and/or a last resort, waterproofing the interior of the walls.  The reason we mention this as a last resort is because waterproof paint is not a replacement for good drainage–it simply can’t hold back a large amount of water for a long time (check out our article here).  Also, waterproofing should never be installed on both sides of a wall, because it needs to be able to dry out from one side.  Since foundation work is costly and intrusive, it’s best to get plans and quotes from several reputable companies before proceeding.   

Flood conditions can rise very quickly, so there is no substitute for planning and supplies.  Here’s to hoping that you are able to stem the flood/tide and keep your home dry this spring, and all year long!

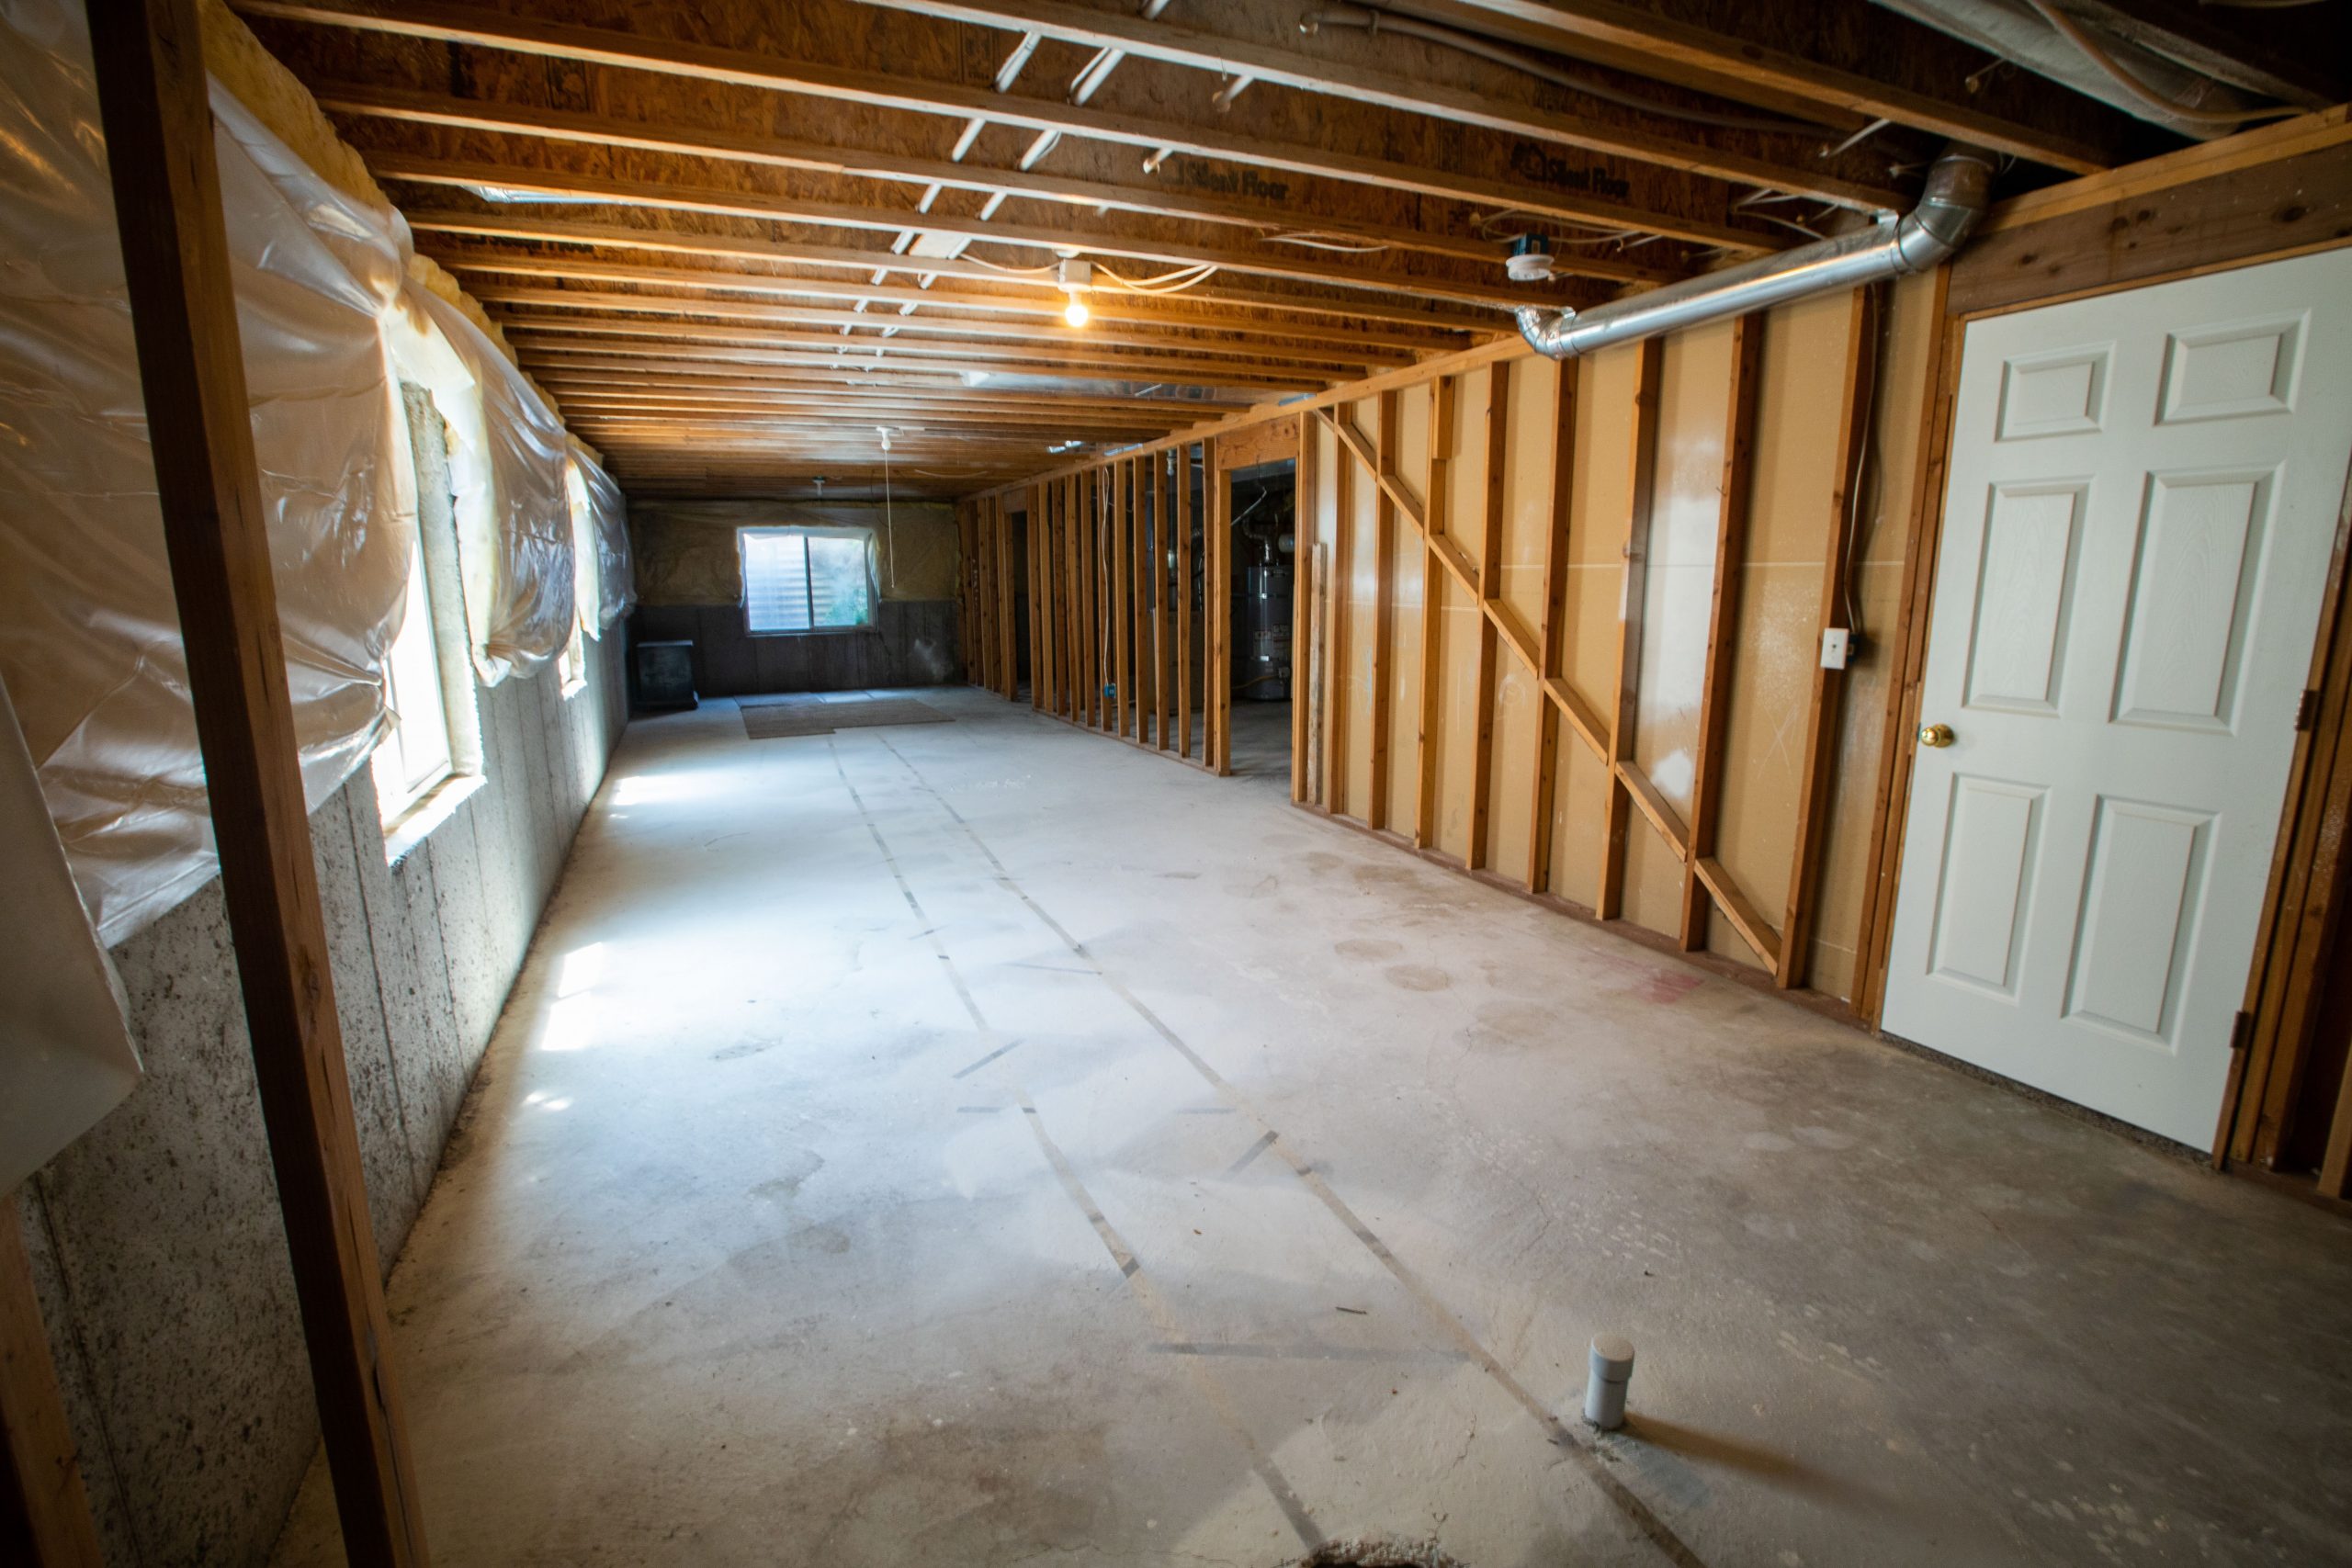
Photo by jim gade on Unsplash

Getting the Basement Dried Out

Getting the Basement Dried Out

In our post on how the basement affects our whole home’s air quality, we discussed how mold and mildew form and are sustained in the basement.  Active water leaks (flowing down the walls and pooled on the floor) are not required to make the basement a musty place.  Here are some sources of moisture coming into the basement:

  • Concrete is not a moisture barrier on its own!  Water will permeate concrete walls and floors and simply evaporate, increasing humidity.  
  • Open or broken windows allow moist air from the outside to come in and upon encountering cool walls and surfaces in the basement, condensation will form or just increase relative humidity in the air.  
  • Air leaks around windows, entry doors, unsealed wall penetrations and penetrations into the first floor above allow air to come in, in an uncontrolled way. 

Ideally the basement is inside your building envelope, whether you decide to finish it or not.  This is because it can be a suitable place for mechanical systems like HVAC air handlers and furnaces, hot water heaters, and also for storage.  To house these systems, however, the basement needs to be dry, with good air quality.  We argue that the basement air quality needs to be as good as any other floor in the home, because it will mingle with the atmosphere of the rest of your home!  There will be small leaks in the basement ceiling that make it permeable to the rest of your home.

The way to control humidity is to control:

  • Water flow into the space,
  • Airflow into the space, and
  • Air circulation within the space.

Let’s tackle each problem individually.

Water flow into the basement

Water flowing down walls in streams and puddling on the floor is a major problem– in this case, it is like living above a lake!  It will be difficult to “dehumidify” the air when open water is present, because the water will be continually vaporizing into the air as fast as a dehumidifier can take it out.  Although many basements exist like this, walls and storage of home goods in such environments can accumulate mildew rapidly.  Painting on a “waterproofing coating” will usually just act as a band-aid, because the pressure behind the wall, forcing it into your basement (called hydrostatic pressure) will eventually break through the paint and even degrade the foundation if it’s not drained away properly using interior and/or exterior drains. (basement waterproofing)  It’s best to contract several reputable basement remediation contractors in order to get their recommendations and quotes on stopping the inflow of water.  

If the water is only causing dampness on the walls but not visible condensation, then it’s possible to allow the walls to continually “dry” to the inside by doing the following:

  • Cracks and damage to the walls need to be repaired first.
  • Install rigid foam board with a “perm” rating of 1 or greater.  This allows the moisture to move through the foam and dry out, but still insulate the basement for greater thermal comfort and avoid condensation on the cold wall. Keep the foam insulation up about an inch from the floor to allow any condensation to drain.  If desired, the walls can be framed with treated wood to hang drywall inside.  An excellent cutaway diagram of the installation can be found here (page 24). Below is a picture of rigid foam board insulation from the same document (page 32).
  • An alternative to applying rigid foam board is to paint concrete walls with a waterproofer such as UGL’s Extreme Latex Masonry Waterproofer.  This product has a perm rating of less than 1 (according to this manufacturer’s video), so it is vapor semi-impermeable, but it does not have any insulating properties, like the foam board, so the walls will still be cold to the touch and allow condensation if the air inside is too warm and humid.  
  • Use dehumidification to dry things out.  
  • Decrease relative humidity by increasing the temperature slightly (the dehumidifier may raise the temperature a few degrees, but if not, you can add a small heater).
  • Increase circulation with fans so that air is evenly dehumidified.

Some notes on Vapor Permeability: A material’s permeability is measured in units called perms, which assess how much moisture can pass through a barrier in a 24-hour period according to standardized industry tests. Materials are separated into four general classes based on their permeance:

  • Vapor impermeable: 0.1 perms or less

  • Vapor semi-impermeable: 1.0 perms or less and greater than 0.1 perm

  • Vapor semi-permeable: 10 perms or less and greater than 1.0 perm

  • Vapor permeable: greater than 10 perms

Materials with lower perm ratings are better at stopping the movement of water vapor. If the perm rating is low enough, the material is a vapor retarder. If it’s really low, it is a vapor barrier. (Barricade Building Products)


Air flow into the basement

Sometimes it’s difficult to know what to do: open the windows or not?  Many reputable websites advocate “airing out the basement” (such as thisoldhouse.com), and we at HypoAir always advocate for ventilation to dilute stale air, but here’s the problem: when you don’t know the dewpoint of the air coming in or leaking in, it can cause major mold problems in the basement!  Dewpoint is the controlling factor of whether fresh-air ventilation alone can prevent mold.  As we wrote in another post

The best way to explain this (per this great article) is to find out the dewpoints of the indoor and outdoor conditions.  If the outdoor dewpoint is lower, you can ventilate with fresh air and still dry out your house!  For example on July 26, 2002, here are the conditions inside and outside my house (a relatively “dry” hot day outside!):

Inside: 76 deg F, 67% humidity = 63 deg F dewpoint (check out this easy calculator on dpcalc.org)

Outside: 91 deg F, 54% humidity = 72 deg F dewpoint (dpcalc.org)

See, in this case even though the relative humidity outdoors is lower, if I open my windows, that hot air coming inside would be cooled and relative humidity would increase, working against my humidity goals.

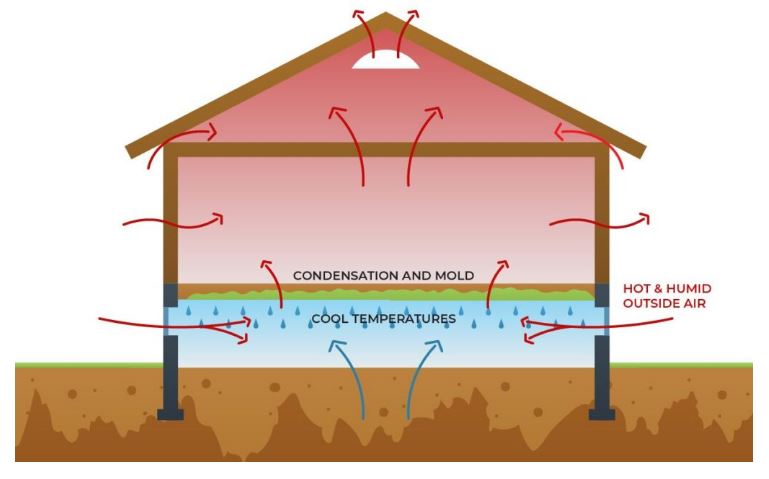
In the case of the basement, the air temperature could easily be lower, like 68 deg F.  If you cool 91 deg air with 54% relative humidity down to 68 degrees, water vapor in the air is going to condense, making your humidity problem worse!   Therefore we want to control all sources of air inflow and only let in drier air for ventilation.  Here is a diagram showing the problem of leaving windows open, and how to solve it:

source: bayareaunderpinning.com

  1. Close windows, block off vents, and seal the window frames with caulk, spray foam or adhesive tape made for the purpose.  Make sure exterior doors have weatherstripping. 

  2. Check for unsealed penetrations in the walls.  If you have to use a flashlight and look behind appliances such as water heaters or furnaces, be prepared with gloves and pest spray to get it done!  The best sealant for wall penetrations in the basement would be sprayfoam, because it conforms to the shape of the hole.  You may want to shove in a wad of steel wool first, because it deters animals from chewing through the foam and re-opening the hole.

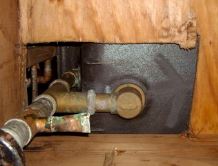
  3. Look up–check the ceiling.  If there is a false ceiling in the basement, you may need to remove ceiling tiles and/or insulation in order to see the underside of the subfloor, but this is where big problems can hide!  The photo below shows the underside of a tub.  Plumbers often cut BIG holes to make their jobs easier, but this can really hurt air quality when these holes let lots of moldy air up (if there’s a negative pressure generated in the space above, this is easily done with a bathroom vent fan), or warm air down (if you are using any type of air extractor in the basement).  It’s best to seal big holes like this one by framing in a box to the surrounding joists, and using spray foam to seal the resulting cracks and holes.  It’s not recommended to insulate the ceiling of the basement (see this definitive guide, page 25) to try to separate it from the rest of the building, as this will only cause more mold problems in the basement.

Source: energyvanguard.com

Where does fresh-air ventilation come from if you’ve sealed outside access off?  According to energyvanguard.com, there are 6 ways to supply fresh air to your home in a humid climate, and for the purpose of a basement that is outside the building envelope, only one makes sense since you’re probably already using a dehumidifier: a fresh air fan that purposely pulls in outside air.  Here are some options to make it happen: 

  • Air King’s QUFresh, 120 cfm, $413 at ecomfort.com
  • Broan’s FreshIn, 180 cfm, $239 at sylvane.com
  • ACInfinity’s AIRTITAN T3 6-In Ventilation Fan, 120 cfm, $69.99, sylvane.com

The AirTitan is a good option where windows are available, because it can be retrofitted to fit in an open window more easily than the other ducted models.  Each of these models have temperature and humidity settings you can adjust so that the fan will only operate when it meets those specifications.  These may need to be set higher in hot and humid climates, but the dehumidifier should be able to handle moderate inflows of fresh air.  When you control the airflow into the basement, you can control the humidity.

And finally, Air Circulation Within the Space

Your basement may be one wide-open area, or several rooms separated by walls and doors, but in each case, good air quality requires that air is moving constantly.  Here are some tips to get the best circulation:

  • Leave doors within the basement open as much as possible
  • Leave dedicated fans running all the time.  Floor fans work great for this purpose, as you can move them around/adjust direction and speeds until you find the optimum circulation.
  • Move boxes and furnishings away from walls and up from floors so that air will circulate to dry them.  Don’t stack boxes to the ceiling.  Separate boxes by several inches to get air moving between them. 
  • Remember, the less absorbent material stored in a non-conditioned space, the better (less cardboard, less fabric, and less wood).

I hope these suggestions help you to dry out your basement so that your whole-house air quality improves, from the ground up!

Waterproof wall coatings: should you use them in your basement?

Waterproof wall coatings: should you use them in your basement?

As a followup to our article on Getting the Basement Dried Out, and in response to customer questions, I thought we should talk about sealing basement walls.  There are some really good products like GAF Hydrostop, UGL Drylok Extreme, Koster, Xypex and Sani-Tred to name a few.  These kinds of coatings can definitely stop moisture and are relatively cheap compared to the other measures I’m going to recommend here, but the sad truth is that they’re usually only a temporary stopgap measure if proper drainage is not in place.  The building science experts have determined that the basic rules for water management in buildings are:

  • Don’t trap water in building materials or assemblies.
  • Allow materials and assemblies to dry to at least one side. (energyvanguard.com)  

In the words of expert Joe Lstiburek:  “Waterproof coatings are not bad; they are not, however, a substitute for an adequate drainage system.” (buildingscience.com) The reason is that waterproof coatings act as a vapor barrier, and applying them to the inside of your basement is not a good thing.  

Without proper grading and drainage, your basement is basically a hole in the ground where water IS going to collect.  Construction of a house with a basement doesn’t begin with pouring the basement; it begins with preparing the ground so that it slopes and drains away water, which is the enemy of all the precious building materials in the home.  If your home was not graded/prepared properly during the construction phase, here are the ways that you can get the water flowing in the right direction (down and away from the house!)

  • If you have a dirt floor in your basement, cover it with polyethylene to seal the moisture below it.  You don’t want moisture and possibly radon continuously seeping into your basement air space from the dirt).  If you have a bit more in your budget, dig out some of the soil first so you won’t lose ceiling height. Then install a layer of crushed stone, a horizontal layer of rigid insulation (plus some vertical insulation at the perimeter), a layer of polyethylene, and a concrete slab over it all. (greenbuildingadvisor.com)
  • Check/install roof gutters:  Gutters are the first line of defense in routing water away from the foundation, because instead of pouring directly down around it, water is directed away from it.  Ideally, the gutters will drain to areas 10 feet away from the house.  If you have gutters, make sure that they and the downspouts are not plugged up with leaf debris!
  • Check/adjust grade around your home: if you have an older home, many times the soil around it has built up over the years with mulch, grass clippings, and vegetation so that it doesn’t drain properly.  A good slope to aim for when grading land extending out from a house foundation is about 6 inches for the first 10 feet (that translates to a "slope" of 5 percent). This article tells you how to determine whether your lot already has this slope, or you need to do some work to get that slope.  
  • If you can’t grade the area with a rake, shovel and wheelbarrow and you’re going to hire an excavator, then it’s worthwhile to dig down to the footers and install gravel and a perforated drainpipe, so that any water that drains down the wall will drain down and away from the footers.  If you are doing this, THIS IS THE BEST TIME/AREA TO USE A WATERPROOF COATING: on the exterior of the wall! 
  • If your home has nice patios, walkways, etc. around it and you don’t want to tear them up, then go for an interior french drain, so that water around and under the slab can be pumped away.  It’s probably a job you’ll want a contractor to handle, but it’s best if you know what to expect and that the contractor outlines his plan, before work starts!  According to Green Building Advisor, a trusted building science site, here is how they would install a french drain: 
    • Cut a trench about 8 inches wide and at least 8 inches deep at the perimeter of your basement slab, near the wall.
    • Put some crushed stone in the trench, and some perforated 4-inch pipe, followed by more crushed stone. The pipe can be installed level or slightly sloped, and should lead to a sump installed in a corner of the basement.
    • Install a sump pump and connect the pump’s discharge pipe to a distant drywell, to daylight far from the house, or (if permitted by your local municipality) to your sewer drain. 
    • Once the French drain is installed, the concrete slab can be patched.  Before patching the concrete, however, you may want to install a tee in the 4-inch pipe, and connect the tee to a solid 4-inch riser pipe that extends through the roof. This riser pipe, along with a properly sized inline exhaust fan installed in the attic, are the essential components of an active radon mitigation system. Such a system depressurizes the air under a basement slab, and provides an important side benefit: it helps keep your basement dry.  (greenbuildingadvisor.com)

If you have done these things and have a condensation problem on the walls, it’s still not time to break out the waterproof paint, because the condensation is likely because of temperature differentials.  Typically condensation will occur on the upper part of basement walls in the winter, when it’s cold outside and warmer and humid inside, or on the lower part of basement walls in the summer, when it’s cooler down below grade but the basement has warmer, humid air.  Check the wall to see if this kind of seasonal condensation is what you’re experiencing.  If so, this calls for permeable insulation that isolates the interior atmosphere from the cold walls, yet allows any moisture coming through the block to pass through.  .  

The best insulating materials for a basement are those that are permeable or semi-permeable such as expanded polystyrene (EPS) or extruded polystyrene (XPS), as these materials are less sensitive to moisture than other insulation types. However, EPS is preferred over XPS in our opinion for the following reasons (airfoam.com):

  • Off-gassing: EPS does not contain hydro-chlorofluorocarbons (HCFCs))
  • Loss of R-values: in tests XPS has lost up to 44% of its R-values and EPS only 6%
  • Water absorption: in tests XPS absorbed up to 18.9% by volume and EPS 4.8%  
  • EPS has higher vapor permeance (thus allows more water vapor to pass through) at about 1.2 perm versus roughly 0.3 perm for XPS for R-12 insulation boards.  Normally one would not think this is desirable as vapor is passing through to the basement interior, but this factor affects the foam board’s own potential to stay dry. 

The best place to insulate is on the exterior.  Exterior insulation is advantageous because it protects the wall from the cold soil so that condensation cannot occur on the wall and the wall can dry to both the interior and the exterior. Installation of exterior insulation is best done during construction, however it can be accomplished as a renovation if  great care is taken to prevent damage during back filling around the foundation. If you don’t plan on excavating to the footings of the home, opt for interior insulation.  It should be vapor permeable or semipermeable as well as “air tight” to prevent warm, moist interior air from condensing on the cold concrete or block wall. Some foam insulations such as EPS and XPS can satisfy both conditions if installed properly (including taping at the seams). (buildingscience.com)

The slab floor:  Once again, the best place to insulate the slab is under the slab during construction, however, if you’re renovating, then insulating on top of the slab is fine.  Because most of the year the slab will be colder than the interior air, it’s a surface on which condensation can occur. The best way to accomplish this is adding a layer of rigid foam insulation, 2 layers of plywood for support, and a permeable finish like wood, carpet or cork (see diagram below).

Source: (“The No-Mold Finished Basement”; greenbuildingadvisor.com)

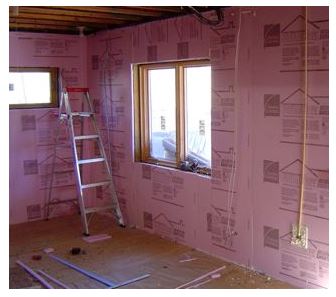
If you don’t have a need for a finished basement, you can still create a liking for pink (or blue or whatever color the rigid foam board comes in!) like this one:

Source: energyvanguard.com

A few final tips for finishing your nice, dry basement:  

  • Carpet should not be installed directly over an uninsulated concrete basement slab. Any moisture that condenses on the cold slab becomes a nice habitat for mold and other biologicals. (buildingscience.com)

  • Impermeable paints (waterproof coatings) should also not be applied to an uninsulated basement slab. Moisture that condenses on the cold, coated surface cannot be absorbed by the concrete. The thin film of water that forms on the surface of this floor is very slippery. (buildingscience.com)

In all of these improvements, the only vapor barriers we’ve recommended have been on the exterior of the block wall and under the slab, because water permeating through the wall should not be trapped on the inside.  It’s like choosing to paint the interior of a gypsum wall (drywall) with latex paint, with a pinhole plumbing leak behind it that keeps the wall moist.  Is there going to be mold growth on that wall?  Of course!  You won’t see it right away, but when the paint starts to bubble and peel, it will eventually rupture to expose all of that mold to the air of your home.  Similarly, in most cases waterproof coatings don’t have a place inside basements, because unless they are waterproofed on the outside, they need to constantly dry to the inside.  That’s actually a good thing, so in our opinion it’s best to resist the temptation of slapping on a waterproof coating to reduce moisture in your basement.  Go for the long-term solution: good drainage and insulation!

Photo by Adam Winger on Unsplash