Tag Archives for " air sealing "

Why is my house so DUSTY? Assessing the air currents gives a clue

Why is my house so DUSTY? Assessing the air currents gives a clue

This article was written in response to an actual problem.  My elderly parents moved into a “barndominium” which was converted from a 35x35’ metal workshop, in 2020.  The walls were insulated with fiberglass batts, and the attic above their 10’ ceilings was insulated with blown-in insulation.  I listened to my mom’s complaints about dust in the house. This is a real problem because the dust seemed to settle very quickly after cleaning, and my father has COPD.  Since the dust seemed to be a whitish colored dust, together we decided it must be coming from the attic, which had extra (white) insulation blown in after renovations were complete. We increased the HEPA filtration of the HVAC, with no results.  I checked for openings in the flexible ducts of the HVAC which could entrain insulation, with no results.  I tried several different times to seal the attic penetrations, which in actuality should have been done by a conscientious insulation company BEFORE the extra insulation was blown in.  I sprayed foam:

  • Around the HVAC vents
  • Around the bathroom exhaust fans
  • Around the LED puck lights (must check with the lighting manufacturer before doing this as some lighting is incompatible with direct-contact insulation.  The light needs to be “IC rated” in order to safely come into contact with the insulation.)
  • Around ceiling fan boxes
  • Around hanging shelf penetrations through the drywall of a floor-to-ceiling closet

It took multiple trips to the attic (with a good dust mask, of course) and quite a few cans of spray foam to get the job done, but sealing these areas, and one other (big) thing really helped cut the dust down.  It wasn’t until I really analyzed what was propelling the dust from the attic into the living space, that I figured out what was going on.

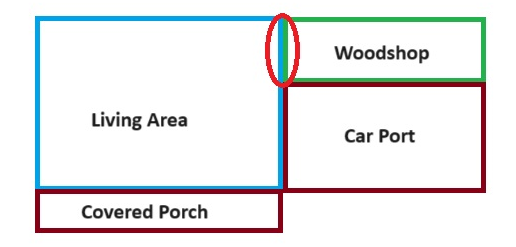
We’ve written several articles about negative pressure in your home and its negative effects. (This one has an eye-opening video linked).  I suspected that the dust was coming from the attic because negative pressure was somehow being generated in the house by the HVAC system.  However, I didn’t look at the big picture.  The living space is adjacent to a woodshop where my father carves (his hobby) and he uses a powerful dust collector to whisk the dust out of the workshop to a drum container.  The motor on this dust collector is rated for 240V so you can imagine that it’s a heavy-duty machine and being situated in the carport, can be heard from some distance from the house.  This thing SUCKS, and most of the time he’s using it with the door and window closed, so where is the makeup air coming from?  The workshop shares a common wall with a small bedroom in the living area (see red circle in diagram below).  It’s not too big of a leap to think that the dust collector may be pulling air from the house, as well, which in turn draws air from the attic when the ceiling penetrations were not sealed. 

To seal the wall between the woodshop and living area, I caulked the baseboard to the floor, as well as sealed the electrical boxes by taking off the switchplate and sprayfoaming around them as much as the little foam straw would allow (extra large switch plates help if you have to cut out the drywall a little).  The drywall took care of the rest of the wall.

Sometimes it takes a bit of thought to figure out the air currents in your home, but they are well-worth investigating!  Recently I found (by accident) that some carpenters had terminated a whole-house vacuum system in the ceiling of their house instead of routing it outside.  Even though the system used a filter, the space above the tiled ceiling was thick with a fine dust. We only discovered it when a  leak forced replacement of part of the roof above it.  We extended the PVC vacuum exhaust pipe just a few more feet and ran it out through the soffit.  It just goes to show that a little investigation (and a lot of spray foam) can go a long way to maintaining less dust in the house! 

Photo by Kent Pilcher on Unsplash

Sealing your Attached Garage

Sealing your Attached Garage

For many people an “attached garage” is an asset in a home: the convenience of parking and walking inside under cover is very attractive when there’s extreme weather outside!  However, from an air quality perspective, attached garages are actually a liability, unless the garage has been air-sealed from your house!

In our articles about negative air pressure here and here, we talked about how contaminants can enter your home from the garage.  The garage not only has car exhaust fumes, it can also have paint or chemical fumes from your hobby, VOCs from pesticides and insecticides stored there, and possibly even exhaust gases from your gas water heater, furnace or clothes dryer.  Need we  mention the mold and mildew spores when humidity and cardboard boxes create the perfect environment for mold?  It’s almost like having an unsanitary neighbor in the apartment next to you…now, does an attached garage still seem like an “asset” to your clean, healthy home?

If you are coming around to a healthier way of thinking about your garage, it’s essential to consider installing some boundaries with this unsanitary neighbor!  “Air sealing” is more than just a tight-closing door.  It goes from the ground (foundation), through walls and insulation and even into the attic.  That’s right–if the attic over your garage is not sealed from the attic over your home, you got it–there is shared airspace and the possibility of contaminants crossing over from the air that circulates there due to changing temperatures. 

As with most air-sealing projects, creating this boundary is easiest if it’s done during the building phase.  The easiest way is to build your attached garage as a “separate” building…as in this article.  Jake Bruton of Airow Building in Missouri does it this way: do all the framing for the house, install your air barrier, and only then, frame the garage on the other side of the air barrier.  Finally, any penetrations like electrical and ventilation must be properly sealed. 

Another way to airseal during construction is to hang drywall on the shared wall inside the garage, foam the penetrations like light switches and outlets on that wall, and also run plywood sheathing above it to the roofdeck, using sprayfoam to seal the entire barrier in the attic as in this video.  Sprayfoam really is the only way to effectively seal around ceiling joists, which often run straight over the wall from the home into the garage.     

This is all great...for new construction.  What if you are buying an existing home, or just now want to upgrade your home?  First of all, examine that shared wall from the garage side, from floor to ceiling. 

  • If the drywall is finished, that’s good.  Finished drywall can be an air barrier.  However, you’ll want to remove any trim like baseboards or trim around doors, faceplates like electrical plates, and uncover any penetrations.  Get some spray foam in a can and seal all of these cracks with spray foam.   You’ll want to cover the space from the sill plate to the drywall, the spaces around electrical boxes, and around any pipes sticking through the wall like gas pipes or hot water pipes if you have a hot water heater in the garage.  Make sure to seal around the door frame if there’s dead space there. 

  • If the drywall is not finished (no tape and mud or just insulation), that’s even better!  Consider removing the existing drywall on the garage side (you can install it again later if screws were used), as well as any fiberglass or rolled insulation, and sprayfoaming the entire wall.  Spray foam can be an excellent air barrier if it’s done by a pro.  Before you schedule the job, however, go to the next point and prep the attic space so that they can foam there as well.

  • If the attic space between the garage and home are shared, you’ll need to build a partition wall between them.  Of course this is not a fun job, because attics are typically low, cramped and have extreme temperatures, but it’s critical if you’re going to do a thorough job.  Then, the wall can be sprayfoamed on the attic or house side, or at least foamed around the roof, rafters and joists and taped where plywood sheets come together.  

  • Ventilation (air conditioning and heating) is something that should never be shared between a house and garage, because that is a sure way to pull those contaminants right in and distribute them around your home!  If you do have a shared system, consult with an HVAC company about terminating the vents to the garage and installing a dedicated mini-split.  For small garages, a window air conditioner and portable heater will do the trick!  

  • If flexible ventilation ducts go over the garage with no vents, it’s really hard to get an air seal around flex ducts.  If you can’t/don’t want to switch to metal ductwork, install a collar in the attic wall that separates the garage and house (the one you build as in bullet #3 above), and attach the ends of the flex duct to it, so the wall can still be adequately airsealed.  

  • The door between the house and garage, of course, is an area that needs to seal tightly.  Adjust the door so that no daylight shows around the perimeter (I know, this is easier said than done!) and use weatherstripping around the sides so that it seals when closed.  If necessary, install a “sweep” on the bottom or replace the rubber seal in the threshold so the bottom seals as well. 

Here are some product recommendations for air sealing the garage:  

  • Air-sealing tapes can be expensive, but don’t scrimp: don’t use duct-tape, vapor-barrier tape or anything less than a product that is for air-sealing.  ZIP System is a great brand and be sure to buy more than you think you will need, because there always seems to be another seam to seal!  Use this tape to seal plywood edges together, seal the door frame to the drywall (if you can’t foam it), etc. 

  • Spray foam cans come in lots of formulations: small cracks (less than ¼”), larger gaps and cracks ( ), pest block formula (who knows what kind of chemicals are in there), but just be sure to buy a good number of the small and large gap formulations before you start the job.  Wear gloves, safety goggles and old clothing (long hair safely tucked away) because this stuff is super sticky!  Also, if you use a can quickly, you can reuse the same straw on the next can, and save the extra straw in case one gets plugged or lost.  Unless you buy the “smart dispenser” version, the straws and remainder in the can cannot be reused after about 30-40 minutes, so be sure to have several spray areas ready when you start spraying!  After it hardens, you can use a utility knife or hacksaw blade to cut away excess foam.  Consider these different products:

    • Great Stuff Window and Door gently expands so that frames will not warp under pressure.

    • Great Stuff Gap and Cracks (use in gaps up to 1”)

    • Loctite Tite Foam, pack of 2 for $19

    • Great Stuff Pro (large cans, $14 each–a great tool for a large job because it’s easier to dispense and can be reused for up to 30 days); however it requires a special gun.  Users report that a can goes a LONG way (3-6 cans on a large home) but if you have more air-sealing to do, it’s worth having several more on hand.

    • And more…

Not only will your house smell better and stay cleaner after these airsealing improvements, you’ll probably notice less cold drafts in winter and hot air in summer, since most attached garages are not conditioned.  Finally, complete your sealed garage upgrade with a funny sign reminding everyone to “close the door”...after all, airsealing can only go so far when the door is open!!

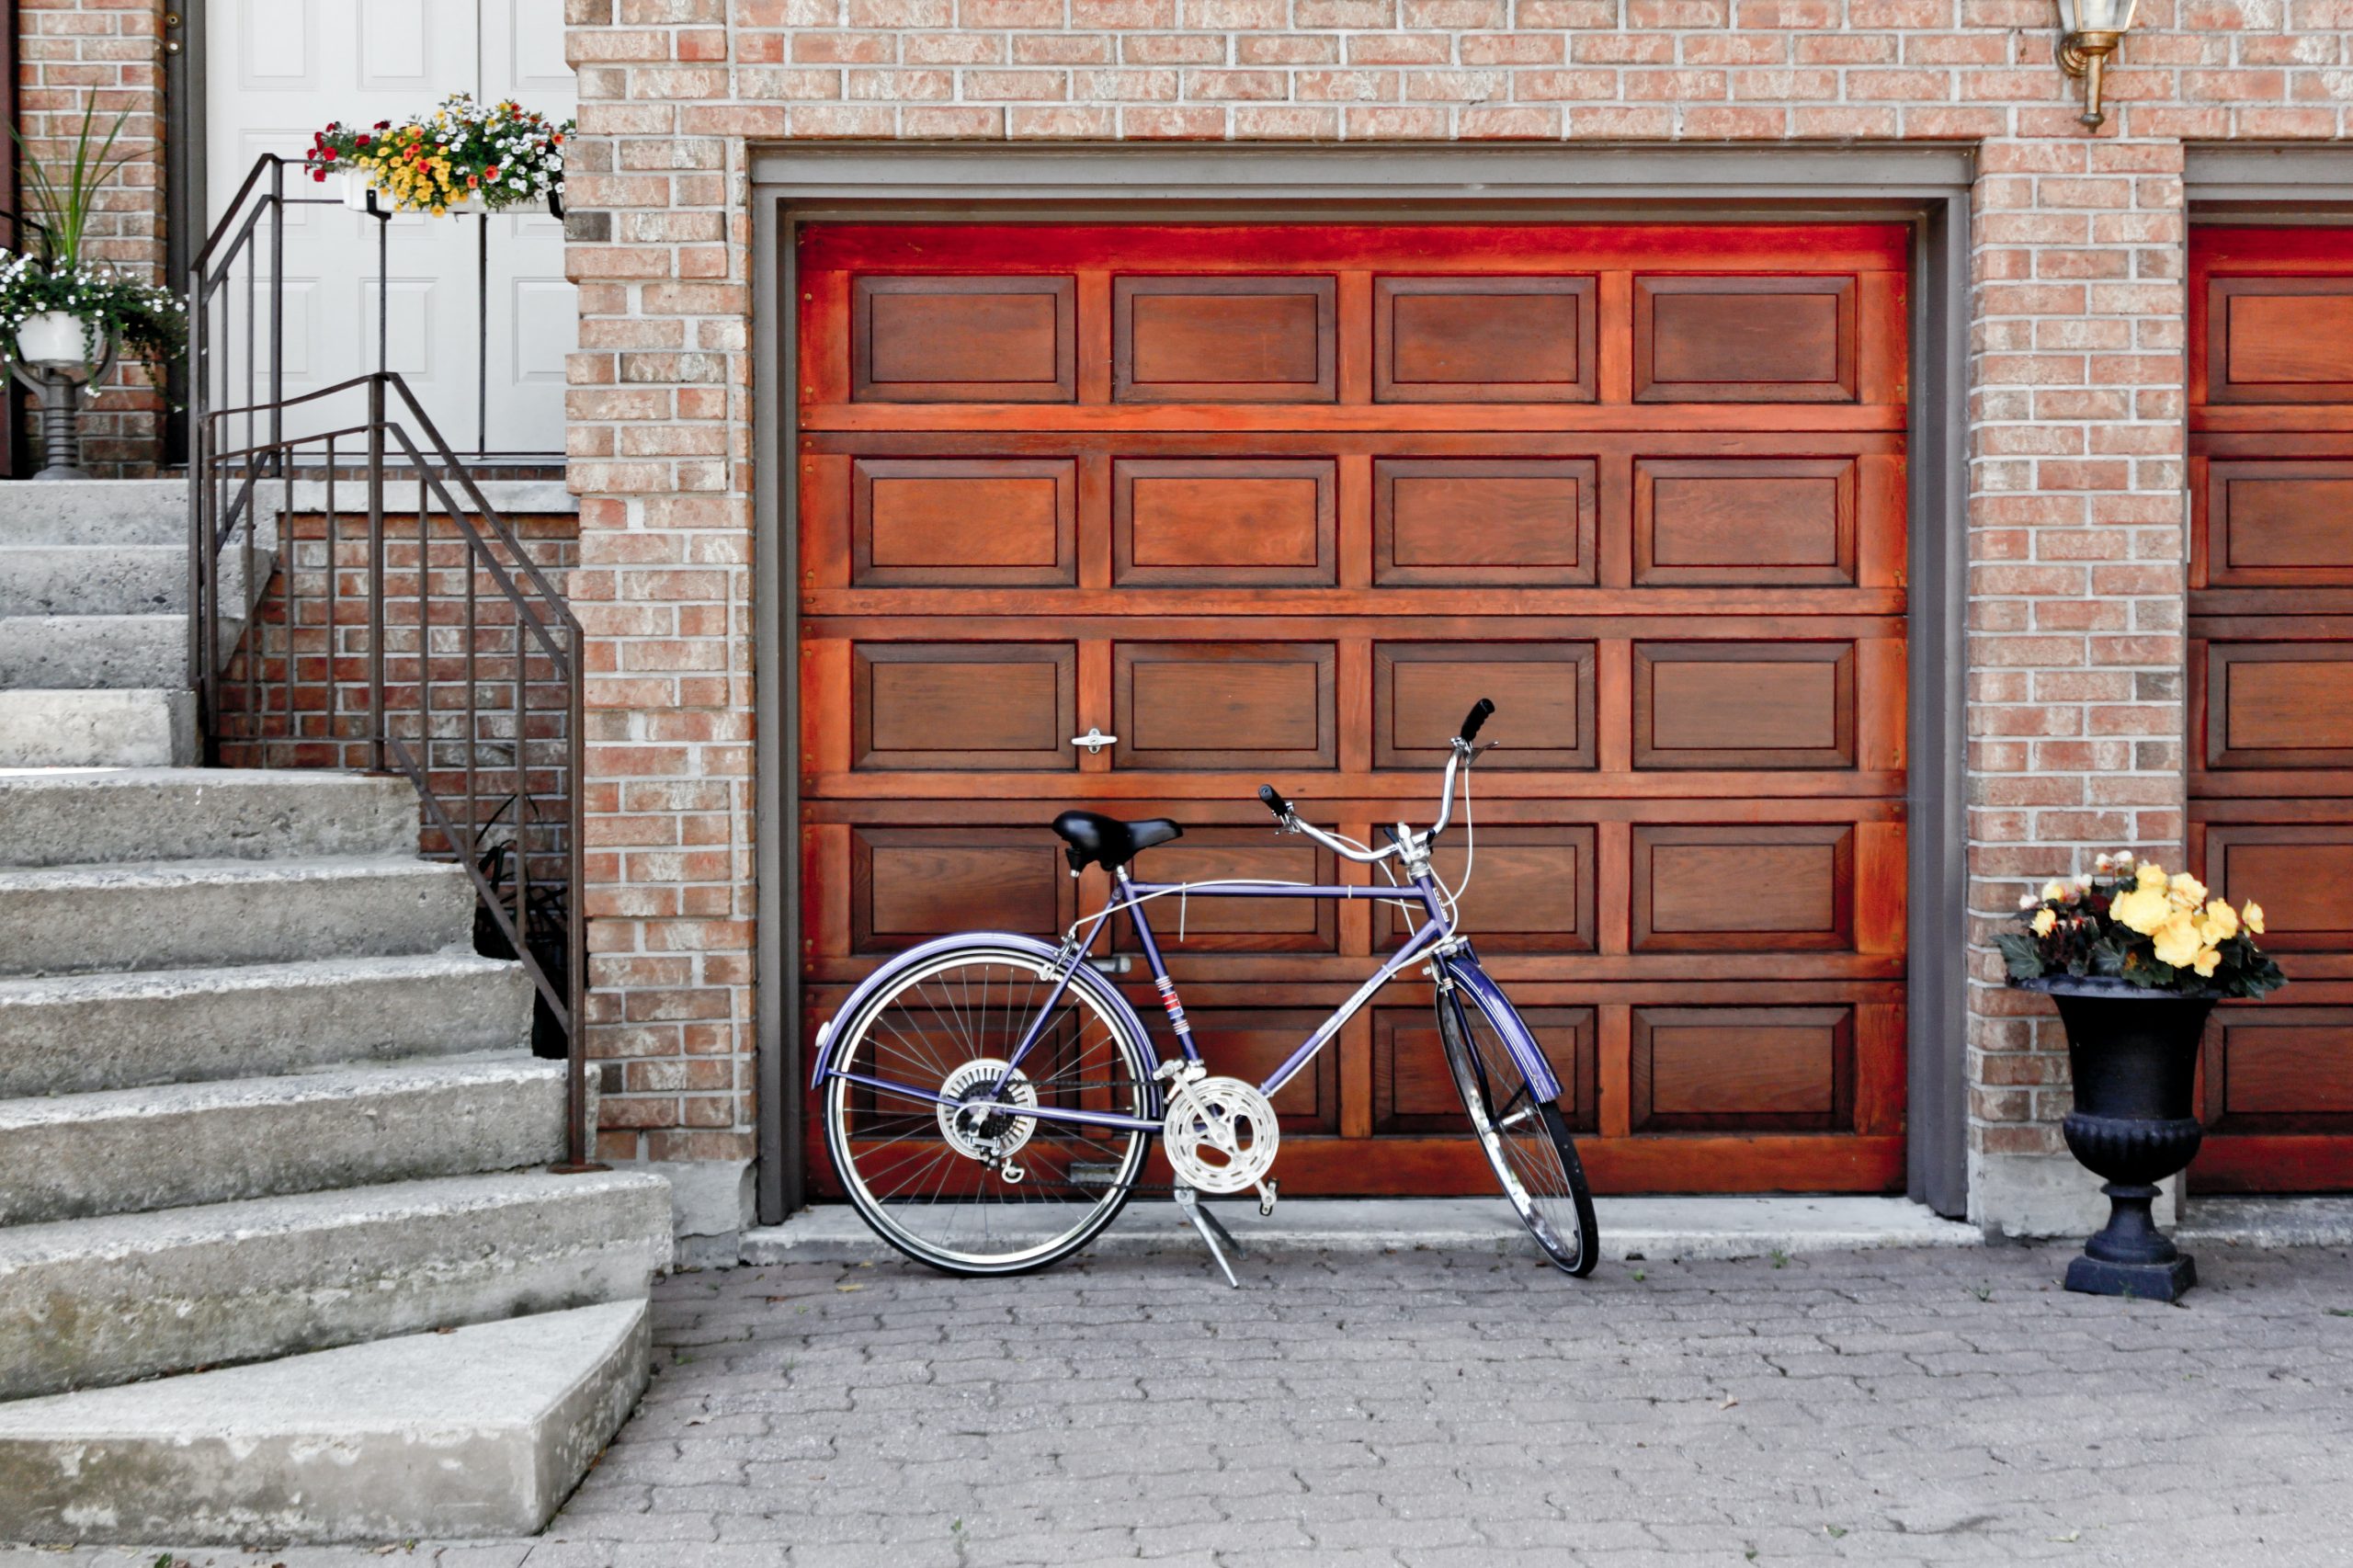
Photo by Kevin Wolf on Unsplash

Excuse me but your fireplace is open!

Excuse me but your window fireplace is open!

Heading into the winter heating season, many of us are thinking of cozy nights snuggled inside our homes, not the cold drafts that spoil the atmosphere in more ways than one–ahem, even our heating bills!  Drafts are invisible sucks on our budget, like “phantom” power leeches that use electricity.  The drafts coming from the fireplace are comparable to leaving a window cracked open.  In our article about how to keep the fireplace from polluting the house, we noted that the average household can save 14% on their heating bill by weatherstripping the fireplace.   It’s time to prepare for maximum coziness!

Working fireplaces have dampers, and these should work well.   Dampers are like “valves” that should be closed when the fireplace is not in use, to prevent outside air (and smoke particles from the flue) from coming back into our homes when we’re not using the fireplace.  However, dampers are not air-tight; they just don’t have the ability to block drafts.  Here are several other places to really air-seal your fireplace:

1) At the chimney cap: this requires you to get up on the roof or hire someone to do that.

2) Inside the flue with a balloon: the balloon, however, can shrink as temperatures get colder, or get punctured on a rough surface and leak.

3) At the hearth (bottom): this is the most physically convenient place, and can be easily removable for those times you want to use your fireplace.

Although the first two can accomplish air sealing well with the right products, #3 is actually the healthiest because the chimney and firebox (with smoke particles on their surfaces) stays separated from your house air.  

Here are some ways we’ve found to seal out those drafts all year long: 

If your fireplace is a bare opening in the bricks, like mine, this is the most difficult to seal but worth the effort.  Here is are two ways to do it:

Method 1: You’ll need: 

  • 4 pieces of wood (at least 1” square, larger is better) or metal tubing cut to fit the length and width of the opening (see diagram below)
  • Foam insulation tape to go around the frame in the opening
  • Glue gun and glue if adhesive on insulation doesn’t work well
  • Magnetic tape or velcro tape
  • Optional: 1-2  tension rods will help stabilize the frame if the wood doesn’t fit snugly.
  • An insulated blanket or piece of plywood cut fit over the frame.

You’ll want to thoroughly plan out how the frame will fit together before cutting your wood or metal to length!  Here’s how I cut mine:

Then, add insulation to the perimeter of the pieces using the adhesive on them, or a glue gun, and fit the wood snugly back into the opening–you may need to re-cut the pieces to accommodate the increased thickness due to the insulation.  

You can add 1-2 adjustable tension rods across the opening or up and down for added stability.

Next, add magnetic tape or velcro to the front of the wood pieces in order to attach the insulation.  You can use all kinds of materials to cover the opening and get creative!  Just remember that there will be a temperature differential in winter or summer, so adding some insulation to the back of the material makes it even more energy efficient.

  • Foam board or cardboard (if cut to fit snugly, no tape is needed to secure it in the opening)

  • Bed blanket with extra insulation glued or stitched to back or inside

  • Old electric blanket with wire removed and extra insulation added inside (stitched in place)

  • Plywood

  • Drywall

Of course, if you decide to use the fireplace, remove ALL of these materials and store them away for re-installing later. 

Method 2 involves taking a baby or pet gate and setting it to firmly span the opening, then cutting a foam board or cardboard to fit exactly over it (you can cover the foam board with wallpaper or fabric).  While this method can be sturdier and quicker to do, it does involve finding an unused gate and cutting the foam very carefully so that it seals the opening. Alternatively, you could cut a used foam mattress topper slightly larger than the opening, and squeeze it into place to cover the gate (again, covering the foam with any decorative material). 

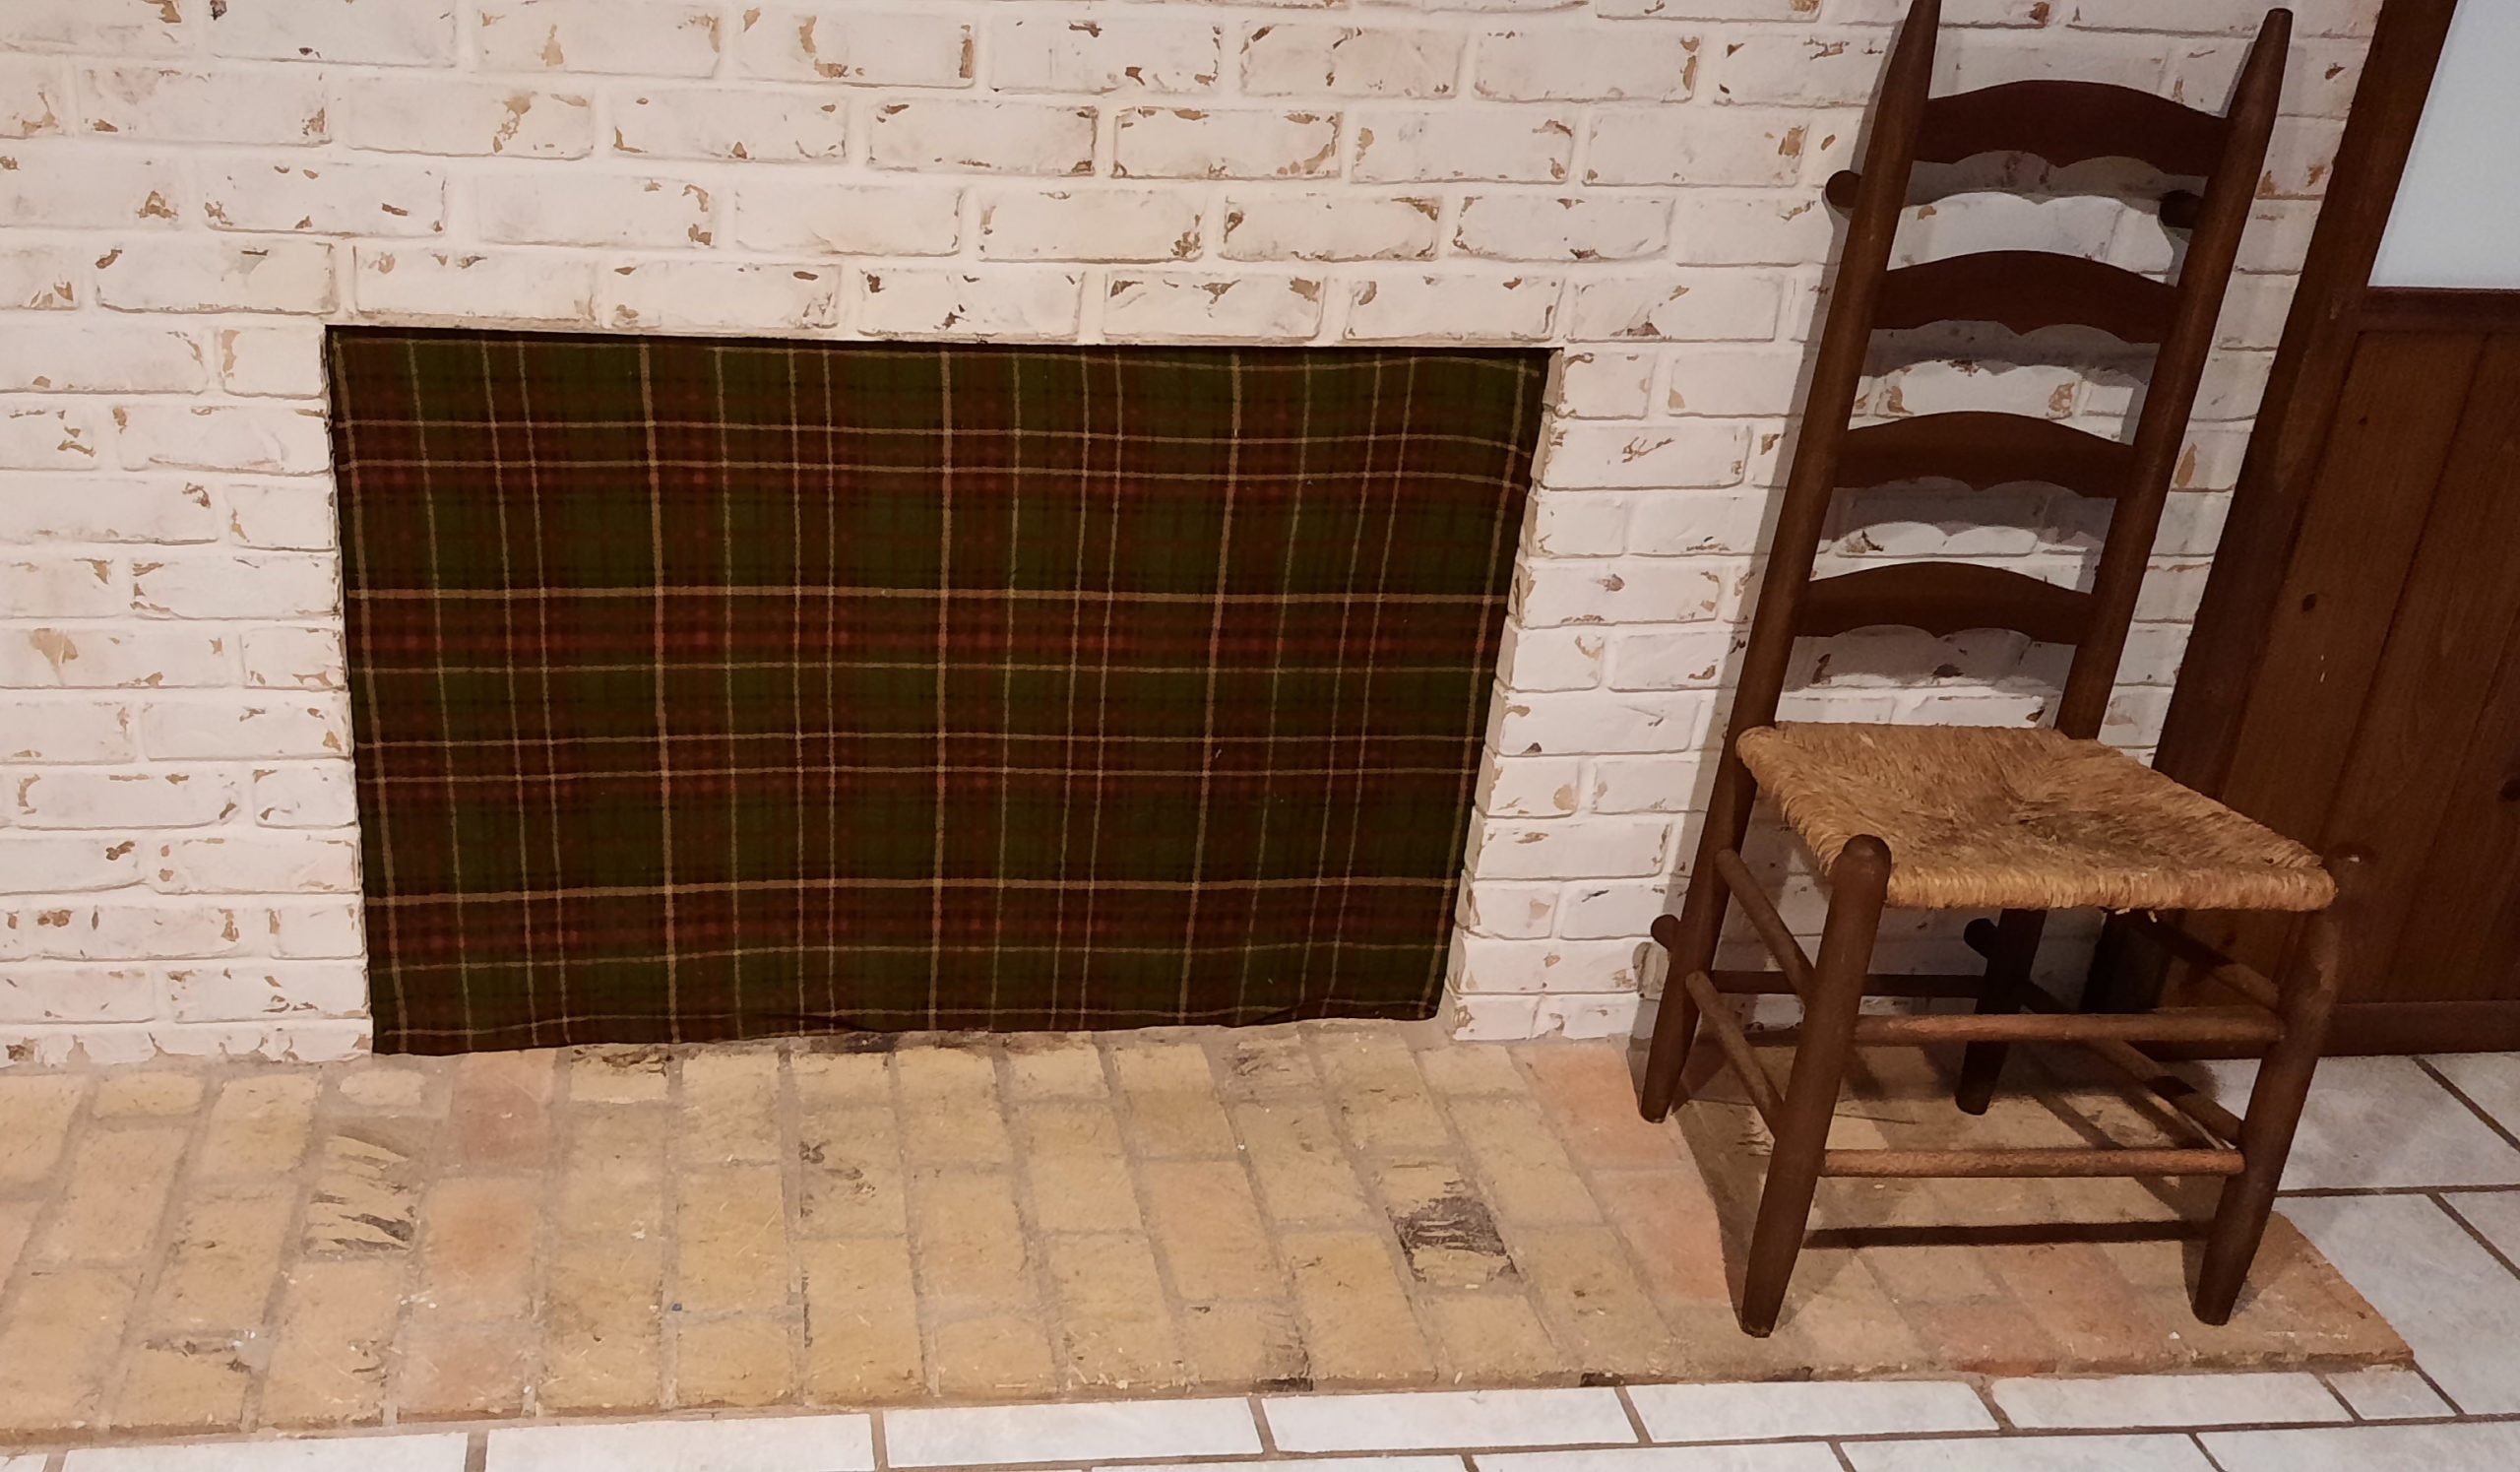
Here’s how my fireplace draft blocker turned out with a fleece blanket, 2 sheets of cardboard glued together, and a staple gun (admittedly I could have stretched the fleece a bit more or made a border for more visual interest):


Voila!  Just sticking my head into my fireplace one time during this project and smelling the lingering smoke smell made me think, why didn’t I do this sooner?  Drafts and smoke be gone all year long!

How can I apply Altitude Simulation to my home?

How can I apply Altitude Simulation to my home?

Visitors and full-time residents in high-altitude locations are susceptible to altitude sickness, also called Mountain Sickness.  This is due to the lower atmospheric pressure and consequently lower oxygen molecules by volume, found in the mountains.  These illnesses include problems sleeping, fatigue, headaches, and even life-threatening pulmonary edema (buildup of fluids in the lungs).  At just 6,000 feet many people experience trouble sleeping, and, according to the Cleveland Clinic, about half of people who ascend to 8,000 feet will experience some form of altitude symptoms, and almost 75 percent of people will have effects at 10,000 feet. (Oxygenation for Mountain Hotels and Resorts)  Even one of the premier experts on altitude sickness, Dr. Peter Hackett, had a close call with pulmonary edema while mountaineering (video). Technically, even people at sea level can get “hypoxia” (the condition of low oxygen content in tissues) if the atmosphere is low in oxygen or their breathing function is impaired.  

Studies have shown that supplementing oxygen during sleeping reduces the effects of altitude sickness or hypoxia, while also improving daytime oxygen saturation and ability to function during the day.

Altitude Control Technologies (ACT) works with ordinary homeowners, as well as the US Air Force, US Navy, universities, professional sports teams, Olympic training facilities, etc. to provide “altitude simulation” for enhanced health and performance.  It’s a unique technology that raises oxygen levels in a room to “simulate” lower altitudes.  In homes, ACT only services bedrooms because with 8 hours of sleep at a simulated lower altitude, people can become better acclimatized to their physical altitude during the rest of the day.  This informative video shows the machines, how they work, where they are installed and how they are controlled.

ACT machines take in air from outside, splits up oxygen and nitrogen, sends the nitrogen out of the house, and the oxygen to the bedroom(s).  For example in Colorado, oxygen levels are increased by about 30% to simulate an altitude closer to sea level.  The control sensors monitor the oxygen saturation, barometric pressure and CO2 in the room constantly.   In this way, too much oxygen (which violates the National Fire Protection Code) is never a problem.  

The oxygen machines installed by ACT use molecular sieves.  They are placed outside the bedroom(s) in the attic, mechanical space or crawlspace so that noise and heat created by the machines does not impact the restful area of the bedroom.  To counter the heat of the machines that could otherwise place an additional burden on the HVAC system, ACT has developed an Alticool™ system uses a combination of fresh mountain air and exhaust fans to cool the machinery space.

Although the machines used by ACT are proprietary, many of the machines used by oxygen medical supply companies use Pressure Swing Adsorption (PSA) systems to separate oxygen from nitrogen.  Two pressure vessels are filled with Carbon Molecular Sieves (CMS).  In the first pressure vessel, clean compressed air is introduced, where the nitrogen and carbon dioxide is attracted to the CMS and oxygen is allowed to pass through.  The second pressure vessel is regenerated to “purge” the nitrogen and carbon dioxide from the CMS by vacuum and a small stream of pure oxygen.  Then, the vessels switch placement in the process and the first vessel is regenerated while the second vessel produces oxygen. (How Oxygen PSA Generators Work)

Because air pressure is lower at higher altitude, simulating a lower altitude in a room involves adding oxygen, which also increases air pressure in the room.  In building science, this is a “positive pressure” scenario, where good air sealing must accompany the installation so that the newly added oxygen doesn’t leak out of the room and cancel the work of the equipment!   For this reason, detailed engineering of the space(s) to be oxygenated precedes any installation.  The engineers take into account the room boundaries including doors, windows, walls and ventilation systems that are shared with other spaces, often specifying dampers that are activated when the system is in use.  New construction and pre-existing structures are candidates for the system, however it’s always less costly and easier to plan for such a system before the home is under construction. 

So you may be saying, how does all this apply to my home at sea level?  Even if you don’t live at or visit high altitudes, you can apply some of the principles of this technology to make your bedroom the optimal place for your body to recharge and repair itself while you sleep.  Let’s recap to understand how this applies to your bedroom:

  • Getting a better sleep at night increases performance and cognitive facilities during the day. 

  • Air-seal the room boundaries from pollutants by using air-sealing techniques at the door(s), window(s), corners, outlets and openings like can lights and ceiling fans.

  • If you want more fresh, clean air, you can consider the following: 

    • Use a window ventilation filter where you can open the window comfortably without excess humidity, heat or cold.

    • If you have central air conditioning, you could switch the bedroom to a dedicated mini-split with its own filter and option to intake fresh air from outside, OR

    • Add a fresh-air intake in your HVAC system and add an inline duct fan and filter to the vents serving your bedroom (here’s an inline duct filter). 

    • Add plants that are low-maintenance and produce the most oxygen while filtering pollutants. 

  • Check with your doctor to see if you suffer from sleep apnea or hypoxia.  Usually these are diagnosed through a sleep study.  If you are a relatively stationary sleeper, you could add oxygen to your sleep routine with a portable oxygen concentrator and mask or cannula.  Continuous positive airway pressure machines (CPAPs) are popularly prescribed but they do not increase the oxygen content of the incoming air;  CPAPs just increase air pressure slightly to keep breathing airways open while you sleep.

  • Consider that outside noise can also reduce your sleep quality, so check out our recommendations to seal out unwanted noise, as well. 

  • Make it a priority to clean surfaces and change your sheets at least once a week.  To help combat dust and allergens between cleanings, add an Air Angel and a standalone HEPA filter.  A dustmite-proof mattress encasement also helps to transform your bed from being a dustmite haven to a clean “nest”!

Consider what and how you are breathing during the most important time of the day–your sleep–and you may find that making small changes can improve your daytime enjoyment immensely!

Photo by Jason Hogan on Unsplash

Do you need more INSULATION?

Do you need more INSULATION?

When seasons change it’s easier to get a fresh perspective on how well your home is performing against the elements, or we would say how well the building envelope is “sealed”.  Because it’s very difficult and expensive to build a home that is perfectly sealed, everything else is relative to the best-case scenario.  It’s best to have a good idea of what kinds of insulation are out there, before even requesting estimates to improve your insulation, so you know what the experts are talking about!  We can start by discussing what insulation does, how it is rated, and then move on to what types of insulation exist and what they do for our building envelope. 

Heat is a source of energy, and here on the surface of the earth on Monday through Sunday, energy naturally obeys certain laws (we won’t go into any sub-atomic or supersonic cases here). According to the 2nd law of thermodynamics, heat flows from hot bodies to cold bodies.  If the sun has heated up your roof and it’s cool inside because your air conditioning is running, the heat of the roof will try to flow into your cool house.  It’s just doing what is natural, like water running downhill!

Insulation is what we use to stop or retard the flow of heat, whether it’s trying to come in like the above example,  or go out on a cold winter’s day.  It’s like putting on a fluffy down jacket over your warm body, to keep the heat where you want it.  Some heat will undoubtedly escape through the openings and seams, but if you had to spend all day, every day outside, you will want the best insulation, tightest seams and the smallest openings you could get in that coat!  That’s the picture.

To rate the possible types of insulation you can stuff in the floor, walls and ceiling, we have “R-values”.  R-values measure an insulation’s resistance to heat flow; lower R-values allow more heat flow (not good) than high R-values (better).  Typically R-values can range from R-10 for some flooring materials to R-60 for some dense attic insulation materials. (Forbes Home)  These are all based on 1” of thickness, though, so one inch of R-30 is roughly equivalent to two inches of R-15. 

According to the Department of Energy, nine out of ten homes in the US are underinsulated.  (energystar.gov)  Therefore, chances are good that your home could use more insulation.  This map of the US shows 7 zones, which are basically increasing “delta T” or temperature difference between the interior and exterior of the home.  For example, the northernmost extremes in Zone 7 have the greatest temperature difference during the winter, so will need the most insulation.  It also gives guidelines on where and how to add insulation.

Because heat rises (an important part of the “stack effect” in your home), the most effective place to add insulation is in the attic.  Keep that expensive heat inside where it belongs!  This chart shows by the number of stars what value is obtained by adding insulation in the attic vs. floor (lots).  

Everything has an R-value–even carpet and glass.  Here’s a chart that shows the R-values of many common building materials.  Manufacturers generally price the insulation according to its R-value–meaning that the highest R-values are most expensive!   Because heat transfers in three different ways (convection, conduction, and radiation), some materials are better at retarding the transfer in one or more ways.  Here are the differences:

  • Convection is heat transfer from fluid to fluid.  Because air is a fluid for these purposes, air barriers (air sealing) is important to stop air from outside your home stealing heat from air inside your home.  Fiberglass batts with a paper facing are not great for protection against convection, but they are better than loose fiberfill.  Air can move through fiberglass batting, and it can actually move loose fiberfill out of the way.  Spray foam, when correctly applied, is one of the best convective thermal barriers. 

  • Conduction is heat transfer from solid to solid.  Most homes are built with 2x4 or 2x6 studs of wood that are joined directly to sheathing, then roofing or siding.  Without a conductive thermal barrier, cold from outside conducts directly through the siding, to the sheathing, to the wood stud, to the interior drywall.  Brrr!  This is why you can usually “see” the framing of a home on a thermal image on a cold day.  Conduction of heat in this manner is also called thermal “bridging”.  Newer building techniques suggest that a layer of rigid foam board between the siding and framing isolates the framing and prevents it from conducting heat into or out of the home.

  • When there is no direct contact or fluids between two bodies, heat transfer can still occur through thermal radiation.   Waves of electromagnetic radiation from the sun reach our planet and roofs everyday, and on cloudless nights, the warmth is reflected back into space.   Radiant barriers, either as part of a rigid foam board or on their own, have become popular additions in attics to retard heat radiation.  In order for radiant barriers to be effective, though, they can’t be sandwiched between other layers of insulation.  I won’t discuss radiant barriers in this article, but you can read more about them here

Here are some other pieces of information about insulation that it’s important to know:

  • Many types of insulation, like fiberglass and sheep’s wool, are “fluffy” because they are using the insulative properties tiny pockets of air within them.  Therefore when installing fluffy types of insulation, you want to “fluff” them out (wearing a respirator of course), not compress them, as compressing them actually decreases their R-value. 

  • Although the Department of Energy says that fiberglass batt insulation is fine for new construction or even laying over old insulation in attics, the building industry does not agree.  According to Family Handyman, batt insulation simply does not cover well in the attic because of its shape and inability to fill odd crevices and voids.  Of cellulose and loose fiberglass, cellulose has slightly higher R-value but fiberglass is more widely used in attics.  

  • Every insulation type must be correctly installed in order to achieve its rated R-value!

  • Loose fill insulations are very popular for ease of application and decent R-values, but in terms of air quality, most have the ability to generate dust and PM2.5.  If you are looking to use loose fill, make sure your HVAC ducts are sealed well and the area using the loose fill (for example the attic) is air-sealed from the rest of the home.

Here are the types of insulation grouped by where they are generally used:

Attic: Make sure that you have done the best air-sealing possible before adding insulation to your attic.  

Cellulose is recycled, ground-up paper with boric acid added for insect control and fire resistance (Family Handyman).  It comes in dense sacks and is installed with a blower.  Installation creates a lot of dust, but professionals can do a “wet-spray cellulose” that adds a small amount of water to keep the dust down and slightly increase the R-value, which is 3.5 per inch.  

Loose Fiberglass:  Fiberglass is small strands of glass that clump to form fluffy insulation.  It is also densely packed in bags that must be blown in.  It is very itchy to the skin and irritating to the eyes and lungs, so be careful to use full-body protection or hire a professional to install it.  It also can get entrained into your HVAC system if any ducts in the attic have leaks in them.  Fiberglass is lighter than cellulose so that if wind-washing occurs (where air/wind enters the attic through cracks), it is not a good choice for protection against heat convection. R-value: 2.5 per inch

Spray-Foam Insulation:  Spray foam generally comes in two varieties, open cell and closed cell.   To get anywhere near the R-49 recommended in attics of zones 5-8 on this chart, you’ll need to think about using closed-cell spray foam or adding rigid foam board when you replace the roof (see next point).  Open cell foam deforms easily when you poke a finger in it, and has an R-value of approximately 3.6 per inch.  Closed cell foam is typically used in extreme temperatures and under homes, because it has a higher R-value of 6 per inch, and it’s very hard, making it almost impervious to critters that tend to chew through insulation.   Besides being used as an air barrier, it’s also a total vapor barrier, and it adds a lot of structural rigidity to the cavity it’s sprayed in.  The downsides of spray foam insulation include the use of toxic blowing agents that, if improperly installed, can cause long-term off-gas issues (see our post here).  It is also difficult to detect leaks and insect damage behind the spray foam, so that major damage can be done before the problem is evident.  Spray foam must be installed by experienced professionals, and the cost is accordingly higher than other types of insulation!

Rigid foam board insulation:  Installation of foam board in attics is not as easy as blowing in loose insulation, but it adds a lot of  R-value as well as protects against conductive heat transfer.  It gives some of the closed-cell properties of spray-foam, without the offgassing (most of the off-gassing is accomplished at the factory) and installation cost (it can be installed DIY).  The most popular types of foam board are EPS (expanded polystyrene) and XPS (extruded polystyrene).  Polyisocyanurate is made of urethane and is a newer, popular choice with an R-value of 6 to 8.   The easiest way to install these boards is during roof replacement, but they can also be used to create a conditioned attic by screwing them to rafters with special fasteners like drywall (video).  Seams and penetrations can then be sealed using foil tape. 

Walls: Of course, the best time to insulate well is during construction.  However, insulation can be added to walls during siding replacement.  Here are typical wall insulations and their values: 

Fiberglass batts:  Fiberglass has been the standard for many decades now, but its R-values are limited to R-13 for a 2x4 wall, and R-20 for a 2x6 wall (since fiberglass has an R-value of 3.7 per inch,  and a 2x4 stud is 3.5” wide, it gives a value of 12.95). (learnmetrics.com)  This is not very much for northern climates, and it doesn’t address conduction transfer, so you may choose to add rigid foam board to the exterior before the siding. 

Mineral Wool batts: Mineral wool is a fiber insulation, similar to fiberglass, but is made from natural materials and not glass. There are two kinds of mineral wool available for home insulation – rock wool, which is made from fibers of stone and slag wool, are fibers made from iron ore waste.  Additional benefits of mineral wool is that it is an excellent acoustic insulator and it’s very fire-resistant. (What is mineral wool insulation?)  The R-value is about 3-3.3 per inch for a brand-name mineral wool called RockWool.  (bobvila.com)  Mineral wool is also made into boards, with an R-value of about 4.0 per inch.

Sheeps Wool batts:  For those who are sensitive to other types of insulation, or want to use some of the most natural building products available, sheeps wool fits the bill.  What you will need to ascertain, however, is if synthetic adhesives are used, and how sustainably and humanely the sheep are raised and sheared, because the industry has the potential to generate abuse.  Sheep’s wool can also regulate the humidity in your home: it can absorb around 33 percent of its weight in moisture without ever losing its insulating ability.  (buildwithrise.com)  The R-value of sheep's wool insulation ranges between 3.5 and 3.8 per inch, due to millions of tiny air pockets in the folded wool.  Sheeps wool can also come loose in bags for blowing in behind netting (see “loose fill” section below). 

Hemp batts: Hemp has an R-value of approx. 3.7 per inch, making it a very good insulation.  It is sustainable because the hemp plant grows fairly quickly (only 90-120) days, and the product uses only about a pound of raw material per square foot of R-13 HempWool, one brand name for this product.  According to BuildwithRise.com, hemp insulation is non-toxic. It is a plant-based product that contains no VOCs, no chemical binders, and does not off-gas. Hemp insulation is hypoallergenic, repellent to mold, pests, and insects.  One drawback to hemp insulation is that it is not naturally fire-resistant, so fire retardants must be added to it, potentially adding chemicals with sensitivities or toxicities. 

Recycled Denim Batts: It’s unlikely that you have enough old jeans to insulate one 2x4 cavity, but the recycled clothing industry has more than enough!  Denim insulation is actually a combination of recycled jeans and post-industrial denim and cotton, not just denim alone. The fabric is shredded and treated with boric acid to make it flame retardant, and insect, pest, and mildew resistant. (builddirect.com)  It also comes in loose fill for attics and walls, and has approximately the same R-value as fiberglass: 3.5 per inch.  It doesn’t require special protective equipment to install, but it is more difficult to cut and can take a long time to dry if it gets wet. 

Cork:  Cork is a remarkable material.  It’s harvested by hand from trees that live from 150-250 years.  Only the bark is removed every 9 years, without harming the tree.  Most of the world’s cork comes from Portugal.  ThermaCork is a product that is made from the bark and water in a superheated steam process.  It has an R-value of 4 per inch, which is on the high end.  It can be used on the interior for soundproofing, flooring and partitioning, as well as exterior walls and roofing.  It’s non-toxic and sustainably produced. 

ClimaCell: ClimaCell was developed out of an effort to find a scalable alternative to EPS, which is more commonly known as Styrofoam®. (businessinsider.com)  It’s made with paper and corn starch so that it’s fully recyclable and is a preferred packing material for cold shipments.  In residential use, it’s made in loose fill, batts and rigid boards, but only mainly available in European markets at the moment  (start saving all your cold-pack boxes!).

Rigid Foam Boards: EPS and XPS are great choices to protect the structure because of their “closed cell” insulative properties and vapor barrier properties.  Polyiso can absorb moisture, though, so it cannot be in contact with the ground or wet surfaces.  They can be installed during siding renovations or additions.  Check out this article where rigid foam insulation was used to create a continuous air barrier between the garage and the home (genius!)

Spray foam: As stated above, spray foam has good insulative, air barrier and in the case of closed cell foam, vapor barrier properties that make it an excellent choice for walls during construction.  It can also be retrofitted into existing home walls by removing a layer of siding, removing the old insulation and filling the stud cavities from the exterior.  (Removing old insulation before installing new)

Loose fill:  If you live in an older home that was poorly insulated, it may be possible to add insulation between the studs by either removing a layer of siding at the middle or top of the first floor, or drilling through the interior wall.  Then loose fill can be blown into the cavity, and the siding replaced or the hole patched.  (attainablehome.com)  Loose fill can be sheeps wool, cellulose, fiberglass, hemp, cork or a mixture of agricultural products, like ClimaCell.

Loose fill is also a popular choice for new construction, when it is used with netting to contain it.   Netting or fabric is stapled to the studs and insulation is blown into each cavity until it is full. The only problem with this is that it may settle over time, leaving gaps at the top.  

Floors:  If your home is built above the ground, it’s important to consider where your building envelope lies: at the floor, or at the ground?  If you have a crawlspace, consider closing it off and conditioning it, so that humidity and mold from the ground are not sucked into your home.  If you decide to keep the crawlspace open and ventilated, however, additional insulation can be added to the underside to keep cold air from leaking out in summer or penetrating in winter.  Any insulation should have good water-resistant properties to avoid absorbing moisture and breeding mold.

Rigid foam board is great for insulating the walls of conditioned crawlspaces.  This type of insulation may be faced with silver foil, with the foil facing inward toward the crawl space. Though the rigid foam is the chief insulator, the foil adds a bit more energy savings by reflecting heat into the crawl space. The foil, too, acts as a vapor barrier. (thespruce.com)

Closed-cell sprayfoam could be used on walls of conditioned crawlspaces, but they would need to be clean and dry first.  More often, it is used under the floors of ventilated crawlspaces to provide the thermal insulation, moisture and air barriers needed to keep the home more comfortable. 

“New” Insulations

Residential insulation is evolving all the time, and one thing we are watching is Vacuum Insulated Panels (VIPs). With the absence of air in their core, they resist all types of heat except radiation, and often they are covered with a radiant barrier that closes that gap.  They are quite expensive at the moment and shapes/sizes cannot be cut on the job, but they are very promising for roofing especially because of the need to reject heat at this high-access point.  Like other emerging technologies, we expect these to become more widely and cheaply available in the next decade. 

Aerogel is a gel is most commonly made from silica (silicon dioxide), where the liquid portion of the gel has been replaced with air or another gas.  It’s very low density but with high-crush strength, and has an R-value of 10 or more per inch.  It’s used in thin strips and sheets to eliminate thermal bridging, and also available in blanket form.   Aerogel is supposedly “low-dust” compared to loose fiberglass and batts, but silica is dangerous to breathe in so respiratory protection is still required when installing and cutting it. (A Look at Aerogel as Insulation) In addition, it repels water so it can protect your structure from water damage.  Alas, its cost is prohibitive for most residential projects at the moment.

There’s only a few year-round climates that don’t need insulation (Hawaii, anyone?), so it’s always good to stay on top of potential thermal leaks and new developments in insulation.  It’s a case of sowing some money and effort to reap comfort and energy savings down the road! 

Photo by Greg Rosenke on Unsplash

These steps convert your HVAC into a whole house filter

These steps convert your HVAC into a whole house filter

Many people have central air conditioning/heating, yet they don’t know that this machine could be used year round to improve the air quality in their homes.  For such an expensive investment, it’s wise to get the most out of it–everyday!  Here are a number of tips to do just that.

  1. Air-seal the return ductwork.  We’ve written extensively on air-sealing your home, attached garage and attic, but the return ductwork is super-important too.  A lot of contractors use wood or drywall to “frame” a duct but without sealing the corners, you are pulling dusty air from wall cavities, the attic and maybe even under your house, if the return air grille is near the floor.  Here is a great video on what to do and which products to use.  Air-sealing your ductwork is not a bad idea, either.

  1. Make air filter changes top priority!

If you’ve finally gotten on a schedule of changing your HVAC filter, we applaud you!  You are protecting this expensive equipment by preventing an overly-dirty filter from damaging the fan or other components, because dirty filters increase the pressure drop, like trying to suck a Big Gulp through a coffee stirrer.  Try to use a higher MERV filter (like 11, 12 or 13), first by reading our article How can I get more filtration with my current HVAC system, then increasing the MERV if you have enough filter surface area.

  1. Seal the filter in place.

There are several ways to make sure that air is not bypassing the filter.  

  • This video shows how to seal a vent grille to the drywall using spray foam.  Although this can also be done from the attic (with less chance of dripping messy foam in your house, not all vents can be accessed from above.  

  • For the return grille: caulk the filter grille to the drywall.  

  • Use filter-sealing tape over the filter:  

    • AllergyZone FilterLock Filter Slot Seal, $10, has a magnetic closure to stick securely to your filter slot opening, sealing gaps to maximize filter use.  The video on this page for the product shows how easy it is to install.

    • Or, if you have a filter that lies flat in a filter grille, use masking tape or painter's tape to seal the edges of it to the filter grille like in this video (I prefer painter's tape because it removes more cleanly). 

  1. If you have a BP-2400 Whole Home Ionizer, install it between the return air filter and evaporator coil, or before the fan, in order to get those ions circulating through your whole home.  Once a year, it helps to de-energize the ionizer and clean of any dust from the brush heads, which will maximize its efficiency.

  1. Set the fan to “on”, not auto.  This ensures that the fan is always running even if the heat or AC is not on.  If you’re concerned about the cost of running the fan all year, you don’t have to be.  Check out our article on how to calculate this cost to see that it’s not a lot (~$10 per month or less), especially for the reward of cleaner home air.  The bonus is that circulating air with this fan redistributes air throughout your home, reducing moisture content in soft furnishings and mold growth.

You are ready to go!  Dust, cleaning and personal products, pets, cooking–they all contribute to less-than-stellar indoor air quality, so it’s wise to make the most of what you already have to improve it!

Photo by Tekton on Unsplash