Excuse me but your fireplace is open!
Excuse me but your window fireplace is open!
Heading into the winter heating season, many of us are thinking of cozy nights snuggled inside our homes, not the cold drafts that spoil the atmosphere in more ways than one–ahem, even our heating bills! Drafts are invisible sucks on our budget, like “phantom” power leeches that use electricity. The drafts coming from the fireplace are comparable to leaving a window cracked open. In our article about how to keep the fireplace from polluting the house, we noted that the average household can save 14% on their heating bill by weatherstripping the fireplace. It’s time to prepare for maximum coziness!
Working fireplaces have dampers, and these should work well. Dampers are like “valves” that should be closed when the fireplace is not in use, to prevent outside air (and smoke particles from the flue) from coming back into our homes when we’re not using the fireplace. However, dampers are not air-tight; they just don’t have the ability to block drafts. Here are several other places to really air-seal your fireplace:
1) At the chimney cap: this requires you to get up on the roof or hire someone to do that.
2) Inside the flue with a balloon: the balloon, however, can shrink as temperatures get colder, or get punctured on a rough surface and leak.
3) At the hearth (bottom): this is the most physically convenient place, and can be easily removable for those times you want to use your fireplace.
Although the first two can accomplish air sealing well with the right products, #3 is actually the healthiest because the chimney and firebox (with smoke particles on their surfaces) stays separated from your house air.
Here are some ways we’ve found to seal out those drafts all year long:
- If you have a metal surround with a flat surface, a number of companies sell blankets that can easily attach to the metal with magnetic strips, like this one for $28.
- If you have an insert with glass doors and like their look, you can get a magnetic strip ($11) to seal just the vent at the bottom of the insert, which is usually the largest source of draft (but air may still leak around the glass doors).
- If your fireplace has a stove insert, make sure that the perimeter of the insert is sealed to the brick or tile with the appropriate sealant. It’s best to consult with the manufacturer, but here are some fire-rated products that can do the job:
- MEECO'S RED DEVIL 1105 Fireplace Insert Insulation, 120”Lx1.5” W, $20
- Midwest Hearth Fireplace Insert Insulation (10’ roll), $15
- 3M TALC Fire Barrier Moldable Putty Stix MP+, Red, 1.45 in x 6 in, $20
- Kraken Bond Fire Block Caulk, $9
If your fireplace is a bare opening in the bricks, like mine, this is the most difficult to seal but worth the effort. Here is are two ways to do it:
Method 1: You’ll need:
- 4 pieces of wood (at least 1” square, larger is better) or metal tubing cut to fit the length and width of the opening (see diagram below)
- Foam insulation tape to go around the frame in the opening
- Glue gun and glue if adhesive on insulation doesn’t work well
- Magnetic tape or velcro tape
- Optional: 1-2 tension rods will help stabilize the frame if the wood doesn’t fit snugly.
- An insulated blanket or piece of plywood cut fit over the frame.
You’ll want to thoroughly plan out how the frame will fit together before cutting your wood or metal to length! Here’s how I cut mine:
Then, add insulation to the perimeter of the pieces using the adhesive on them, or a glue gun, and fit the wood snugly back into the opening–you may need to re-cut the pieces to accommodate the increased thickness due to the insulation.
You can add 1-2 adjustable tension rods across the opening or up and down for added stability.
Next, add magnetic tape or velcro to the front of the wood pieces in order to attach the insulation. You can use all kinds of materials to cover the opening and get creative! Just remember that there will be a temperature differential in winter or summer, so adding some insulation to the back of the material makes it even more energy efficient.
Foam board or cardboard (if cut to fit snugly, no tape is needed to secure it in the opening)
Bed blanket with extra insulation glued or stitched to back or inside
Old electric blanket with wire removed and extra insulation added inside (stitched in place)
Plywood
Drywall
Of course, if you decide to use the fireplace, remove ALL of these materials and store them away for re-installing later.
Method 2 involves taking a baby or pet gate and setting it to firmly span the opening, then cutting a foam board or cardboard to fit exactly over it (you can cover the foam board with wallpaper or fabric). While this method can be sturdier and quicker to do, it does involve finding an unused gate and cutting the foam very carefully so that it seals the opening. Alternatively, you could cut a used foam mattress topper slightly larger than the opening, and squeeze it into place to cover the gate (again, covering the foam with any decorative material).
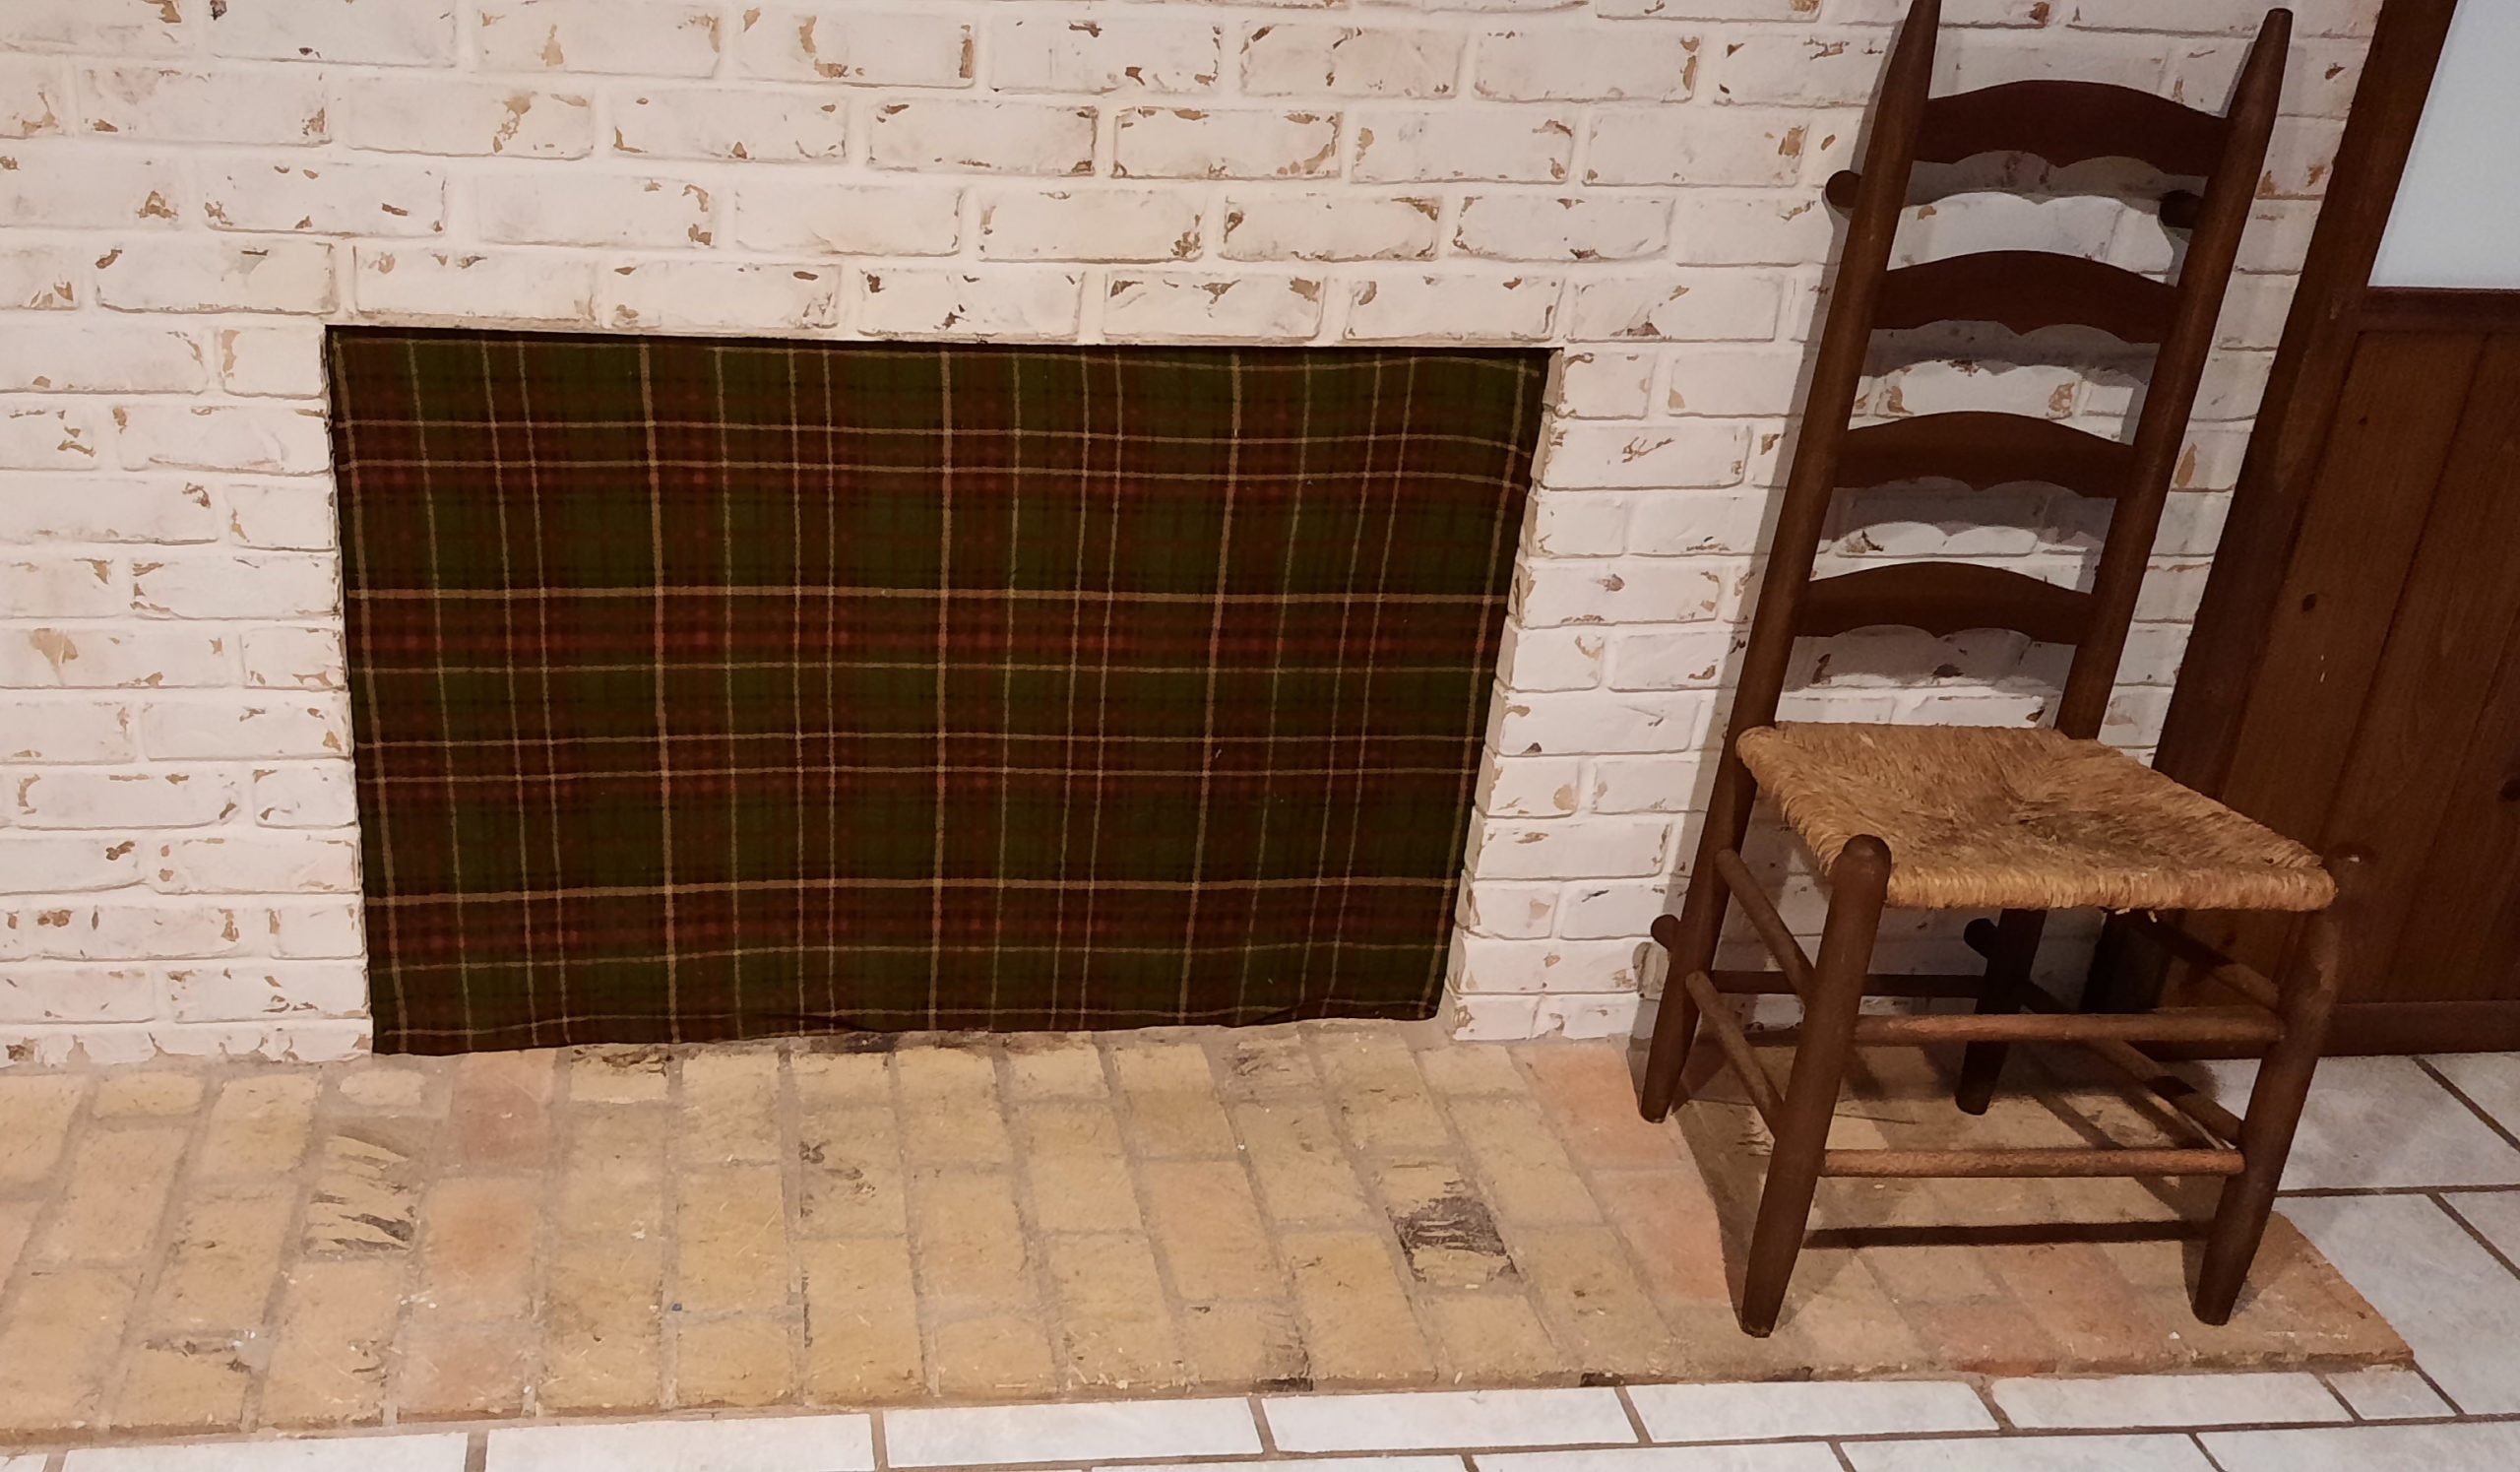
Here’s how my fireplace draft blocker turned out with a fleece blanket, 2 sheets of cardboard glued together, and a staple gun (admittedly I could have stretched the fleece a bit more or made a border for more visual interest):
Voila! Just sticking my head into my fireplace one time during this project and smelling the lingering smoke smell made me think, why didn’t I do this sooner? Drafts and smoke be gone all year long!
Photo by Jessica Johnston on Unsplash


