HypoAir's nature-inspired technologies lead the industry with over 14 years of engineering excellence & innovation.
14 Years of R&D, Innovation & Proven Results
Our Guarantee
In the air purification industry we know there are a lot of claims, differing opinions, oversimplification, fancy marketing, and broken promises. We strive to be transparent, understandable, and accurate. For the last 14+ years we've stood behind all of our products with a 30 day risk free money back guarantee. Sign-up for a free 1 on 1 phone consultation with an IAQ Expert, call (949) 791-9404, or simply contact us online with your questions.
Clients Testimonials
What Our Clients Say About Us

Learn how to reduce your exposure
5 Primary Toxin Types
 Mold
Mold
 Penetrating Particles
 Toxic Gases
 Bacteria & Viruses
 Odors
Odors

Air Quality is not "one size fits all"
Air quality is complex. No single technology or product is optimal for every situation or contaminant type (despite what some may claim). Our current array of products utilize a combination of the technologies depending on the application. The proprietary technologies we have invested in are backed by nearly 15 years of laboratory, university, and "real world" commercial studies. These tests are available upon request, and cover topics including VOCs, MERS, Molds, MRSA, O3, TBC, HCHO, RSP, NH3, H2S, and many more. Studies referenced on the site are often relevant to one or more of the technologies we use, but not all of the products we sell as different products use different technologies.†

Proven Effective by World Renowned Laboratories

The Man-Made Problem: Modern buildings, especially homes, represent an unprecedented large-scale experiment in how we live and breathe. The way we design, insulate, and control indoor environments today is fundamentally unnatural. With sealed walls, synthetic materials, forced air systems, and temperature control, we’ve created indoor spaces that isolate us from natural air purification processes. These environments trap pollutants, increase moisture, and disrupt the natural balance of elements found outdoors, leaving us more exposed to a variety of airborne contaminants. In particular, homes and buildings in North America face an increasing issue with water-based biological overgrowth, with mold and actinobacteria often found with unhealthy concentrations.
The Nature-Made Solutions: In the natural environment, the air is continuously refreshed and purified by a combination of physical and chemical processes. Plants absorb carbon dioxide and pollutants, while rain and wind physically remove particles from the air, keeping the atmosphere clean. UV radiation from the sun plays a crucial role, producing hydroxyl radicals that break down and neutralize pollutants in the atmosphere, along with various diverse sources of natural positive and negative ionization. These natural purification mechanisms work together to create the outdoor air quality that humans thrive in. At HypoAir, we’re committed to replicating and enhancing these natural processes indoors.
Need Help Finding the Right Product?
Take our short questionnaire so that we can better understand what products & technologies to recommend to your specific situation – in less than a minute.
Scope Of Work
Industries We Serve
Bedrooms & Nurseries
Kitchens
Pets and Allergies
Cars & Travel
Whole Home
Resorts & Casinos
Aerospace
Food Industry
Office Buildings
Energy Sustainability
Air Handler Solutions
In-Duct installations
PTAC, VTAC, and more
Any size building
Ice Machines
Mold Sensitivities
Microorganisms
Medical Facilities
First Responders
Dynamic Purification
300+ Free Research Articles
HypoAir’s Natural Home Blog
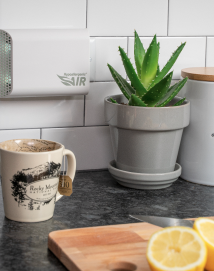
5 Benefits Of Bipolar Ionization Technology In Households Stеp into a world whеrе thе air swirls with frеshnеss and vitality, thanks to thе еxtraordinary...

Sealing your Attached Garage For many people an “attached garage” is an asset in a home: the convenience of parking and walking inside under cover is very attractive when there’s extreme weather outside...

The Downside to Smart Thermostats (and many other smart appliances): Invisible Radiation Saving money is still a big draw for...


