Tag Archives for " mold "

The unintended consequences of turning down the thermostat this winter

The unintended consequences of turning down the thermostat this winter

According to the Energy Information Administration and their Winter Fuels Outlook report, it will cost 27 percent to 28 percent more than 2021/2022 to heat your home with oil or gas.  If you heat with electricity, prices may rise by as much as 10 percent, because much of our electricity is generated from oil and gas. (Newsweek.com)

When you have a fixed or unstable budget, the decision to lower or turn off heat during the winter is not easy.  The other components of our budgets–food, housing, transportation and medical care–aren’t as flexible as those extra blankets, mittens and hats, so down the thermostat goes.  This is where what you don’t know might hurt you.

It’s not only the air temperature that changes when the heat source turns off.  Air holds a certain amount of water vapor, also called humidity, and warmer air can hold more water vapor than cooler air.  When the air cools, water vapor in the air will tend to condense on any surface that is lower than the dewpoint temperature.  That’s why you see condensation on windows and around door frames in winter: these are the points that tend to conduct cold temperatures from the outside, and moisture from the air is condensing on them.  Persistent moisture is mold-feeding moisture, and before you know it, there is a mold problem.  Even worse is that mold could be forming in places you can’t readily see, like inside walls, attics and basements, because the air temperature has dropped and cooler air just can’t hold the moisture of warmer air.   Cooler air can easily reach humidity levels of 80% or more, giving that “damp” feeling and over time, exposing the home to mold growth.  

There is a myth that when a room is not being used, it’s best to turn off heat (close registers) and close it off from the rest of the house (close the door) to save money.  If this is done without any ventilation or air circulation, it’s also a recipe for mold, because without air circulation, water vapor in stagnant air will be absorbed by furnishings and allow mold to take root.  If you need to limit heating in your home, try to leave doors to unused rooms at least cracked and leave a fan running in the room, because dynamic airflow limits moisture ingress due to evaporation. For more on finding and fixing areas prone to mold in the winter, check out our article.

If high humidity is not a problem, low humidity might be.  Low humidity can damage all kinds of decor in your house by shrinking and drying, from wood flooring, wallpaper, and furniture to fine instruments like pianos and guitars and artwork.

Then, there’s your body.  Stress due to cold is a real problem for the elderly and those with pre-existing medical conditions like asthma or heart disease.  It also makes people more likely to use alternate heating methods that could be unsafe.  Small room heaters are often known to tip over and cause fires, and electric blankets can actually cause burns.   Falling asleep on a bunched-up blanket is a common cause of burns, according to Bell, a plastic surgeon who treats many burn patients. He explains that when a hot blanket rests on the same body part for an extended period, the skin can burn. “These burn accidents usually happen because someone has fallen asleep on a bunched-up area of the blanket,” he says.  Unfortunately, people with diabetes are more vulnerable to burns from electric blankets because their condition makes them less sensitive to heat. “Electric blankets are also not recommended for infants, young children or anyone who is paralyzed or incapable of understanding how to safely operate them,” says Bell.  People with urinary incontinence also should not use electric blankets because wetness and electricity don't mix. (ul.com)  If you do use an electric blanket, follow all the safety guidelines of UL Solutions (previously Underwriters Laboratories) so that you don’t become one of these statistics!

When home heating costs rise, air quality can also worsen due to particulates in the air.  In Europe, the impacts of inflation and fuel scarcity due to the Russian-Ukrainian war is particularly hard on middle and lower income families, and they turn to alternative sources like burning wood, coal and even garbage in indoor stoves.  These stoves impact indoor and outdoor air quality.  Indoors, reloading a stove that is already burning fills the air with particulates, and combustion gasses can leak out of improperly-sealed doors and exhaust pipe fittings, exposing inhabitants to dangerous levels of carbon monoxide and particulates.   Outdoors, European cities that typically have poor air quality during the winter may have even worse this winter. A recent study from Greece showed that wood burning was responsible for almost half of the cancer-causing air pollution in Athens and a new study from New Zealand has showed an increase in serious respiratory infections when wood smoke built up in an area. (TheGuardian.com)  If you live in one of these areas, it doesn’t matter whether you are the one burning wood–you will still be breathing its effects. 

If you feel financial pressure to lower the thermostat this winter, here are some practical ways to keep the air warmer and less humid in your home (Prof Cath Noakes from the University of Leeds):

  • Move seating away from cold windows
  • Use thick curtains at night, but allow the sun to come in during the day
  • Ensure radiators or ventilation registers are not covered or blocked by furniture
  • Ventilate using high-level windows can reduce cold drafts
  • Ventilating after a shower or when cooking can prevent moisture buildup which can lead to damp and mold.

It’s sometimes harder to detect high humidity in the winter because of the lower temperatures, so don’t take a risk–keep one or more humidity sensors in your home for monitoring it.  Our bipolar ionizers like the Germ Defender, Air Angel or Whole Home Polar Ionizer actually deter mold even if humidity temporarily goes too high, making them great investments for all seasons. 

Finally, if you have a warm home, sharing it with your elderly, disabled or disadvantaged friends for a meal or a few hours could make a huge impact in their lives.  Helping them to purchase safe heating appliances and understand how to keep humidity at manageable levels also will help them to live healthier.  Warmth is not always about containment, but allowing it to radiate to others. 

Photo by Will on Unsplash

Ancient homebuilding 101: How did ancient people prevent mold in their homes?

Ancient homebuilding 101: How did ancient people prevent mold in their homes?

Mold is an ancient problem, the most infamous account of which is in the 14th chapter of the book of Leviticus in the Bible.   Although it’s described as a “plague of leprosy” in the King James translation (verse 34), the references to “ingrained streaks, greenish or reddish, which appear to be deep in the wall” (verse 37 in New King James translation) are hallmarks of mold.  Indeed, some scholars investigating the meaning of the Hebrew word “Tsara’at” that was translated “leprosy” have inferred from ancient skeletal evidence and modern symptoms of mold exposure that a better translation may have been “mold”.  (Mold: “Tsara’at,” Leviticus, and the History of a Confusion).  Going forward with this assumption, the prescription for mold in the ancient Hebrew home was inspection (by the priest), identification (by shutting up the house and seeing if the mold grew), remediation (empty the house of everything valuable, remove the stones and plaster, and replace them with new stones and plaster), reinspection and cleansing, and in the case of last resort, demolition (complete dismantling and removal of the house). 

Has the problem (or plague) of mold gotten worse since ancient times?  Maybe so.  After World War II, a housing boom generated the need for faster and cheaper construction and made gypsum wallboard (drywall) much more popular than plaster as a building material.  Drywall is composed of compressed gypsum between two layers of durable paper. Gypsum readily absorbs water and dries slowly, while paper supports mold growth very readily. Since mold growth can occur within 24-48 hours of a water event, according to the US EPA, this is a perfect recipe for mold growth (just add water!).

The housing boom also caused quality of construction to decrease as volume increased, allowing for water problems to happen more frequently. “Back in the days of plaster, brick and stone construction, we didn’t have mold problems like we do now. This is in part because mold doesn’t grow on those materials very easily, if at all. Drywall, on the other hand, is like a Petri dish. What’s worse is that drywall is an ideal growth medium for Stachybotrys, the black toxic mold referenced above, because of its high cellulose content. Nearly every mold will grow on drywall given the right moisture levels, but Stachybotrys has a field day with it.  The final component of the perfect storm, which has made mold into the problem we now face as a society, here and internationally, is that our buildings are built so tightly, in the name of energy efficiency. Ever since the fuel crisis in the 70’s, there has been a huge push to reduce energy usage and create a more comfortable living environment. We have walls stuffed thick with fluffy insulation. Having a small utility bill is a bragging right at cocktail parties.” (A Brief History of Mold)

We can see that there are three things we need to consider in homebuilding to prevent the dreaded “m” word: design (for natural ventilation), construction technique (to avoid water intrusion and decay) and materials.  Here are two examples of how ancient people incorporated these mold-fighting aspects into their homes, knowingly or unknowingly:  one is from Israel and the other is from Egypt.

Building techniques in first-century Israel:

According to nazarethvillage.com, villagers in Israel often built homes on the bare ground.  They could dig into soft limestone to make caves for water or wine storage, but often just used what the topography offered.  “Building on sloping bedrock requires great care in setting the first course, starting from the lowest part of the foundation and working upwards step by step. The bedrock footing is flattened and slightly stepped, but does not need to be completely level. By fitting stones into the uneven footing, the force of gravity will secure the buildings onto the bedrock. Using the land as the ancients did makes a lot of sense – there is less to dig and less to build.”  (Site Excavation)  The mortar used to hold the stones together was primarily earth, chalk (calcium carbonate), leftover straw (to add strength and reduce cracking) and a small amount of hydrated lime for durability.  The chalk is excellent at absorbing excess moisture from the air (reducing humidity inside), while the lime also inhibits fungal growth (keep reading for more benefits of lime!).  (Mortars for building and plastering in antiquity)

House windows in first-century Galilee were typically placed relatively high in the wall for maximum ventilation and privacy. Ventilation, as we know, can discourage mold by allowing ions in the fresh air to reach interior surfaces. (Windows)  The same principles were used in design of the homes, which featured a central courtyard with rooms added around it; thus fresh air could flow through the rooms whenever doors were opened to the courtyard. 

Preparing the house for plastering inside requires placing “small chinkstones and mortar to fill cracks and create a flat substrate for the interior plaster. Although obscuring the beautiful view of exposed stone masonry, interior plaster was necessary for insulation and to prevent household pests from taking over.  Plasters also improve interior lighting by brightening up the colours of the walls. We discovered that mixing chalk with the earth plaster gives a bright yet warm tonality to the home. The homes of more wealthy residences and public buildings – such as our synagogue – were finished in white lime plaster and occasionally painted.” (Interior Plaster)

Building techniques in ancient Egypt:  The following facts were taken from the article Homes and Mud-Brick Construction in Ancient Egypt, which references the report by Virginia L. Emery, University of Chicago, UCLA Encyclopedia of Egyptology 2011, escholarship.org:

Unfired mud brick houses were common in ancient Egypt, from the simplest abodes to the grandest of palaces.  Mud brick had several advantages over stone:

  • Brick ingredients were available virtually everywhere (sand, clay, and silt combined with chopped straw or dung as temper and binding agent)
  • Mud bricks are quicker to fabricate than quarrying stone, making them more economical in that sense
  • Mud bricks are quicker and easier to build with because they don’t require the trimming or fitting that building with hewn stone demands. 

“Mud-brick walls could be constructed directly on an unprepared ground surface, though more commonly were provided with brick foundations and wall footings laid in trenches upon a bed of sand... Occasionally, particularly along high- traffic routes, the base of the wall at ground level was protected by a footing of stone, in an effort to minimize the undercutting of the wall due to water or wind damage and traffic; stone elements also could be included in the wall proper, being most common at the quoining of building corners.”

The article Mudbricks give clues to understanding the Bible, which referenced the article Mud Bricks and the Process of Construction in the Middle Bronze Age Southern Levant, confirms that unfired mudbricks are susceptible to water damage.  Water can dissolve the bricks as well as weaken them, especially near the base of the walls. Several strategies are used to help minimize water damage. Typically, the construction techniques in the Ancient Near East involved building a stone foundation of 2-3 courses of stone upon which mudbricks were then placed to the desired height. The stone foundation does two things:  it minimizes the capillary action of water and salts seeping into the lower courses of bricks; it also helps reduce the erosive effect of water splashing from the roof back onto the bricks or from water running in the street.  Another aspect of mudbrick preservation was regular plastering and re-plastering the walls, which helped retard the effects of moisture and erosion, as well as the intrusion of plants, insects, and animals. 

How do these natural building methods defeat mold?

Mud-brick, which is also called adobe in areas of Spanish influence, can still be an economical way to build. Many people think that mud-brick invites mold and dampness into your home, however, it actually inhibits mold in several ways.  Ideal conditions for mold or rot are caused when a building material absorbs moisture and is unable to later release it, or when moisture is not absorbed but condensates on a surface. Here are the ways mud-brick and other earth building techniques inhibit mold, according to Earth Building School:

  • Creating thermal mass:  Thermal mass regulates temperature by absorbing heat when it is available, storing it and slowly releasing it when ambient temperatures drop.  Keeping temperatures higher and more constant reduces condensation and dampness, because cold air holds less moisture and so will condensate on windows and walls.Earth is one of the best thermal mass materials available, because of its slow reaction time and because it naturally regulates humidity.  It is easy to retrofit earthen building elements to your existing home: Earthen plaster over drywall, inbuilt cob furniture or mudbrick feature walls - let your imagination run free while creating a beautiful, healthy living space.
  • Clay regulates humidity: You can't beat clay when it comes to balancing indoor humidity at optimum levels of 40-60% RH. A solid wall of earth bricks can absorb up to thirty times the moisture of conventional burnt bricks and a 30mm (1-3/16”) thick surface coating of clay is more than enough for daily buffering.  
  • Naturally anti-fungal: Finally, natural finishes such as clay, lime plasters or Tadelakt (Moroccan plaster) are naturally anti-fungal.  These are good finishes in areas that are often damp, such as kitchens and bathrooms.  Lime is highly alkaline (high pH) and inhibits mold growth. It can be used to fix mold problems in old buildings (once permanent water damage has been remedied) and is a good and very hygienic choice for bathrooms - even in splash areas such as hand basins and showers.  Lime plaster is water resistant and can be applied as Tadelakt, for a totally waterproof result.  Working with lime - especially in situations where waterproofing is required - is a bit more technical, so it is advisable to get a skilled person onto the job. 

Whether the building is constructed with mud-brick or stone, these are the “bones” of the walls; plaster is placed over the brick or stone, and then the final interior and exterior finishes give them the protective “skin” that really preserve the construction from the elements.  Let’s dive into the finishes of Limewash and Tadelakt to find out why they are so good at inhibiting mold.

Limewash:  This ancient paint has so many physical benefits, and topping it off, has a soft and warming aesthetic that is causing a resurgence in its popularity.  Chemically, limewash is calcium hydroxide mixed with water.  Calcium hydroxide, also known as quicklime, is a naturally-occurring mineral that is soft and easy to mine from the ground (nature also “excavates” lime deposits with water, producing caves with fantastic formations inside).   Adding just the right amount of water causes the mixture to heat up (an exothermic reaction) that can be used immediately or left to cool down and thinned out with more water.  Here are some benefits of applying limewash in your interior or exterior finishes:

  • Limewash applied to stone and wood prevents rot and erosion while allowing the structure to “breathe” and release moisture.
  • Limewash is a natural pest repellent: the active ingredient, calcium hydroxide, discourages many types of worms, beetles and even mosquitoes from infesting the structure.
  • Lime is a farmer’s friend because it naturally deodorizes.  Lime provides free calcium ions, which react and form complexes with odorous sulfur species such as hydrogen sulfide and organic mercaptans found in animal and biological waste.  Thus, waste odors are not “covered over” with lime, but actually destroyed.  (Uses of Lime/Environmental/Animal Waste)
  • The high pH of limewash (10-13) makes it anti-fungal, anti-viral and anti-bacterial when it’s wet.  When dry, the pH lowers to neutral; however certain commercial limewashes like Lime Prime by Earthpaint have proprietary resins/polymers that allow the active ingredients to rehydrate and raise the pH again, so that it continually fights mold.
  • Limewash (and the plaster beneath it) are naturally incombustible.  This property was recognized at least as far back as 1212, when the King of England decreed that buildings that survived the terrible London fire must be plastered and limewashed immediately to prevent future fires.
  • Limewash prevents rust on iron surfaces.  This makes it even easier to apply, as masking off hardware is not necessary unless for aesthetic purposes.
  • Limewash is cheap and easy to make on your own.  You’ll just need to purchase calcium oxide (also called burnt lime or quicklime) from a supplier, and be sure to wear the proper clothing and protective gear to guard against chemical burns.  There is plenty of tutorials online, and this article from a long-established UK building conservation company also describes the process.
  • Finally, if you prefer skip the DIY and use commercially prepared limewash, Earthpaint, a company that prides itself in only offering non-toxic paints and wood finishes, has a set of products that can specifically tackle damp areas and mold remediation areas: Lime Prime and Lime Seal.  These are also great on unprimed drywall in any location.

Tadelakt: Sometimes referred to as Moroccan plaster, tadelakt is a traditional plaster indigenous to the Marrakesh region of Morocco that can be used as a stylish wall covering and alternative to tiles. It can be used indoors and on exterior walls.  Tadelakt-plastered walls create a solid, waterproof surface that is seamless, has no grout lines and is resistant to mold, which are some of the reasons why this traditional plaster style has become so popular in contemporary, minimalist homes. (Tadelakt: What you Need to Know About Moroccan Plaster)

Tadelakt is applied in several coats and finished using a special technique. "The final stage of polishing is done by using a plastic trowel, Japanese trowel or a traditional Moroccan application which requires a special polishing stone," explains Ian Kozlowski, Founder of Decor Tadelakt.  It's the final stage of applying tadelakt that makes the resulting surface waterproof.  Valentin Tatanov, manager at Tadelakt London explains: "The olive oil soap that is rubbed into the surface of the product chemically reacts with the lime to form calcium stearate."

This waterproof membrane makes Tadelakt appropriate for use in shower enclosures and wet room ideas (where shower walls are not necessary and the entire room can be wetted and drained).  The seamless application means that details like benches, windowsills and shower niches are easy to create.

Tadelakt is relatively low maintenance;  it can be cleaned simply by rinsing with water because the surface resists dirt and mold. "In the shower, squeegeeing down the walls after each shower is all that is needed to maintain the tadelakt shower walls," explains Decor Tadelakt's Ian Kozlowski.  What's even better from a non-toxic standpoint, you must avoid using commercial bathroom cleaners on tadelakt, especially any containing bleach or harsh solvents, as this may destroy its waterproof quality. 

Just like a wooden countertop or cutting board needs periodic maintenance to keep it looking great, water-resistant and bacteria free, "regular recoating with soap solution ensures that the tadelakt stays in excellent condition for years to come," suggests Valentin. 

Shikkui Plaster:  The Japanese started using this type of thick plaster in the 6th century following the spread of Buddhism from the Korean peninsula.  It is made of slaked lime additives including seaweed extracts, soybean oil, natural plant fibers, and eggshells.  It is also used on interior and exterior surfaces.  According to this article, some versions of the plaster also contain plankton skeletons and special algae only found in Japan, which is hygroscopic and helps control humidity. Due to these ingredients and the plaster’s natural ability to absorb pollutants and VOC gasses, it creates healthy airflow within spaces. It is fire and earthquake resistant, has the ability to naturally control bacteria, fungi, and molds; and is naturally anti-static, which reduces dust accumulation.   This Shikkui plaster manufacturer shows the tools and techniques for applying this plaster to practically any wall surface (even wallpaper!).  It is applied quickly in two thin coats back to back, and has a highly polished finish.

For all of their benefits and non-toxicity, we shouldn't be afraid to experiment with limewash, tadelakt and even Shikkui plaster in our homes as the "new" anti-microbial coatings.  They've stood the test of time!

Photo by Anne Nygård on Unsplash

Breaking down Mycotoxins and mVOCs with Enzymes and Non-Toxic Cleaners

Breaking down Mycotoxins and mVOCs with Enzymes and Non-Toxic Cleaners

If you haven’t read our white paper on mold, mycotoxins and mVOCs, you should!  While discussing the meanings of these scientific terms with our team, we thought it would be even more helpful to break it down to the vernacular.  Mold is like most other living organisms that excrete waste products.  Mycotoxins are not similar to excrement, in that they are not secreted because of normal growth, development or reproduction of the mold (they are secondary, not primary metabolites).  They are chemicals secreted in offense and defense, and in stressful situations.  Thus, mycotoxins are like sweat–the toxic sweat of mold (yuck!).  They can be sent aloft into the air on mold spores (which are also released whenever the mold is stressed or physically agitated), or even smaller fragments of mold and dust, which are all easily breathed in.  

Microbial Volatile Organic Compou0nds (mVOCs) are gasses as a product of growth, development or reproduction (some are primary metabolites), and as a signal to other microbes around them (secondary metabolites).  This means that mold uses mVOCs to communicate and affect the behavior of other molds around it, even as a competitive tool to directly exert antimicrobial activity (suppressing or eliminating potential enemies). (Volatile affairs in microbial interactions)  As such, mVOCs are akin to body odor–the toxic body odor of mold, which it uses to intimidate other mold!   Although they are meant to signal other microbes, even humans can recognize the smell of some mVOCs in that musty, earthy smell that is a tell-tale sign of mold.

It has been shown that the mycotoxins can be eliminated by various physical means such as thermolysis (destruction by intense heat), radiation treatment and low-temperature plasma (bipolar ionization).  They can also be destroyed by chemical methods such as oxidation (removal of electrons), reduction (addition of electrons), hydrolysis (breakdown by reaction with water), alcoholysis (breakdown by reaction with alcohol), absorption and adsorption, and biological methods by using living things like bacteria or other molds. (Enzymes for Detoxification of Various Mycotoxins: Origins and Mechanisms of Catalytic Action)  Only two  of these methods are permitted to mitigate mycotoxins in foods, however, contamination of raw materials with chemicals and/or products of side reactions limit their use.

Alternatively, using enzymes to detoxify mycotoxins mostly avoids these problems.  First of all, what is an enzyme?   Enzymes are proteins produced by living organisms that act as catalysts in chemical reactions.  Enzymes can either build up or break down.  For our purposes, cleaning enzymes facilitate breaking down microbes and their byproducts that cause sickness, stinkiness or stains.  

Scientists have been exploring making artificial enzymes since the 1990’s, and many of these are mimicking enzymes found in nature.  Here are the most common types of natural enzymes (from Simple Science: How in the World do Enzymes Clean?):

  • Proteases break down protein-based soils including blood, urine, food, feces, wine and other beverages.
  • Lipases break down fat molecules like oils and grease.
  • Amylases break down starch molecules like eggs, sugars, sauces, ice cream, gravy.
  • Cellulases are used to soften fabric and restore color to fibers made up of cellulose material. They also remove particulate soil and reduce fabric graying and pilling.

Various enzymes can also be combined to treat the combinations of mycotoxins that are produced by some molds.  For example, cytochromes are enzymes that include a number of compounds consisting of an iron-containing molecule bonded to a protein (cancer.gov).  Cytochromes are usually used within mammals as detoxifying agents of multiple toxic compounds, including mycotoxins.  Cytochromes in the human liver are able to convert aflatoxin B1 (a cancer-causing mycotoxin) into Aflatoxin M1, which is 10 times weaker in carcinogenic potency.  In turn, glutathione s-transferase, another enzyme in our bodies, leads to the excretion of aflatoxins from the body (2016 study).   

Since the enzyme-based approach for degrading mycotoxins in homes is new, there aren’t that many commercial products on the market.  In fact, Green Home Solutions claimed in 2022 that it was the “is the only professional remediation company that combines the ANSI/IICRC standards for mold remediation with a state of the art proprietary disinfectant/ fungicide that not only kills bacteria and molds, but continues to work by breaking down the allergenic protein structures into harmless amino acids.”  It is only available for professional use, but their product description shows that several enzymes are combined for maximum effect on the broad range of mycotoxins that may be found in a home:

  • AMYLASE is an enzyme that digests the mold’s outer membrane or cell wall. It dissolves and causes the insides to leak out.
  • LIPASE is another enzyme in our product formula which attacks and breaks down the fatty lipids inside of and in between the mold membranes.
  • PROTEASE breaks down allergenic proteins at the mold’s core or nucleus, eliminating them from the air you are breathing.

Since we revealed the real nature of mycotoxins and mVOCs (they’re like toxic sweat and body odor), we thought you might like some real solutions you can use to get rid of these toxins in your home!   Elimination of the mold colony is first and foremost, so it’s best to contact an inspector if you can’t find or handle the problem yourself.  Getting rid of the bulk of mold will remove much of the mycotoxins and mVOCs, but mycotoxins can still be present in dust (they are very hardy and indestructible by heat), and mVOCs may be present in absorbent furnishings.  Here are some products and techniques that can rid your home of the remainder of these toxins.

  • EC3 Enzyme Cleaner Concentratie is a non-toxic solution also trusted by many mold remediation companies and mold awareness sites, such as moldfreeliving.com.  It is an enzyme solution with citrus and essential oils that is safe for food-prep surfaces, can also be used in the laundry and many surfaces around the home, even as a degreaser. It was proven effective for mold spores and mycotoxins by a 3rd-party, CAP-accredited lab.   

  • MycotoxinKlear is recommended for all mold and mycotoxin products in use of a fogger or electrostatic sprayer.  

  • The enzyme-based approach for degrading mycotoxins in homes is not common on the commercial scale.  However, some mold remediation companies use them with great results.  The Mold Pros use SurfaceGuard, which was shown in a 2019 study analyzed by RealTime Labs to break down ochratoxin, aflatoxin and gliatoxin to undetectable levels.  Unfortunately SurfaceGuard is only available to commercial remediation companies.

  • Most MVOCs can be mitigated with activated carbon filters, because they are in a gas form and can flow through and be adsorbed by the carbon molecules.  You can try our Germ Defender with carbon filters, or purchase carbon filters for your standalone HEPA unit.  Mycotoxins, however, will not be affected by carbon filters because mycotoxins are attached to spores, fragments of spores, and dust, which are not captured by carbon filters.

If you can’t remove all of the mold, the next best thing may be encapsulation.  Encapsulation is a controversial method in that it does not physically remove the mold but surrounds it with a protective layer that does not allow it to release spores or mycotoxins into the environment anymore.  If encapsulation is done properly, though, it can be a safe method that allows homeowners to save wet drywall and wood that have not dried out completely, by sealing any mold that is present and not allowing more to grow.  As demonstrated by EarthPaints, encapsulation either needs to be applied to completely dry substrates, or with a solution that allows the substrate to completely dry over time.  Their Lime Prime paint is a non flammable mineral shield that saturates wood fiber cells and pozzolanically reacts with concrete and gypsum. Encapsulated Substrates dry out properly and in 30-60 days are ready for follow up after a flood. (earthpaint.net)  The problem with mold encapsulation is that it must completely coat surfaces in a space with a durable non-toxic product, and of course the space must be clean and dehumidified, or the mold will “break through” and continue growing as dust and moisture allow it to propagate.  For more information on whether encapsulation is right for a space in your home, this article by a building biologist is very helpful.

Once again, we also find that bi-polar ionization (used in the Germ Defender, Air Angel and Whole-Home Purifier) should be effective against mycotoxins in the home.  Because bipolar ionization sends out positive and negative ions that cause small particles to clump together and fall out of the air, this reduction in particles means a reduction in mycotoxins, since mycotoxins ride on spores and fragments of mold.  More testing is needed in residential and commercial settings to confirm this, however, our case studies using bipolar ionization to reduce mold spore counts without any additional filters, are quite extraordinary!

Photo by Anne Nygård on Unsplash

Are my windows causing my mold allergy?

Are my windows causing my mold allergy?

If you viewed the results of my home’s mold plate testing, you probably saw the high count of mold colonies in my sunroom–which doesn’t even have air conditioning vents in it.   What the heck?  I was scratching my head until I remembered that I had placed the plate on a table only a few feet away from the exterior wall of windows.  There are 12 exterior windows in that room!

Here are some of the ways that windows can increase mold counts in your home:

  • Direct water leaks:  if the seals or caulking fail on your window(s), they could allow water to run into the wall, where mold can grow.

  • Drafty windows allow air to pass from the outside in, or inside to outside, where the temperature and humidity difference can surpass the dewpoint and cause condensation.  Condensation can occur on the windowsill or anywhere around the window that is not properly sealed.

  • Outdoor mold can grow on the screens, because they retain dust and moisture.  When you open windows, air blowing through the screens will blow mold spores right into the room.

  • Heavy window treatments create a micro-climate between the room and the window.  Although they are great at insulating the room from heat or cold, fabric curtains retain humidity/moisture, and also create a cold pocket of air without air circulation.  With drafty windows, air between long curtains and the wall can allow condensation, and offer the ideal darkness for mold to grow.    

In my case, I believe it was the drafty windows that allowed air to blow around the frames and carry mold into the room.

Here are some ways to get that mold count down:

  • Check for leaks in your windows.  Here are some warning signs that a window is leaking and how to determine where it is leaking (video):

    • Peeling paint on an interior window sill 

    • Peeling paint on an interior wall near a window

    • Rotting wood on the exterior window frame or sill

If you have any of these symptoms, it’s best to remove the outer siding materials and find out where the water is getting in, because cosmetic repairs will not fix the leak. 

  • Decide whether to replace or reseal your windows.  It’s rarely an easy decision because replacing your windows is not likely to save you money, considering the cost of the windows and installation.  However, there are some ways to know that it’s time to replace them:

    • Replacement: If your windows are extremely damaged by water infiltration, then it’s a good case for replacement. (ecohome.net)  There are many options for energy-efficient windows, available in wood, vinyl or composite (fiberglass or a combination of materials).  Like many products, the installation of the windows is just as important as the quality of the windows themselves. Quality installation is critical for an airtight fit and a continuous water barrier to prevent drafts, water damage and condensation.(efficientwindows.org)  To select windows, the National Fenestration Rating Council (nfrc.org) is a non-profit organization that gives consumers energy performance ratings and other useful information about windows, doors, and skylights.  You’ll also want to consider that new exterior windows that meet Energy Star standards fall under “qualified energy efficiency improvements” which can generate tax credits.  For windows purchased in 2022, you can claim the Residential Renewable Energy Tax Credit for 30% of the total cost, up to a maximum of $600 for exterior windows and skylights. (filemytaxesonline.org) In addition, check with your local power supplier to see if they have more incentives for replacing windows. If you do decide to replace, remember that higher-cost wood windows (which are clad in aluminum or vinyl for weather protection) are only as good as the seals and techniques of cladding them; if water penetrates the cladding, the windows can rot in just a few years.  In addition, the vinyl or aluminum skins on these windows do not permit passage of vapor from the interior to the exterior, so that condensation forms on the inside of the skin.  Condensation = rot! (video)

    • Reseal:  If the windows and frames are in good shape, but you have airtightness problems, it’s most cost-effective to apply some sealing around them. Caulk, weatherstripping and caulking cord are all products made for these purposes, and this video shows how to apply them.  In order to know where the air is coming in, you can do the following (houselogic.com):

      • Seal the house by locking all doors, windows, and skylights.

      • Close all dampers and vents.

      • Turn on all kitchen and bath exhaust fans.

      • Pass a burning incense stick along all openings -- windows, doors, fireplaces, outlets -- to pinpoint air rushing in from the outside. Smoke Pencil Pro ($44) is non-toxic smoke pencil for this purpose.

    • Clean your windows and screens!  On windows where screens are installed, a bi-annual cleaning will greatly reduce the amount of mold present.  In general it’s not better to wash the outside or the inside first, as long as both are done!  However, since outsides usually get dirtier than the insides, it may be easier to see inside dirt if you wash the outside first. You can use a bucket of warm water with a few drops of dish detergent on the outside with a long-handled brush and squeegee, and TotalClean or a mixture of one part white vinegar to two parts water in a spray bottle for the inside. 

    • Get your drapes in order!  If drapes are causing condensation to form on or around your windows, this is not a good situation and it will lead to mold if left unchecked.  Here are some suggestions:

      • Open the drapes during the warm part of the day so that temperatures between the room and window can equalize and dry out moisture. 

      • Leave the ceiling fan running in the room to promote circulation. 

      • True thermal curtains are made of 3-4 layers of material, including a vapor retarder that allows vapor to escape through the curtain.   Problems can occur if the curtains block vapor.  

If you still have a high mold count near your windows, it’s best to check with a qualified, reputable mold inspector to find out the source and be able to enjoy the sun and scenery through your windows instead of the mold!

Photo by Rob Wingate on Unsplash

Insulating drafty windows makes a difference in air quality, not just energy savings!

Insulating drafty windows makes a difference in air quality, not just energy savings!

When you’re trying to make a whole house less drafty, you should go for the low-hanging fruit first.  That means big ol’ holes in the walls, floor or ceiling (like this disconnected register) come first.  If you don’t have any big holes, you can start on the smaller ones–and sometimes the smaller ones can add up.  That was the case in my sunroom. 

My sunroom is west-facing, which means in the summertime it gets brutally hot from sunlight, and in the wintertime it’s brutally cold from westerly winds.  On top of that, it’s fairly dusty and showed some of the highest counts of mold colonies in my home.  When I saw another cold front coming later in the week in December, I finally “made” the time to insulate the windows where I felt the drafts coming in.  I saw that the lower windows didn’t seal at the bottom when closed, AND the previous owner had cut the corners on the lift at the bottom for some reason (they rubbed on the trim?).  Due to these leaks, the room stayed quite “fresh”--meaning the CO2 didn’t really budge from outdoor levels unless I lit a fire in the fireplace on the other side of the room.  If you don’t have a CO2 monitor, I highly suggest getting one: here’s a portable version.

Therefore, the cons of my leaky windows easily outweighed this one “pro”: fixing them was a no-brainer!

Pros

Cons

Better ventilation (lower CO2)

More drafts of hot or cold air (higher energy cost)

More dust or pollution

More mold 

Excess humidity in house

Here are the tools I used: 

  • A spray bottle of TotalClean and several rags for cleaning the windowsills
  • Adhesive-backed weatherstripping in a suitable color to match your windows (low-profile like this one, ¼”, is good unless your windows are very misaligned) 
  • Scissors
  • Optional: A CO2 monitor is helpful–to see the effect on the room
  • Optional: Window locks in case the windows don’t lock afterwards (see below)

If you do have a CO2 monitor, leave the windows closed and take a CO2 measurement before doing the insulation work. You might want to do it while there are a number of people in the room, or you have a propane or natural gas stove burning (I know there are a lot of gas stoves out there!).  Extra people and gas appliances do two things–they consume oxygen and they give off CO2.  These should cause the CO2 to be higher than when the room is empty or no gas appliances are lit.

Next, just get down to it: use the TotalClean and rags to clean off the window sill where the lower half of the window seats.  If you have vertical sliding windows, find the best place to attach the insulation in the vertical track and clean that.  When the track is clean and dry, start peeling the adhesive backing off and apply the weatherstripping a little at a time, cutting it when you get to the end of the track. Close and lock the window to make sure it’s placed correctly.

If you find your windows don’t lock because of the extra height of the insulation (this was the case for my windows) there are a number of window locks available that can be easily removed if you have to open the window for ventilation.  I ended up getting a thumb-screw version that can be moved up a few inches if I decide to ventilate, while still keeping the window secure.  

That’s it!  When you have all of the insulation installed, close the window and repeat the CO2 reading, with or without activity (people or gas-burning appliances).  The CO2 levels should go and stay higher because there is less fresh air coming in.  Fresh air ventilation is needed in a home, but it’s best to do it in a controlled way, not just letting the air come in wherever there’s a small gap or crack.   For more ideas on how to air seal leaky windows, check out this video.

If you’ve completed an easy project that resulted in better air quality, let us know about it! 

Photo by Rob Wingate on Unsplash

What’s hiding in that pallet wall?

What’s hiding in that pallet wall?

Another embarrassing but true story:  

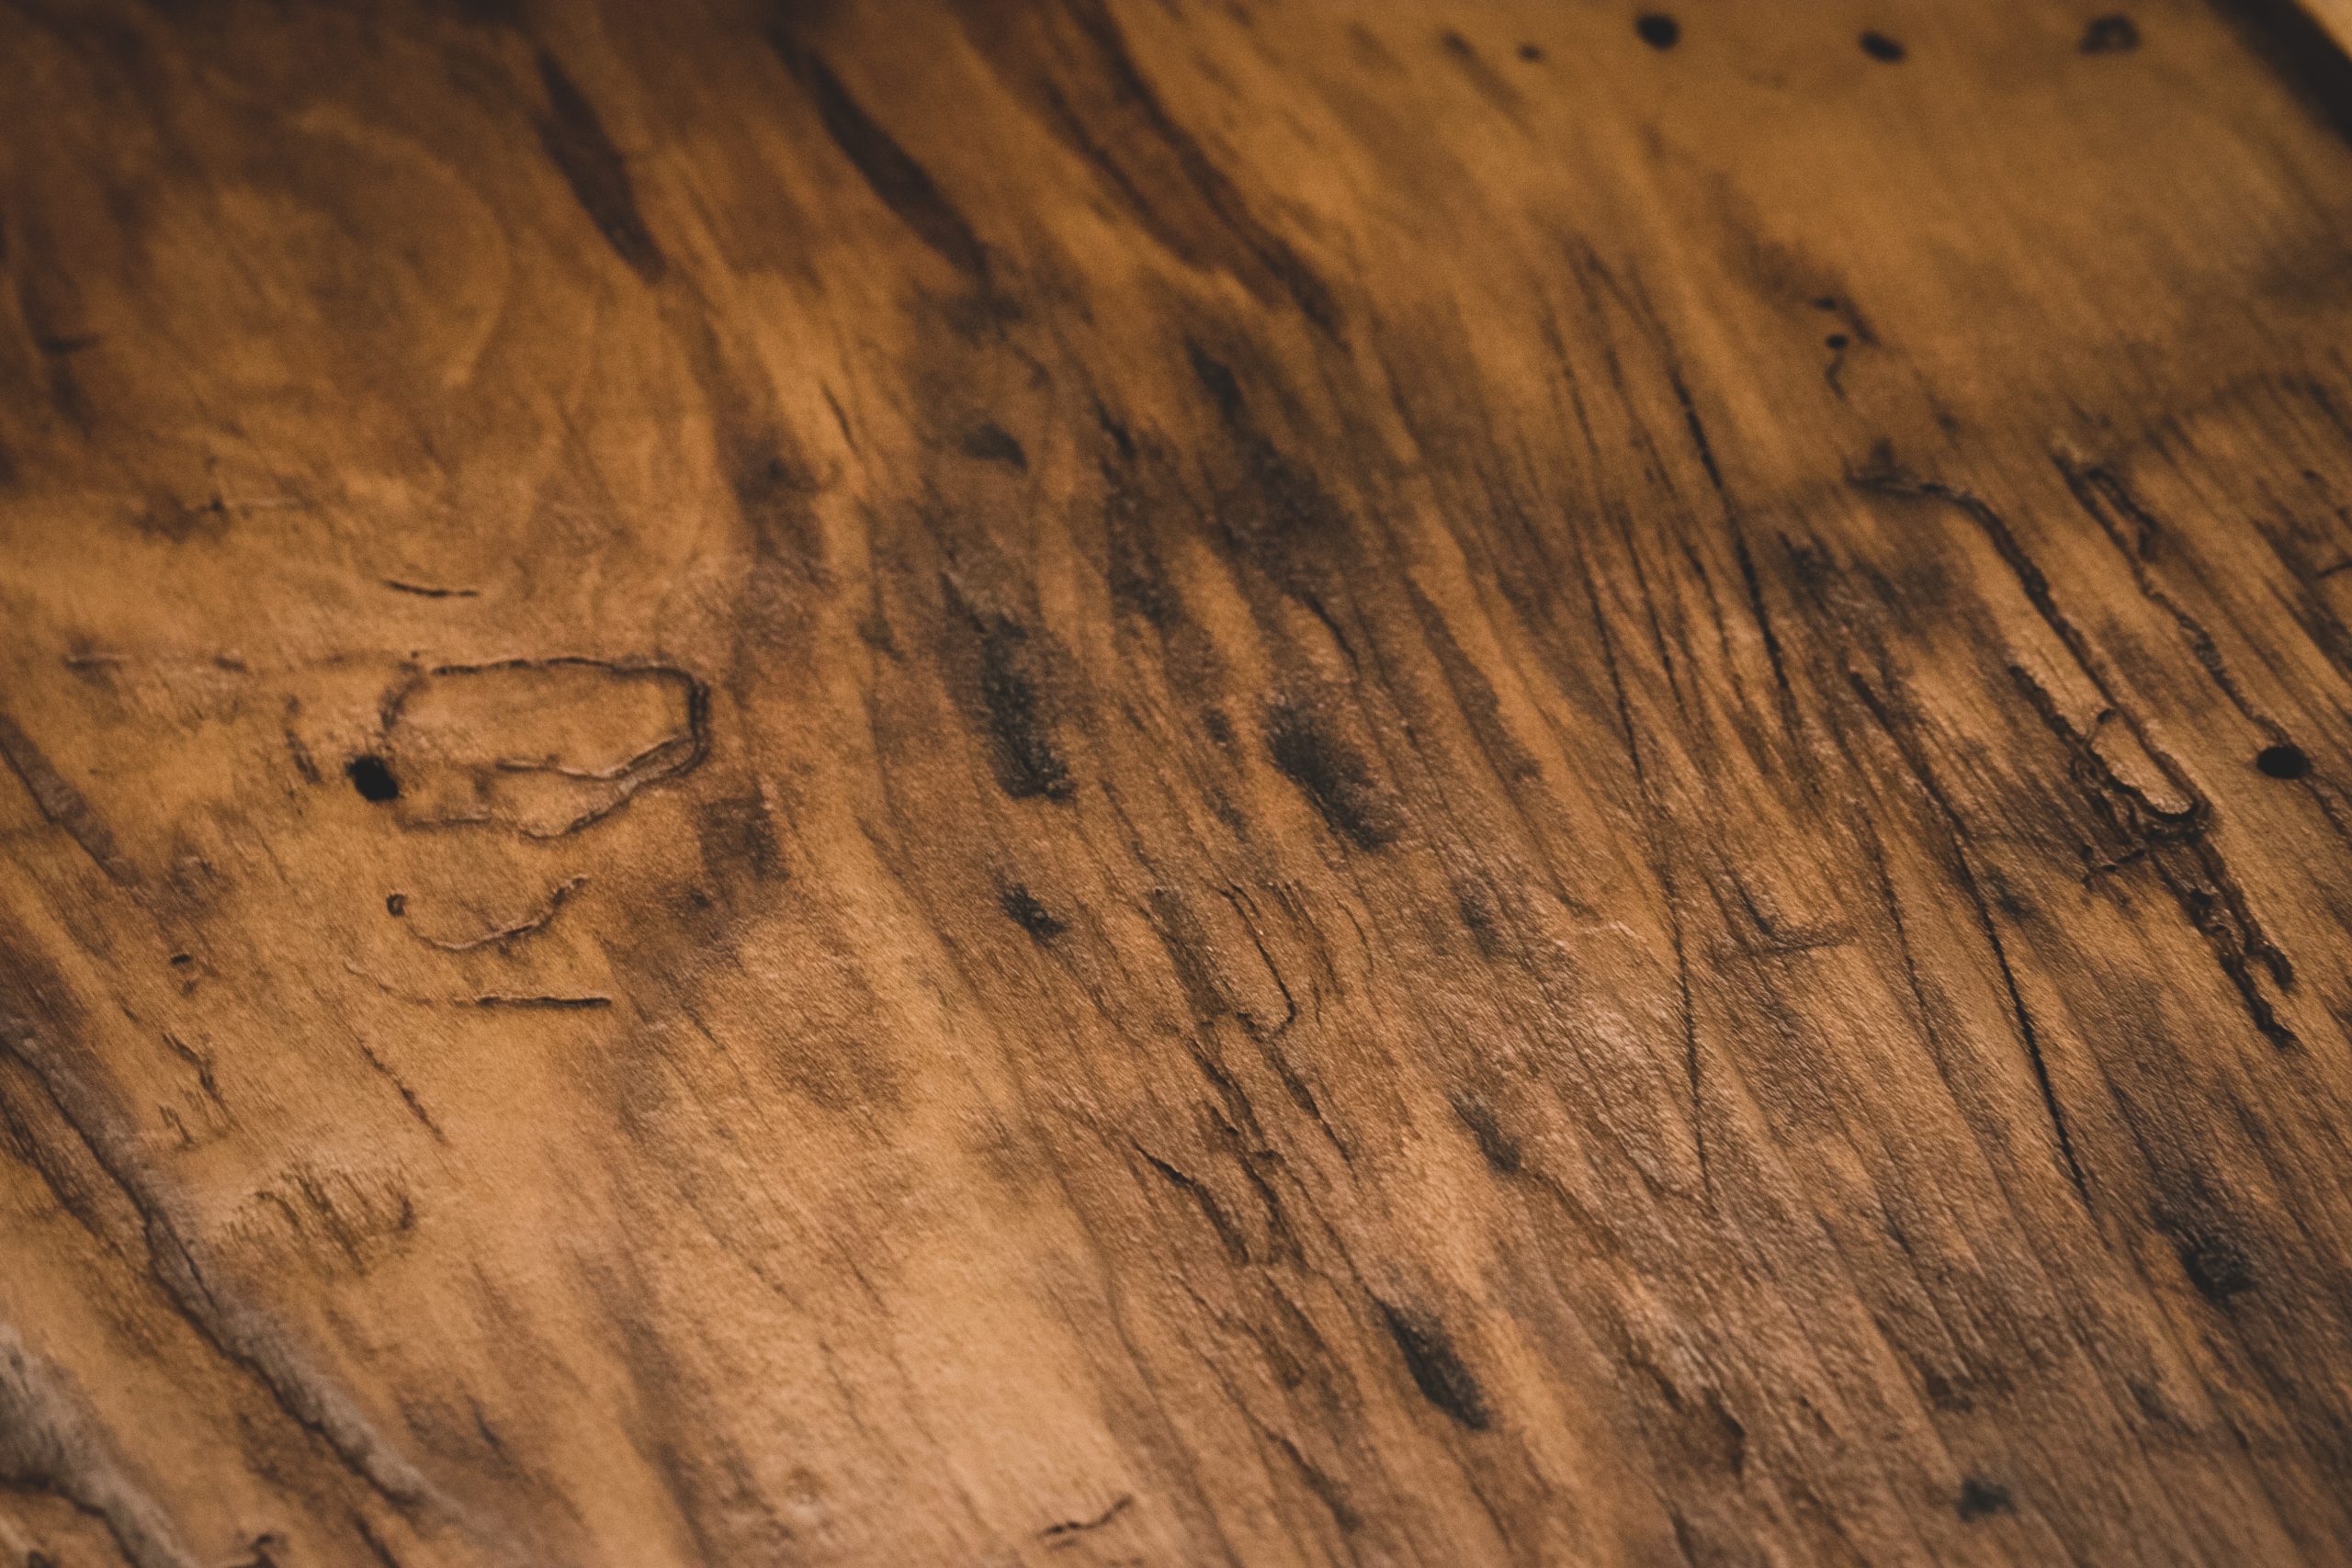
Once upon a time in New Orleans, I rehabbed a house that was gutted post-Katrina.  In a neighborhood built in the 1950’s, I took down a few walls and set about making this little 1500 square foot home into my Pinterest dream.  No matter that the sloping floors would make a soup can roll from front door to back with no effort and amazing speed; all of the reclaimed furniture and materials available at that time were more than sufficient to supply the ideas that came into my head.  Some of my favorite places to go were the local “Green Project” or Habitat for Humanity stores.  Green Project had a small lumber yard of reclaimed wood and salvaged architectural pieces.  I don’t know whether I found this particular piece of wood there, or from the side of the road, but it looked perfect. 

My carpenter had framed in split-level bar countertops on either side of the newly opened-up kitchen, and to keep the cost of countertops low, I decided that the top of the bar would be reclaimed wood.  The chunk of wood I found was long enough for both tops, and the color of dark chocolate, a perfect contrast to the cream-colored kitchen.  I cut the pieces, sanded the edges, coated them with a few layers of varnish and set them outside to dry for a week or so.  Time to install!  They looked beautiful.

Throughout processing this wood, I did notice a “smell”.  It didn’t seem too strong, probably because I was doing the cutting, sanding and painting outside.  But soon after I installed it inside, the headaches started.  I had a constant strong headache most days for a week, until I made the connection and removed the wood.  Bingo!  Problem solved.  This was probably a decade before home VOC-testing equipment was available, but my brain and respiratory system was telling me that this wood was poisonous. Looking back, it was probably treated with creosote, which gave it the (beautiful!) dark brown color.  Creosote is derived from the distillation of tar from wood or coal and is used as a wood preservative. Pesticide products containing creosote as the active ingredient are used to protect wood used outdoors (such as railroad ties and utility poles) against termites, fungi, mites and other pests. (epa.gov) The EPA has also determined that coal tar creosote is a probable human carcinogen (over longer exposure periods).  Thankfully, I was the only one in the household who seemed to be affected.  

I’m still a fan of reclaiming wood and other materials, but I’m a little more cautious nowadays.  That’s the major drawback to most reclaimed wood: you just don’t know its history.  Whether it’s been soaked in smelly chemicals like creosote, or sprayed with non-odorous pesticides, or just sitting outside accumulating mold and insect droppings, it has a mysterious history that you may or may not be able to neutralize when you “reclaim” it.  Following are the main dangers of using some (not all) reclaimed wood (cdawood.com) indoors.  

  • Like my experience above, reclaimed wood that has been treated with harsh chemicals, like paints or stains, or contains VOCs (volatile organic compounds), can release toxins into the air.  Unlike my experience, you may not always smell these VOCs or toxins, which is a “silent” risk.

  • Wood is quite a porous material.  Mold and mildew can be hiding in the crevices of the wood, especially reclaimed wood that has a lot of “character” (read: cracks, knots and grains).  Mold and its toxic byproducts, mycotoxins and MVOCs, can make you quite sick and even spread to other parts of your home via dust and spores.  

  • You could bring pests inside.  Anyone who’s lived in the southeastern US would be familiar with termites, possibly carpenter bees, and maybe carpenter ants.  These are all wood-loving pests that can hitch a ride into your home inside of the lovely reclaimed wood.  They generally exit or die when the wood is agitated or dried out.  But have you heard of powder-post beetles?  These tiny pests can spread to other wood furniture and even the framing of your home, reducing the wood to “powder”.  Imagine losing your grandma’s precious antique dresser, or your kitchen floor joists, to these destructive pests because you decided to “reclaim” some wood for a table top: not a good trade-off!

If part of the reason to use reclaimed wood is “saving money” (one of my original reasons for creating those bar tops), are you really saving if one or more of these problems surfaces because of using it?  Here are a few ways to be more cautious with reclaimed wood: (Brunsell.com)

  • Consider the source: Grocery store palettes are likely to have been in close contact with food, so they run a higher risk of having bacteria (from spills), so don’t use them indoors.

  • Check for signs of how the wood has been treated: Know if and how the wood’s been treated. Heat-treated wood, also known as kiln-dried wood, is generally marked with an “HT.” In terms of your health, HT wood is preferable to chemically treated wood. You forgo the chemicals, and the heating kills off bugs. 

  • Consider the end-use of the wood:  If it will be in close contact with children, pets or food, it’s best to use new, untreated wood and opt for non-toxic finishes (like the paints and stains we mention in this article). 

If your gut says, I don’t know about this piece of wood, it might be best to listen to your gut!   Manufacturers have honed in on the reclaimed trend and created vintage looking wood and furniture from new materials.  

  • CdA Wood in Coeur d’Alene, Idaho is one such company that has the slogan “Barn wood but better”.  They take new untreated wood and make it look like old barn wood without paints or stains, using a patented “Xcelerated” process.  In the words of the VP, they “age wood indoors without using paints or stains”.  

  • Another company that values indoor air quality is EarthPaint.net.   All of their coatings are non-toxic, so you can start with new wood and get a fabulous aged finish without VOCs, mold, toxins or pests.   

  • Here’s a slew of ways you can add “character” to new wood with tools and a little elbow grease; just substitute non-toxic finishes for the stains used in the last few slides.

  • Did you know that charred wood naturally resists water, pests and further aging?  Developed by the  Japanese, Shou sugi ban is the art of preserving and finishing wood using fire.  Cedar wood works best for shou sugi ban because of its natural chemical properties, but you can also use shou sugi ban on pine, hemlock, maple, or oak.  This article tells you a little about the history and how to DIY your own burnt wood!  EarthPaint.net also has “Special Linseed Oil” similar to what is used in the article.  I’ve personally used shou sugi ban on some wood supports for my shower curtain, as well as an outdoor table. 

At HypoAir, we aim to bring the best of the outdoors inside.  We’re very selective, though, to make sure that hidden pollutants or pests don’t slip in with the good stuff…and with vigilance you can be too.  It’s time to raise the bar on reclaimed wood, to make it as healthy as it is beautiful!

Start Thinking Like a Home Inspector

Start Thinking Like a Home Inspector

If you own a home, you need to learn to think like a home inspector.  A home is a great investment, but if the outside elements start to penetrate the building envelope, your great investment can start to deteriorate and become toxic!

Sometimes, after an especially hard rain, there is a different smell in my house.  This tells me that rain is probably going where it shouldn't. According to commonsensehome.com, a natural home website, the first spots to check are the roof and attic, especially around any roof penetrations like chimneys and vent lines.  

Recently one morning after such a rain, I went in earnest search of leaks inside to find the source of the musty smell.  Not finding anything in the attic, I went to the room where the smell was the strongest, the laundry room.  I checked areas around the windows because there were shelves in front of them, hiding any potential damp spots.  Uh-oh– a couple of the windowsills were wet, indicating that more of the not-so-old (10 years) windows were leaking.  I checked the corner above which there was a valley in the roof (roof valleys can be a source of leaks in a hard rain if they are improperly installed/sealed).  Thankfully all the walls were dry.

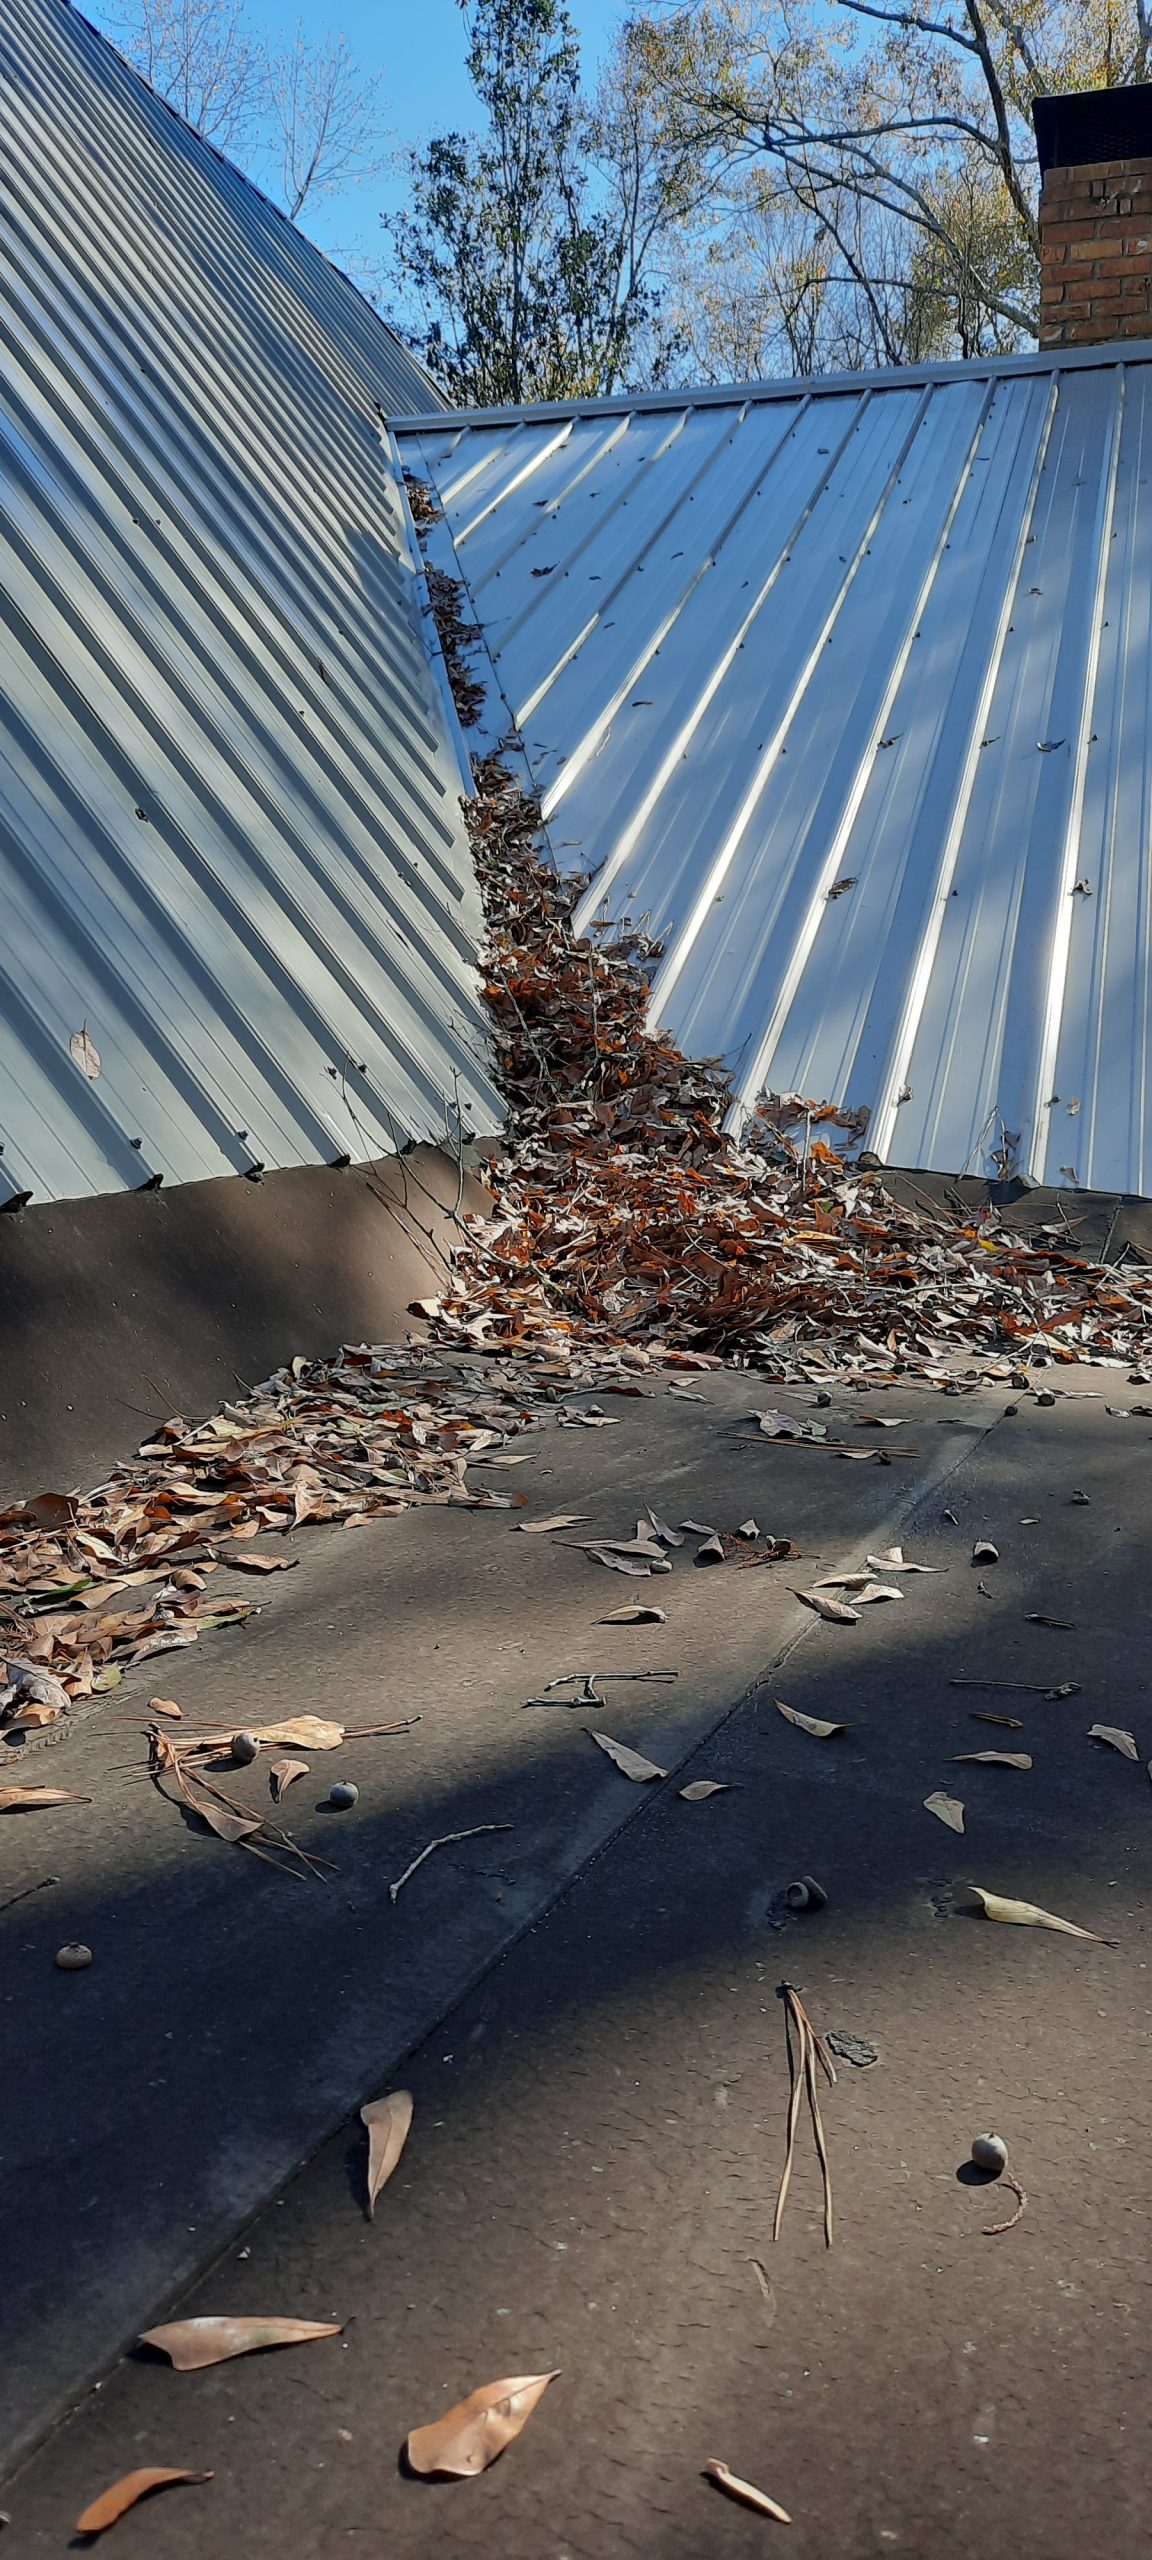
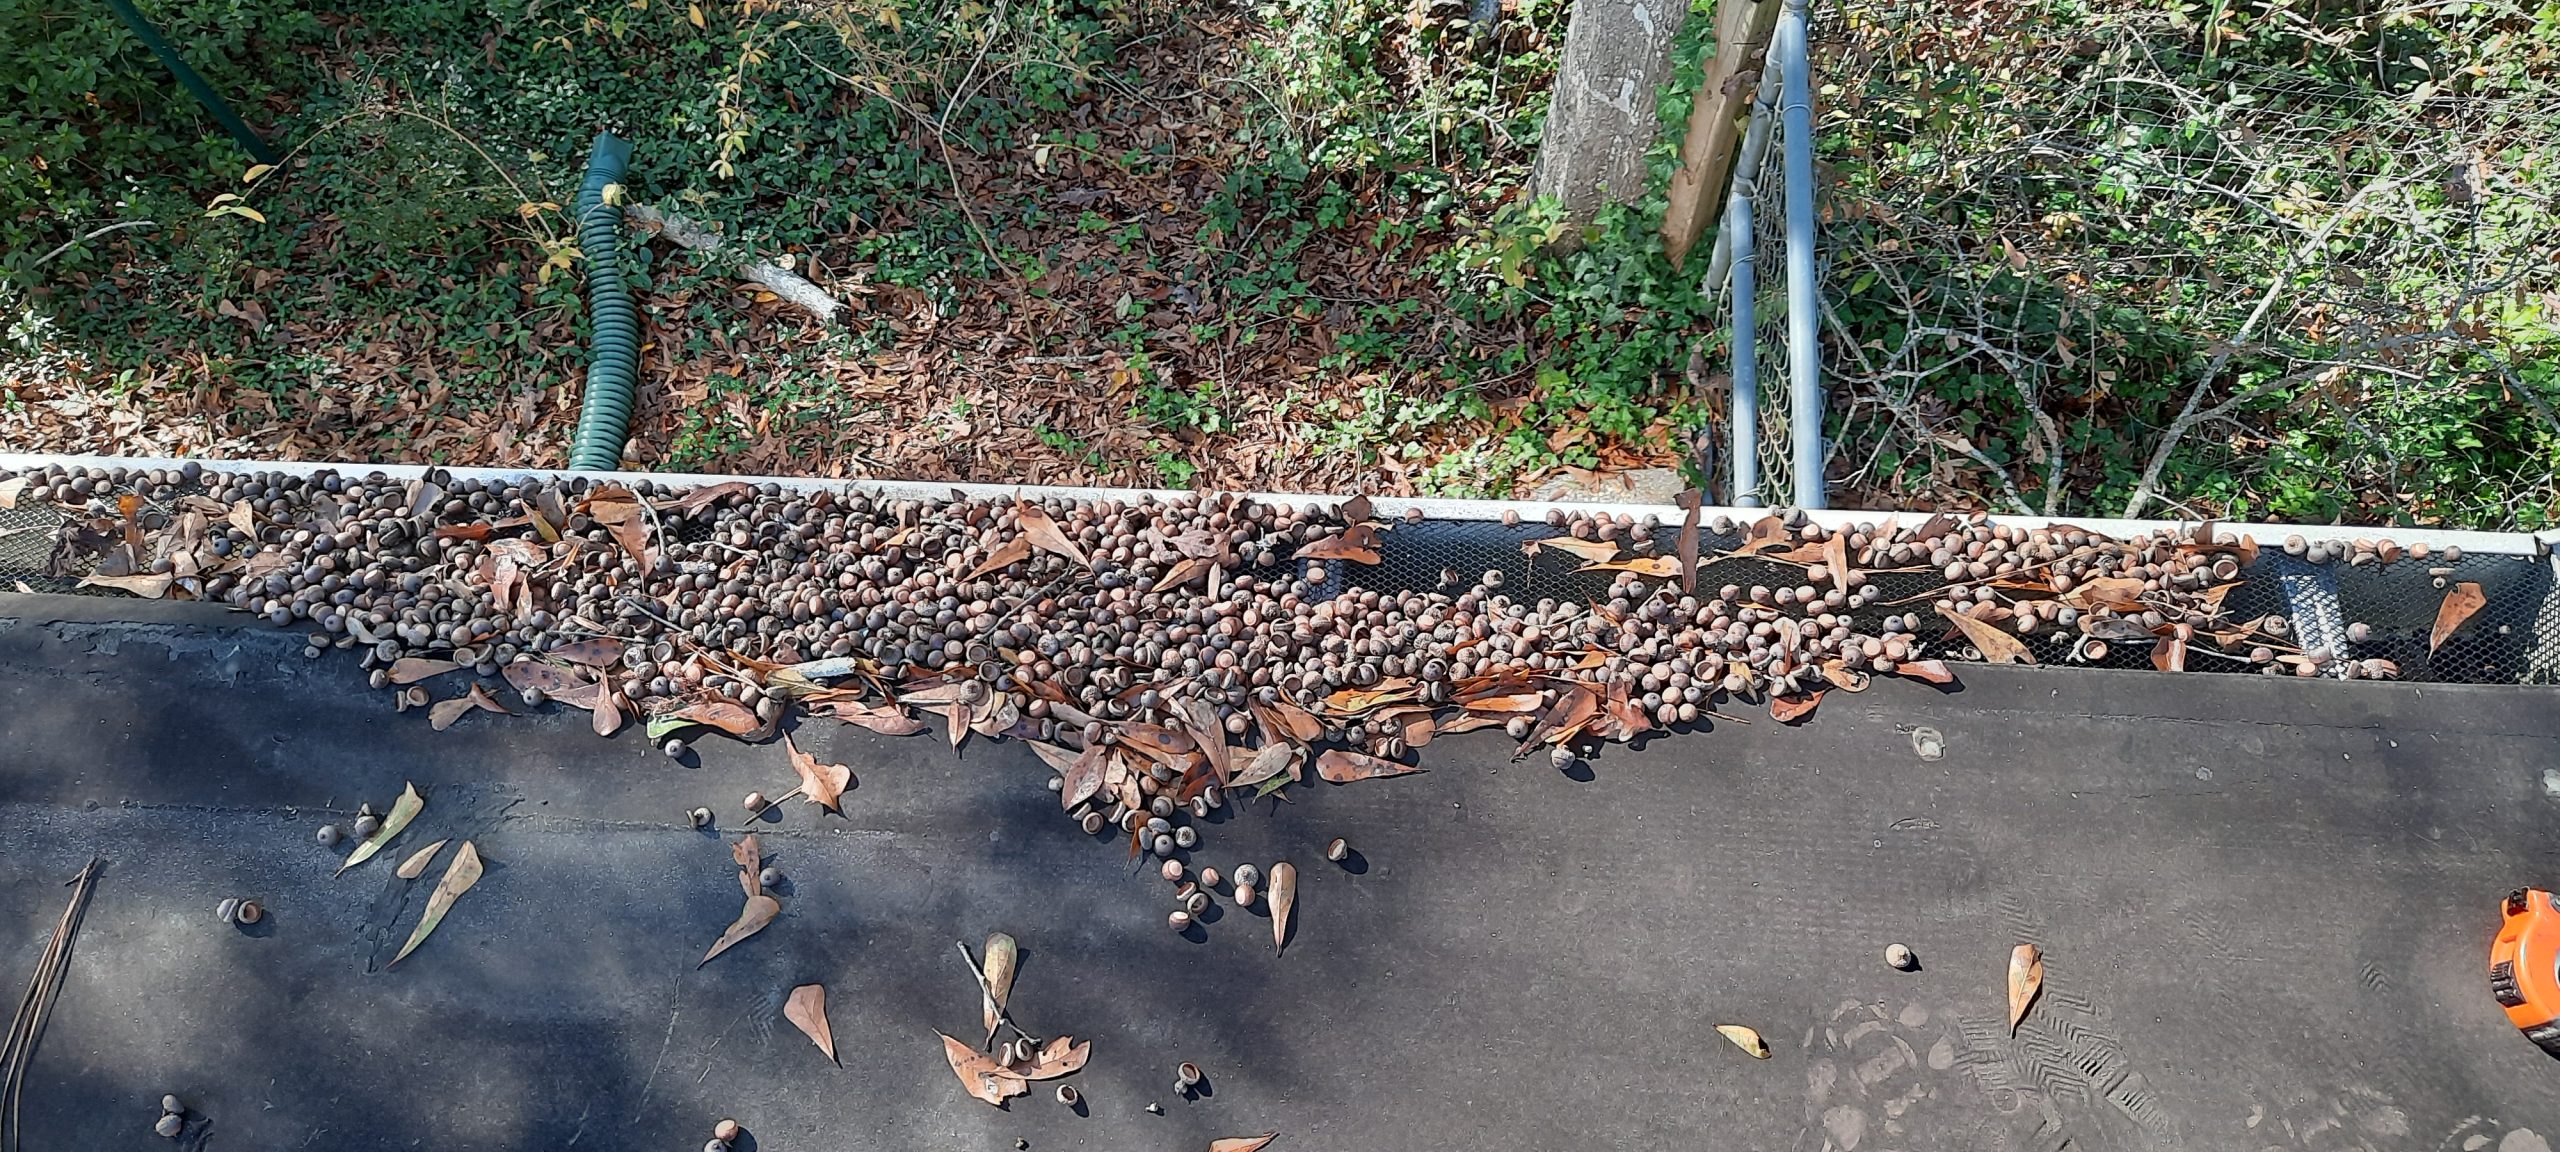
There was a gutter outside this room, and I knew from past experience (rain during the daytime), that the volume of water flowing off the roof seemed to be too fast or too much for this particular gutter, because it would shoot right over the side and pour down next to the wall.  Thinking about it, I went up onto the flat portion of the roof over the laundry room.  There were no big branches or breaks in the flat roof, but a lot of leaves and acorns were up there!  Time to get to work with the broom or leafblower, and I removed a section of the leaf guard over the gutter to clean out the gutter.  I checked to see that the downspouts were clean.

Next, I looked up to see if there were any wet spots behind or below the gutters (this only works after the sun has been out for a bit).  Thankfully, that was not the case.  Looking down the walls, I saw that there were a lot of wet leaves piled up around the foundation.  Wet leaves around the foundation do not just cause a musty smell in the house.  They can allow insects like carpenter ants and termites to come in, using the leaves as a shield to keep their tunnels moist.  I got to work with the leafblower.  

Rain can seep into basements and crawlspaces, so if I had a  basement, I would check the walls for seepage.  Bring a bright light, gloves, and if necessary a respirator (basements can be dusty!) to make sure that you don’t leave any corners/spots hidden from view; try to move any stored boxes to get a peek at every square foot of wall.  It was only after moving some storage shelves in front of the laundry room windows that I discovered the leaking windows. (Crazy, I know, my goal is to build some cabinets so that the windows will not be covered up!)

If you can't find the source of the problem, reach out to a well-reviewed professional home inspector in your area.  Remember, professional home inspection is a service dedicated to helping you find and live in healthy homes--not selling you other products or services.  You can find accredited home inspectors in your state at The International Association of Certified Home Inspectors (nachi.org).

There are a lot of good sites to help you get thinking like a home inspector.  Here are some that we’ve discovered and reference frequently.  Don't be shy about contacting them with questions!  

  • Inspectapedia.com: This website must have THOUSANDS of pages, but the “search” function is great, the website hosts answer questions very promptly (within 48 hours), and there is feedback from many homeowners and experts alike.  Highly recommended!
  • Homeinspectorsecrets.com: Created by a home inspector, this site has a lot of guides about a variety of subjects.
  • Familyhandyman.com: This website contains step by step instructions to correct any problems you may find around your home, and reviews products as well.   
  • Thespruce.com: Although not technically about home inspection, this website contains a wealth of information on a variety of home improvement topics and often contains non-toxic, safer alternatives. Their Home Improvement Review Board is made up of licensed general and specialty contractors, journeyman electricians, and journeyman plumbers, so you know that you’re getting good advice.
  • Energyvanguard.com: This website is written by a building scientist and has an extensive blog, so you can understand the “why’s” of the best building practices.  He also frequently incorporates how he investigates and solves problems at his own home. 

Catch it EARLY

Catch it EARLY

No, I’m not talking about a movie, or even a sale.  I’m talking about water leaks.  After recently dealing with a leaky faucet (what a pain), I figured that there must be something to help me detect the leak in the first couple hours after it starts, instead of days later.  I’ve seen leak detectors that can detect as little as 1/16” of water, but that still requires placing it in the right place and hoping that the leak will puddle there first.  When I opened the doors to the area below my sink, what I sensed first, before seeing any water, was the high humidity.  Even without standing water, high humidity can cause mold to grow in virtually any area that it contacts.  

Here are my requirements for these remote hygrometers (humidity sensors):

  • Use a common, easily accessible battery
  • Place it anywhere in your home
  • Low cost of sensors to enable more monitoring places
  • Wireless alarm through phone app
  • Enabled with history to show trends of rising humidity

Bingo!  There are a few systems that fit this bill and more.

Govee is a brand known for its LED lighting and smart home appliances.  Regarding their WiFi digital thermometer hygrometer, they have great reviews on the ease of setting up the WiFi Gateway, and adding all of the sensors to the app.  The sensors can remain connected up to 230 feet away, and the gateway can connect up to 10 sensors ($119 on sale).  Let’s see, I could use one: under each bathroom sink (2), kitchen sink (1), behind the washing machine(1), next to the water heater (1), next to the HVAC air handler (1), behind the refrigerator (1), under the dishwasher (1) in bedroom closets (2-3).  Other people have used them for greenhouses, humidors, and as room sensors to balance their HVAC systems.   I easily found places for 10+ sensors in my home, and with the discounted price, they are cheaper than buying the smaller 3-sensor pack ($46) and adding more sensors separately. 

The Moen Smart Water Leak Detector ($102 for a set of 3 sensors) monitors moisture levels (through a moisture-sensing cable), humidity and temperature to send alerts to your phone through the Moen FLO app.  It does require a wifi connection, but you also have the option of installing a remotely-operated water shutoff valve ($470) that can operate manually from your smart phone, or automatically in response to a water leak detection signal from one of the monitors.  This valve also performs a nightly check of the system by shutting off the water and sensing pressure drop, to detect leaks as small as one drop per minute behind walls!  

YoLink is another smart appliance manufacturer and their temperature/humidity devices have a few differences.  For one, the wifi connection can be sustained up to ¼ mile, which is over 5 times the distance of Govee.  The YoLink can monitor extreme temperatures, which is useful if you want to place one in your attic or in your freezer (in case of a power outage). It is also compatible with Alexa.  There are  2 sensors and a hub in this pack ($60), and the hub can monitor other YoLink devices such as water leak sensors and door/window sensors. This unit runs on LoRa (Long Range wireless technology), which uses less power and transmits for longer distances than traditional bluetooth technology.

These devices are especially helpful in vacation homes and rental homes, as well as a great monitoring system to assist caretakers for the elderly and handicapped.  The Internet of Things (IoT) is making our lives less prone to worry in more ways than one.  Can it train my dog not to splash water on the floor?  Maybe not, but with sensors in other places maybe I’ll have the “bandwidth” to do it myself!

Photo by Matt Hoffman on Unsplash

What do our holiday traditions really cost?

What do our holiday traditions really cost?

Okay…we all know that visiting the Christmas Tree Lot the day after Thanksgiving can be really expensive, and prices get better the longer you can wait to get one.  That’s not what I’m talking about!   I wanted to know, are some of our traditions costing us in our health?  After my manager shared how his family “mysteriously” gets allergies every December after bringing home a live tree, I had to do some research!

As it turns out, Christmas tree allergies are real.  If you experience any of the following after bringing home a live tree or other live pine decorations, the pine may be an allergen, or it may be carrying allergens (advancedsinusandallergy.com).

  • Runny nose
  • Watery eyes
  • Sneezing
  • Coughing
  • Wheezing
  • Itchy eyes and nose
  • Dark circles under your eyes
  • Skin rash

Now that you may be making some mental connections, here is what scientists have found about homes with live trees:

  • Mold: pine trees can carry 53 different types of mold!  (Researchers at SUNY Upstate Medical University).  Many of these are allergens and especially so for infants and children.  The mold, which is attached to leaves, branches and bark, multiplies in your warm home and spores are released during the agitation of bringing the tree in, setting it up, placing lights and decorations on it and watering it.  A 2007 study found that apartments containing a live Christmas had a 6-fold increase in airborne mold, which did not return to normal until after the tree was removed.  Weed, grass and tree pollens were also found in the air during the time Christmas trees were in the house, because of course, live trees once lived in fields with other weeds and trees.  
  • The beloved pine scent emitted by Christmas trees is actually a family of VOCs called terpenes.  Terpenes are made naturally in the tree sap, and real or artificial terpenes are often used in pine-scented cleaning products and home fragrances.  Terpenes can unfortunately be allergenic to some people. 
  • Dust mites and insect droppings come with live and artificial trees that have been in storage because they naturally accumulate dust. 

Bringing home a live tree is a deeply-ingrained tradition for many American families, so unless your allergies become severe, simply treating your tree appropriately may help you to suffer a lot less this season!

  • Formerly, it was recommended to spray the tree down with water and allow it to dry naturally outside for a day or two, or blow off the water with a leaf blower before bringing it inside (advancedsinusandallergy.com).  However, water is just what mold needs to keep growing and multiplying!  Therefore, we’re going out on a limb here (pun intended) to say that the same EC3 Mold Solution Spray or  Remedy Mold Treatment Spray by CitriSafe that is safe for humans and pets, is a great treatment for live and artificial Christmas trees.  Yes, use that leaf blower on your live or artificial tree to remove dust outside (with a mask of course), and then give it a good misting of EC3 Mold Solution Spray or  Remedy Mold Treatment Spray over every branch (don’t be afraid to use too much).  This should drastically reduce the amount of mold in your home while the tree is up!  Treat live garlands, wreaths and other live decorations in the same way.
  • Dispose of the tree as soon as possible, because any mold that was not touched by the spray will continue to grow.  

If you opt for an artificial tree, you still may suffer from allergies if it’s improperly stored.  Here are some tips:

  • Storing trees and decorations in unconditioned spaces like attics and basements can expose them to mold and dust.  In these situations, don’t use cardboard boxes; change the storage container to a sealed plastic bin or optimally, make a little room in your conditioned space for storage.  
  • Use a mask when retrieving them out of storage.
  • Use a cloth misted with EC3 Mold Solution Spray or use CitriSafe's Remedy Multi-Purpose Mold Treatment Wipes to wipe down ornaments and lights before adding them to the tree. 

Scented candles and sprays may smell nice, but they can seriously irritate your respiratory system and add unwanted VOCs and toxic chemicals to your air.  Instead, we can show you a number of ways to add holiday fragrance without the allergies in this post!  With the vodka air fresheners mentioned,  if you have several spray bottles, you can “decorate” your home with different holiday scents by adding drops from an assortment of essential oils like this one

This holiday season, break the mold (pun intended) by dis-inviting mold and allergens from your decorating party: it will be less costly for your health! 

Check them at the door! (How to bring less contaminants into your house)

Check them at the door! (How to bring less contaminants into your house)

Oh, how I love to walk barefoot or bare-socked around my house!  It’s a pleasure that doesn’t happen often enough. With two (albeit non-shedding) dogs who constantly bring sand and dirt in from the outside, and my own habit of walking straight in from outside with my shoes on, walking barefoot only happens for a few hours after I vacuum and mop.  Vacuuming and mopping takes a minimum of 45 minutes to do, so how often does it get done?  Embarrassingly, not enough!

There are even more benefits to cleaner floors than walking barefoot.  After all, you and your pets are not just bringing in lifeless dirt…there are microorganisms like mold, pollen, bacteria and viruses in every grain of dirt.  These can wreak havoc on those who are more sensitive, and especially those who spend more time on the floor, like babies and young children.  At HypoAir, we’re all about avoiding bringing contaminants indoor whenever possible!

It’s hard to believe what you can’t see, so I was grateful to run across this article.   The hostess of this website became self-educated about mold after she and her family experienced numerous health problems from the homes they lived in, and she has a very informative website that includes interviews with experts!  She performed a test with a white towel laid at the door of her home, to catch dirt and mold particles as they are tracked in. She performed a mold test before and after two days.  Although the “before” mold test revealed some mold from the clean towel being stored in the garage, the “after” test was definitely more prolific and indicated that some colonies could be producing mycotoxins.  Yuck!  Unfortunately I know this is happening at my house in the woods during the very wet summer we’ve had….

This has prompted me to research strategies to avoid bringing that dirt, mold and germs in!  There are some ways that make a big difference.

  1. Leave your shoes at the door.  My main problem with this is time (like when I’m bringing in groceries), and sheer number of shoes.   Patience and dropping off loads at the door will take care of the first problem, but for the second one, If I had a “mudroom” this might be more easy to organize.   I’m not a shoe collector by any means, but I have a number of shoes that I like to wear outdoors!  This has led me to find a used low bookshelf and number of baskets so that I, my sister who lives with me, and any number of guests can feel comfortable storing them at the door.

  2. Find the best doormats for your situation, and use them!  When I went searching for “doormats” online, I was overwhelmed by the sheer number and diversity of them.  Then I refined the search to “best doormats for pets” or “best outdoor doormat”, etc. and read what people wrote about them.  I am even doubling up (one indoor, one outdoor) for more protection.Here are some good ones:

    1. Doormat for pet feet: I like the generous size and decor options for these rugs by PURRUGS, but they are made of polyester.

    2. Outdoor mat for removing dirt: 

      1. According to Spruce.com, coir (pronounced “coy”-er) is the best material for removing dirt: it’s made from coconut husks, so it’s scratchy and natural-looking.  A lot of coir mats are made with a rubber backing, which doesn’t let the dirt fall to the floor, but if you get a woven one with no backing like this one by Kempf ($43), you don’t have to shake it out as often. 

      2. For a modern look, Clean Machine Mats are made of Astroturf, but not all of them have the bright green color!  This one ($29) just takes a simple shake to empty all the sand off your porch.

    3. Indoor mat: Requirements for good indoor mats are that they need to be of a safe material that doesn’t create dangerous VOCs (polyester and PET may have endocrine-disrupting chemicals in them).  A non-slip backing is best, but solid rubber or plastic may harbor mold if moisture gets underneath, so check for mold during wet or humid weather.  Machine-washability is a plus!  

      1. Large and absorbent, these mats by Crate and Barrel ($135) are great for wet and muddy feet.  They can be spot cleaned or taken outside for scrubbing and hosing down.  The rug is made of polypropylene, which is quite durable and has a low off-gas.  The backing is made of rubber (20% recycled), which can give off a smell but doesn’t seem to be a complaint with this rug.

      2. Chenille is very absorbent and soft, which makes these rugs by Gorilla Grip a nice buy at $35-50 depending on the size.  They are machine washable!

      3. I love the idea of recessed mats, which are popular in commercial buildings and apartment buildings.  They “fit” into your floor and are very unlikely to slide around.  Water and dirt will also be more contained in a recessed mat, where you can easily vacuum it up.  You’ll need to create a standard-sized recess that is laid into your floor at the front door.

  3. If you have pets, teach them to stop at the door and wipe their feet! (cue cute video…)  More seriously, you can teach them to at least stop while their human helps them wipe their feet!  You can even hang a towel near the door for that purpose on a simple hook or more elegant towel rack.  You can also use  EC3’s Mold Solution Spray ($28 for 32 oz) for misting their fur to deactivate any mold spores they may carry in.

  4. Use a non-toxic additive or detergent to get rid of mold in the laundry.  EC3 products by Micro Balance are recommended by a number of experts and experienced laymen who know about mold!  This non-toxic, environmentally safe laundry additive ($29) is good for about 11-16 loads at the recommended dosage of 2-3 oz per load.  It’s great for washing those dirty door mats and washable shoes.  (moldfreeliving.com)

  5. For shoes that can’t be washed in the washing machine, spritz them with EC3’s Mold Solution Spray ($28 for 32 oz) before you put them back in your closet.  You can also spritz it on the indoor mat between washings.  (moldfreeliving.com)

  6. Vacuum and mop frequently(1-2x per week) in the entranceways of your home, if not your whole home.  At the beginning of this article, I was lamenting the time it took me to successively vacuum and mop the ground floor of my home (where the most dirt lies).  Well, this is the case IF you don’t have a combo vacuum/mop, which can be a total game changer!  I’m happy that I have all tile with only a few area rugs on this floor, which makes it the perfect candidate for such a machine. I grew up using cumbersome canister vacuums, which seemed to hit every doorjamb as I tugged them through the house.  My mother has already graduated to a Bissell CrossWave, and raves over it.  Here is a great review of the newest upright vac/mop combos, in which I’m sure you’ll find one that’s right for you.  The only problem with using water floor cleaners is that they tend to have chemicals of questionable toxicity in their proprietary cleaning solution (7 of 11 Bissell products earned a “D” grade on ewg.org).  If you use another solution during the warranty period, your warranty may be voided.  If that prospect does not bother you, this article gives some tips on making homemade cleaning solutions for your vacuum/mop machine that have non-toxic ingredients.