Category Archives for "Natural Home"

How to help seniors avoid Alzheimer’s and dementia through better air quality

How to help seniors avoid Alzheimer's and dementia through better air quality

HypoAir has many generous customers!   We frequently get orders for multiple purifiers with different ship locations, because once our customers see how well they work, they want to gift them to friends and family who don’t know about their benefits, or may not be able to afford them.  Inspired by this generous spirit, I want to let you know a few more reasons and ways to help those who need it most, the elderly.

Whether or not you have a senior in your family, it’s likely you know someone who because of age or infirmity has more difficulty cleaning their home than they used to.  Anything that involves a ladder may not be safe for them to do, and heavy vacuums take a lot of energy to maneuver.  They also may not have access to better vacuums and air purifiers with HEPA filters, which are important for filtering out fine particulates from indoor air.  So, the dust piles up and this not only leads to a sense of discouragement; it can affect their physical mental abilities.  At least one study found that air pollution exposure later in life is a risk factor for dementia.  A study published in February 2022 “found that greater improvement in long-term AQ in late life was associated with slower cognitive declines in older women. “  Exactly how was this assessed?

First of all, the researchers reference the National Ambient Air Quality Standards (NAAQS), which were created in 1970 by the EPA through the Clean Air Act.  Six pollutants were identified as “criteria” pollutants, which are carbon monoxide, lead, nitrogen dioxide, particulate matter (in which two categories of less than 10 microns and less than 2.5 microns were identified), sulfur oxides, and ground-level ozone.  (Britannica.com)  Since the enactment of the NAAQS 50 years ago, significant reductions in the average pollution levels have been seen across the US, but not in every location.  This new air pollution study used a subset database of 2,232 women aged 74-92 who were already participating in the the Women’s Health Initiative (WHI) Memory Study (WHIMS)-Epidemiology of Cognitive Health Outcomes (WHIMS-ECHO) study, which began in 2008.  The air pollution study correlated the pollution levels at each participant’s address in the first 10 years (2008-2018), according to US Environmental Protection Agency (EPA) monitoring data, to estimate annual mean concentrations of PM2.5 (in μg/m3) and NO2 (in parts per billion [ppb]).  Then they controlled for other variables such as age, education, geographical region, ApoE e4 genotypes (a gene specifically found to increase dementia risk), and cardiovascular risk factors, and excluded others with prevalent dementia and missing data.   The association of the cognitive decline of the remaining 2,232 women to the levels of air quality improvement where they lived showed that residing in locations with greater AQ improvement was associated with slower rates of decline in both general cognitive status and episodic memory.  These benefits were equivalent to slower cognitive declines in women who were 0.9 to 1.6 years younger at WHIMS-ECHO enrollment, meaning that their brains acted 0.9-1.6 years younger.

Whew, that’s a lot of information (the study was quite rigorous to read) but our customers (and really anyone interested in air quality) are seeking ways to live with the best quality of life, if not also the longest life possible.  Therefore, slowing down mental decline by 0.9 - 1.6 years is nothing to sneeze at!  It all adds up.  It just confirms what we’ve been writing about regarding the location of your home–if you are moving, it’s very important to choose a location that is low ambient air pollution.  Higher outdoor air pollution translates to poor quality air inside, if better ventilation and HEPA filters are not used.  

Fungi in the brain has been studied as a possible cause of Alzheimers and dementia patients.  This summary of recent studies, as well as a 3-part series on mold and its journey through the body on Citrisafe.com, a manufacturer of safe mold cleaning products, show how exposure to mold is a big risk to our brains.  This is another reason it’s important to investigate for mold in the homes of the seniors you know.  

Unfortunately, many seniors do not have the choice to move into better locations to improve air quality, but we can help them by making small improvements inside.  You can do what you can for your aging parents, your neighbors, and anyone else you are able to!

  • Help to identify the big “leaks” that may be letting outdoor pollution into their home.  Some of these are attic doors, leaky fireplace dampers, holes in the subfloor under bathtubs, large holes around plumbing or gas fittings, etc.  Sealing these will help to keep the ultra-fine particles and nitrogen dioxide at lower levels.

  • Encourage and/or help to change their furnace filter regularly.  Often the air return filter is under a ceiling grille, requiring a ladder.  Although it can be expensive to relocate the filter, you can suggest that they use the highest MERV filter possible for their system (up to MERV 13, check out our selection including activated carbon options here).  If renovation is possible, adding a box for a thicker filter will decrease the frequency of changes so that each filter will work longer.  

  • Suggest they buy, or give a gift of a HEPA filter.   In addition to the furnace filter, this filter can be placed in the room they use the most, so that they can breathe comfortably for most of the day.  Some filters are easily transportable to their bedroom.  If they are restricted in movement such as a recliner or bed, a small filter may be best.  IQAir’s new “ATEM” filter directs purified air in their breathing zone, and is quite portable.  HEPA filters reduce cleaning frequency and intensity by trapping dust, but the filters will need changing (a maintenance cost of running them).

  • If particulate air quality is quite good in their home but bacteria and viruses are a concern, you can suggest or gift an Air Angel.  Air Angels are also portable units that deactivate microorganisms like bacteria, viruses and mold with polarized ions.  Air Angels require very little maintenance, in fact only a replacement AHPCO cell once a year. 

  • Advocate for better ventilation.  We are BIG on fresh air ventilation, because it dilutes pollutants that come from inside (CO2, VOCs, etc.).  Our Window Ventilation Filters allow anyone to open their windows for more fresh air, but keep out pollution, pollen and dust.  They are easy to install and remove.  

  • Check for water intrusion and mold.  That “musty smell”, so often a stereotype of older persons’ homes and belongings, in reality is probably not their choice of scent–it’s an indicator that mold is growing somewhere in the home.  Mobility is often a limitation for seniors, so they may not be able to stoop and inspect under sinks, in closets or in the attic, basement or crawlspace.  If you have been reading our website, you’ll also know that if mold occurs, choosing the right contractor is not easy!  Help them to make difficult decisions of who to contract, how to deal with the remediation and what to clean and what to dispose, in order to have a healthy home going forward.

  • Have a conversation about cleaning products.  Of all of these “changes” this might be the most difficult one, because seniors often have preferred products that have been on the market for decades but in reality are toxic to their indoor air!  If you want more information on why these are toxic, and what products to use in place of them, check out our post and our own non-toxic cleaner TotalClean

Our kindness towards seniors counts, because it shows that we value life from the beginning to the end.  It also shows how we want to be cared for when we reach the same age.  Regardless of your financial ability, it’s the time and actions that show you care!

How to increase indoor air quality in mobile and manufactured homes

How to increase indoor air quality in mobile and manufactured homes

No matter where you go in the US, there are mobile and manufactured homes.  The homes we’ll discuss here can fall into 2 categories: homes that were moved from a tractor trailer, placed on pilings and realistically will never move again, and then there are recreational vehicles (RVs) that can travel the country (but many sit at home or in storage for most of the year).  There’s also vastly different reasons to live in one or the other–from financial to lifestyle choices to temporary housing.  Whatever your reason to stay in a mobile or manufactured home, we want to help you make it a healthy place. 

Mobile homes with a pier foundation are actually supposed to be called “manufactured homes” according to the industry representative, The Manufactured Housing Institute.  Mobile homes and manufactured homes are two words for the same thing: a home built in a factory on a steel frame with wheels for transport to a homesite, where the wheels are removed after it is set on a foundation.  Manufacturers and HUD prefer that they be called manufactured homes, but most people still refer to them as mobile homes.  You can have single-wide, double-wide, triple and even quadruple-wide “mobile” homes, where the extra “boxes” can be configured side by side or even on top for a second story.  Mobile homes don’t have a great reputation for quality or lifespan, but that doesn’t mean they don’t start out that way or can’t be upgraded to make them better.  Let’s discuss the ways in which mobile homes can be improved for healthier indoor air quality.  The main objective is to keep water out, seal air leaks and provide good ventilation. (source: howtolookatahouse.com)

Starting from the top down…The roof: generally speaking, less-expensive manufactured homes have flatter roofs.  This is because the higher the “pitch” or angle of the roof, more material is necessary to frame and cover it.  The problem with low pitch roofs is that rain and debris spends more time on the roof–rain doesn’t run off as quickly and debris like tree branches and pine needles don’t roll off as easily.  Roofs in general need inspection and maintenance, and low-pitched roofs need regular inspection to keep water from getting backed up and leaking through.  Many owners decide to “double-roof” their homes and this can make a huge difference in indoor temperature and longevity of the home.  I’m not talking about 

Roof overhangs tend to be short in manufactured homes, so that water coming off the roof runs right down the wall.  This is a recipe for water intrusion and mold, not to mention undermining the footings of the piers.  If the home does not have gutters, you can install gutters and downspouts to channel the water away from walls, doors, windows, decks and the foundation.

Siding is the protection for walls against wind and rain, and siding can be metal (very old homes), fiberboard (80’s and 90’s homes) or vinyl, engineered wood or hardyboard (modern homes).  Fiberboard must be continually maintained, or water ingress will cause it to degrade quickly.  Vinyl, engineered wood and cement board sidings provide longer-lasting protection, but they also need to be inspected for damage or improper installation.  The weakest points in siding are the corners, window and door casings, because the irregular joints are typically spots for water ingress.  

For many years, windows in manufactured homes were single pane with an aluminum frame.    The transport of the home to its new foundation may cause the frame to warp or the casing around the window to become unsealed, exposing the sheathing underneath to water.  If you are able to, you can upgrade the windows to double-pane for more insulation against outside weather, and make sure the new windows are installed with good flashing, casing, and caulk techniques.  Likewise, if the front door is of a thinner, lightweight quality, an upgrade to a steel door is also an opportunity to make sure it is installed correctly with flashing, casing and caulk to minimize water ingress.

Foundation: On manufactured homes that have a “skirt” or foundation, a vapor barrier must be installed on the ground (2008 HUD law).  If the home is resting on a concrete pad, then the vapor barrier is not needed because the concrete will act as a vapor barrier.  Unfortunately, the “underbelly” of the home often falls into disrepair because no one wants to go under the house to inspect it!  Directly under the home, another vapor barrier of plastic or black “belly board” will protect the insulation and subfloor from moisture and pests, but this is often damaged and missing in older homes.  Manufactured homes on piers are really sitting over a “crawl space”, so it’s important to inspect the underside of the manufactured home to see how sealing up the ground vapor barrier, belly barrier and insulation can really make a difference in comfort and humidity!  Here’s an article that goes step by step through this repair. 

Inside: the manufactured home industry has certainly had a bad reputation for formaldehyde emissions inside homes.  Formaldehyde has never been banned from the manufacture of homes, but lower limits have been set on the use of components such as plywood and particleboard by HUD and the EPA.  The problem is that there are no HUD standards for the maximum allowable level of formaldehyde gas inside a home, meaning that all the new components like flooring, cabinets, walls, furniture and drapery can have low individual levels of emissions, but a high overall level.  For this reason, it’s best to avoid purchasing or staying in new manufactured homes,  If this is not an option, you can choose to furnish it with only solid wood furniture or composite wood furniture with sealed surfaces. If you have any newer composite wood furniture that is still emitting formaldehyde gas, remove it from your home. Because the formaldehyde off-gassing diminishes over time, storing the pieces outside of your living area for a while (under cover of course) may solve the problem. (howtolookatahouse.com)  You can also ventilate as much as possible (leaving windows open in mild climates, and using a fresh-air ventilation system in more extreme climates.  And of course, increase ventilation of your home while doing any interior painting or use low VOC paint.

Some of the most important mold protection also happens on the inside of the home, because leaking pipes, sinks, showers, toilets, washing machines, etc. all need immediate attention in order not to cause mold and damage that can be very costly to repair.  The abundance of fiberboard in manufactured homes will wick up water much more quickly than hardwood, and even ambient humidity is important to control.  

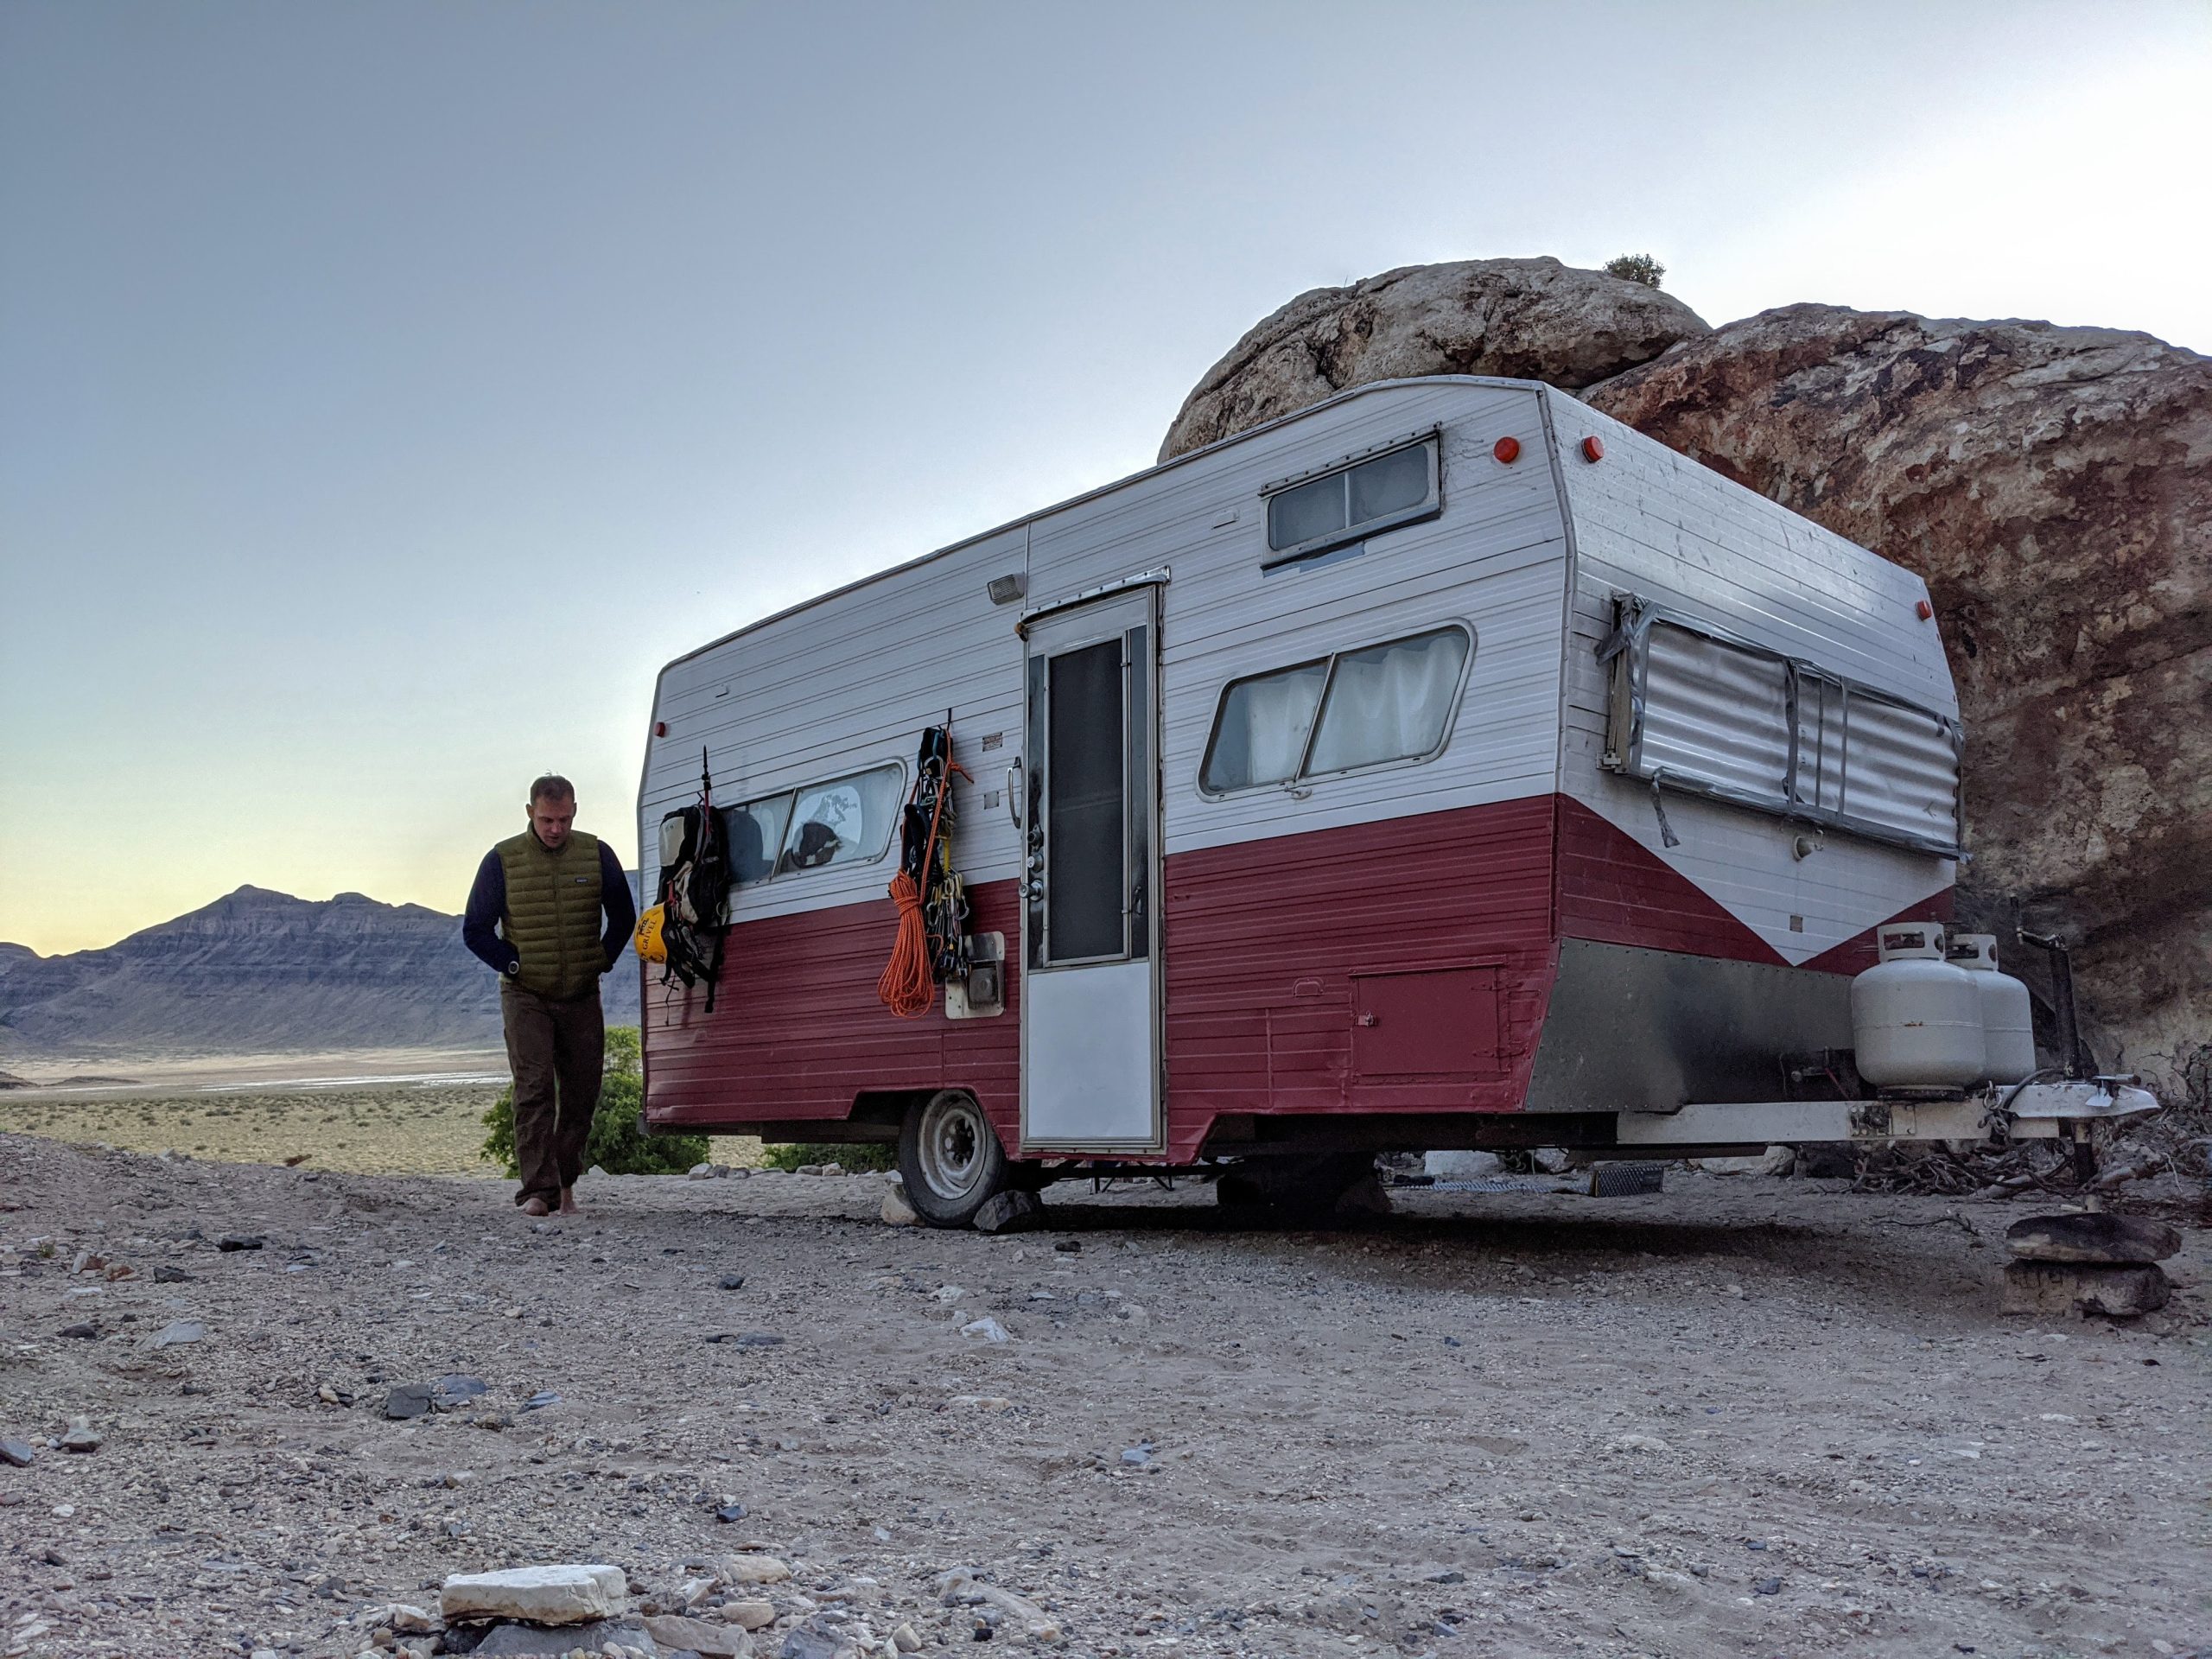
Recreational Vehicles (RV’s or campers) truly are supposed to be mobile, so that you can take your home with you, and enjoy new scenery wherever it’s parked!  Like manufactured homes, there are a variety of pricepoints and features in two classes, motorized and towable.  There are 3 types of motorized RV’s, ranging from the largest, luxury bus-type (Class A), the smallest conversion van (Class B) to the in-between (Class C).  Towable RVs can be as simple as a small “Pop-up” to large “travel-trailers” and “fifth wheels”.  “Tiny homes” can look like miniature versions of homes on wheels.  Here is a more in-depth look at the differences between these classes. 

RVs have similar challenges to manufactured homes when considering water intrusion from above and vapor from below.  It’s a sad truth that RVs are going to leak, but with a lot of inspection and maintenance, you can prevent this.  Most RV’s rely on sealant and caulking, and inspection and repairs should occur every 90 days (see this video for how to inspect it).  Again, let’s take a look from the top down:

Roofs: Most RV roofs are either rubberized (a thin membrane stretched over wooden frame) or fiberglass (molded).  Considering that these materials are more fragile than the asphalt shingles or metal roofs found on manufactured homes, they need a bit more care and upkeep!  Keeping them clean and conditioned helps so that leaves and branches slide right off instead of piling up, and aftermarket coatings can extend life against the sun’s UV damage.  RV roofs can last from 10-20 years or more, depending on the care and maintenance given them.  Here is an article detailing cleaning and repair tips for each type of roof.  Ideally, RVs should be parked under a permanent roof when they are not being used in order to minimize water and sun damage, and a minimal conditioning system (like a dehumidifier) should be left running to keep the air dry inside.

Since RVs are mobile, they are more prone to separation at the roof and wall joint, as well as openings like skylights, windows and doors.  One website says that driving an RV at highway speeds is “ the equivalent of driving your house through a hurricane during an earthquake.” (!)  Any separation needs to receive prompt attention by removing old sealant, cleaning the surface, and applying new sealant.  Here is a great article on how to achieve a professional look and long-lasting finish when resealing seams.   If your RV has a slide-out, special attention needs to be paid to protecting this area, and awnings are a great way to shelter the slide-out roof and joint area by keeping leaf and branch debris, animal droppings and nests off of it, as well as rain and snow. They’re not too hard to install (instructions here) and are a great investment for your RV. 

Each penetration in the side of the RV (like vents, ports for electricity and drainage, and storage compartments) needs attention, because sealants fail over time and with sun damage.  They should have a bead of sealant at least on the top and corners of the penetration to prevent water from coming in (the best would be all around the penetration).

The underbelly (underside) of the RV also needs regular inspection and repair.  Some RV’s have fiberglass, others have wood or metal sheets, and all are susceptible to road damage or more frequently, water damage from the inside like a leaking pipe.  Here is an article with photos on how to assess and repair underbelly damage.  You can even upgrade the type of underbelly protection fairly easily, but it may take more than one person to wrangle the material into place.

Inside the RV, again, motion from road travel is constantly working to pull apart connections and seams.  Keep an eye on all sources of water leaks such as pipes, sinks, showers, toilets, etc., so that water will not damage your home on wheels and initiate mold!  Also, since many RVs have propane powered appliances such as stoves, furnaces, water heaters, etc, a propane leak can be very dangerous to your health. You can use your nose (the old “rotten eggs” smell is a clue, or detectors such as a Gassaf propane leak detector, or a propane dial manometer (to detect pressure drops in the propane system).  (rvlife.com has a great video on how to inspect your propane system).  A pressure drop-down test is recommended once a year so that you can tell if your system is leaking at all.  If you do have a leak, you can use a simple spray bottle with water and liquid dish detergent, to check all joints for leaks (the soap will cause bubbles around the joint if it’s leaking).  

Like manufactured homes, RVs tend to have an abundance of particleboard, fabric and flooring that should have formaldehyde limits individually, but corporately may give off a lot of formaldehyde when they are new from the factory.  These levels go down dramatically as an RV ages, but RV age also increases chances of other problems, like water or structural damage.  In general, less-expensive units have more adhesive-based components (which generate formaldehyde off-gassing) and could create some irritation for more sensitive RV owners. (rvtravel.com).  When checking out RVs to purchase, you can even bring a portable sensor with you to measure the levels of VOCs and formaldehyde inside them (check out our article on sensors for recommendations).  Air purifiers with activated charcoal filters, like the Germ Defender with carbon filters, absorb VOCs and formaldehyde, and fans are helpful to keep air circulating.  1-2 Germ Defenders can cover the average RV (remember that they don’t cover spaces separated by closed doors) so that your RV can be comfortable even new off the factory floor. 

Manufactured and mobile homes can be as healthy as a permanent home inside with a lot of diligence and the decision to choose your neighbors wisely!   If you are in close proximity to smokers, barbeque grills, auto exhaust or other toxins, this can seep into your home.  If possible, try to live or camp on a large lot and use HEPA filters to capture particulates inside.  In a small or large home, it’s best put your health first and live in the best place you can afford.

Photo by Jon Hieb on Unsplash

New SEER ratings and more price increases…

New SEER ratings and more price increases…

Since we’re a company dedicated to healthy indoor air, we’re going to talk about SEER in relation to heating and air conditioning, not a person who can “see” the future!  However, we can see price increases coming because new regulations are soon coming into effect...

SEER stands for Seasonal Energy Efficiency Ratio, and it gives you an idea of how efficient your cooling system is.  For example, how much cooling do you receive for the amount of electricity used?  As the SEER number increases, the electricity used to achieve the same cooling will decrease proportionately.  This means that a 12 SEER unit will cool your home using half the energy of a 6 SEER, and a new 13 SEER system is about 30% more efficient than a 10 SEER from the early 1990s. (howtolookatahouse.com)

The Department of Energy (DOE) regulates the minimum SEER ratings that may be sold and installed, and these ratings increase every few years as technology evolves so that energy usage decreases. For example, the minimum SEER for southern US states will increase beginning in January 2023, from 13 to 14.  It is part of a new rating system called SEER2, which involves a new M1 testing procedures.  As a consumer, you probably don’t want to know the specifics of the testing, but it does more accurately represent the real-world applications (seer2.com)

This regulation essentially causes a mandatory “upgrading” of new HVAC systems.  It also contains legislation that splits the country into North, South and Southwest regions, each of which have different requirements about installing “older” units.  For example, in regards to residential split-system air conditioners, in the South and Southwest, HVAC companies cannot continue to “sell through” their older units.  In these areas, all noncompliant equipment must be sold for installation prior to January 1, 2023 or shipped to the North for installation.  In the North, as long as it’s been manufactured prior to January 1, 2023, they can continue to install it.  (fieldedge.com).  

As a resident of the “South” region, this requirement to sell or ship is definitely affecting new AC prices, as I was warned by my local HVAC installer that prices will go up 15-20% at the beginning of 2023!  

Ok, so how do I know what I’m upgrading to?

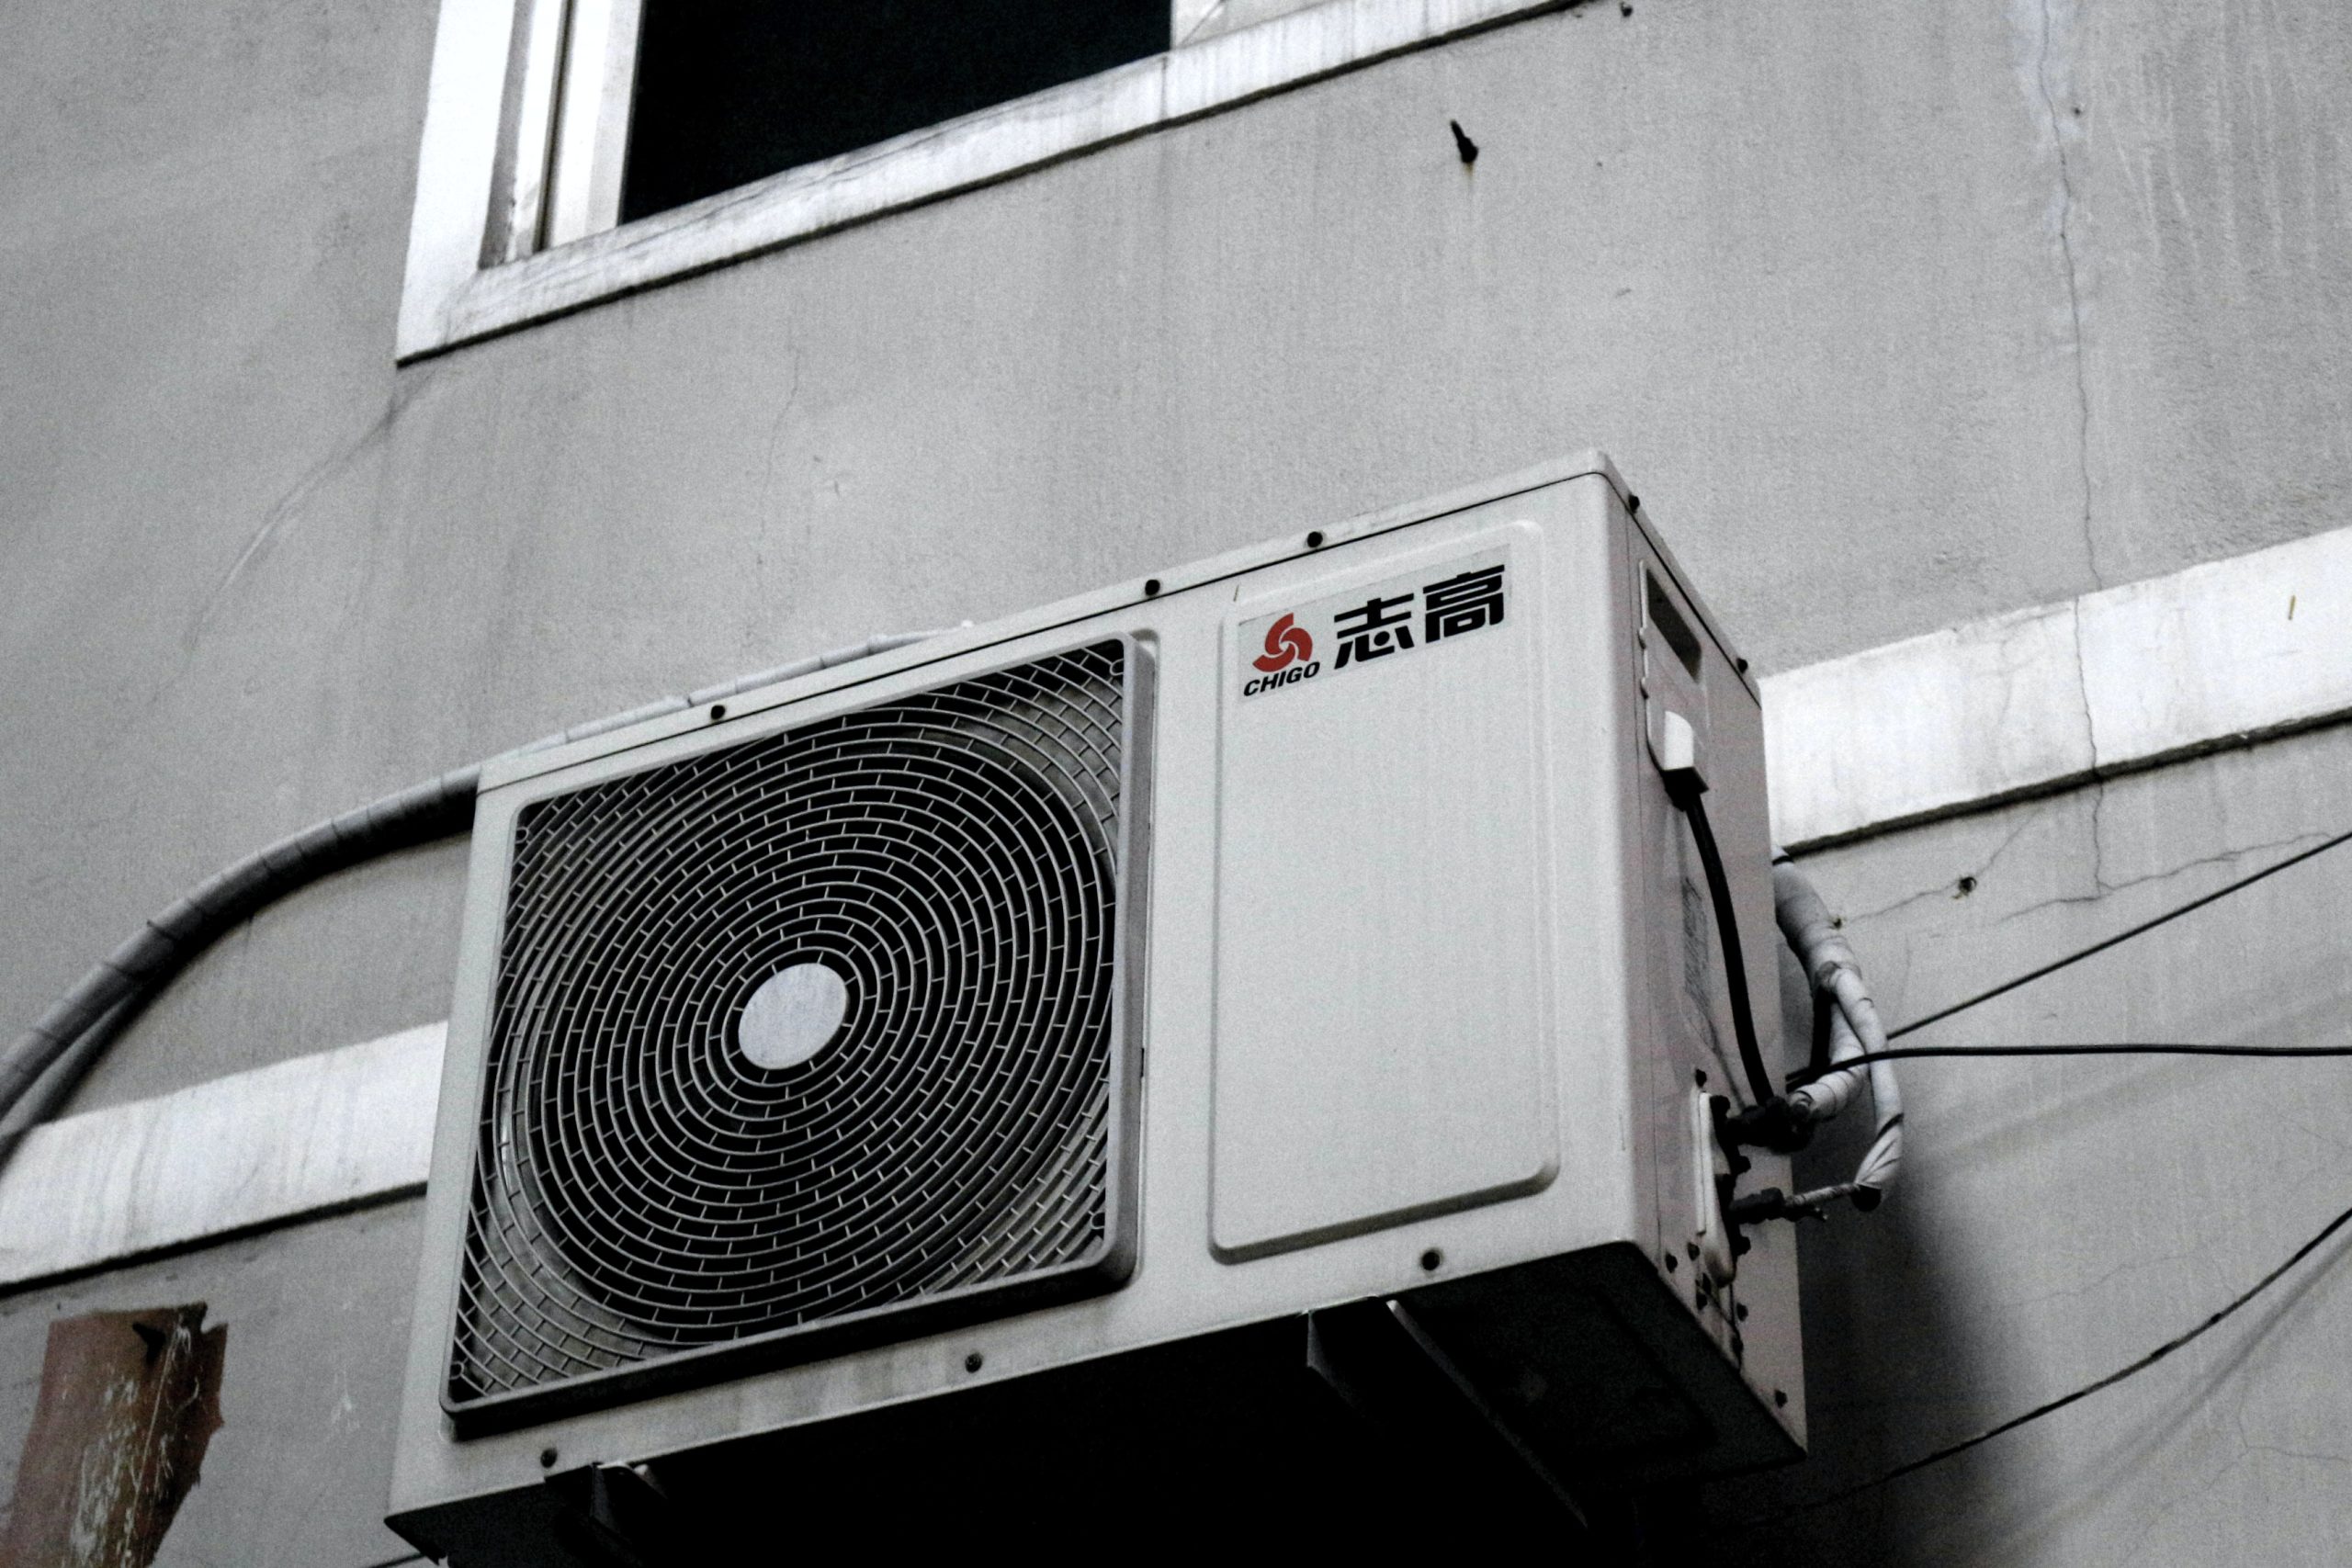
There are a number of ways to find out the SEER of your current air conditioner, even if the yellow and black sticker is long gone.  From the model and serial numbers, I can tell the date of manufacture, the SEER rating, and the “tons” of capacity on the The Rheem unit on my home. 

So, if I have a SEER 13, the same cooling capacity in a 14 SEER system should gain 8% efficiency, or cost me 8% less to run (13/14 = 92%).  However, if you are replacing your home unit, there are more reasons to upgrade further.

Controlling humidity

According to Trane.com, higher SEER units often have 2 components that provide greater indoor comfort.

  • 2-stage or variable-speed compressor

  • Variable-speed blower

Air conditioners with lower SEER ratings are usually single-stage and only run on one speed. This means they’ll frequently turn on and off during mild weather and you’ll experience uneven cooling or hot and cold spots. You’ll also experience higher humidity levels which makes it feel hotter than it is. Your A/C needs to run for a long period of time to remove humidity from your home’s air. 

Tax incentives:  US legislature was recently signed to extend tax incentives to 2032.  At energystar.gov  there is guidance on obtaining a $300 tax credit for split and package air conditioning systems, as well as air source heat pumps.

Local Electric Company incentives:  If you go to the website of your local electric company, there may be details online about rebates for upgrading your home HVAC equipment. 

What does this mean for us as homeowners?  If you are thinking of replacing or upgrading your AC or heat pump, inquire with a local installer in 2022 about pricing and energy usage for higher SEER equipment.  Depending on where you live in the US, you may wait to have it installed in 2023, but you can’t save unless you know, and you can’t know unless you ask!

Photo by P. L. on Unsplash

What is a Heat Pump Dryer? What are the pros and cons of owning one?

What is a Heat Pump Dryer? What are the pros and cons of owning one?

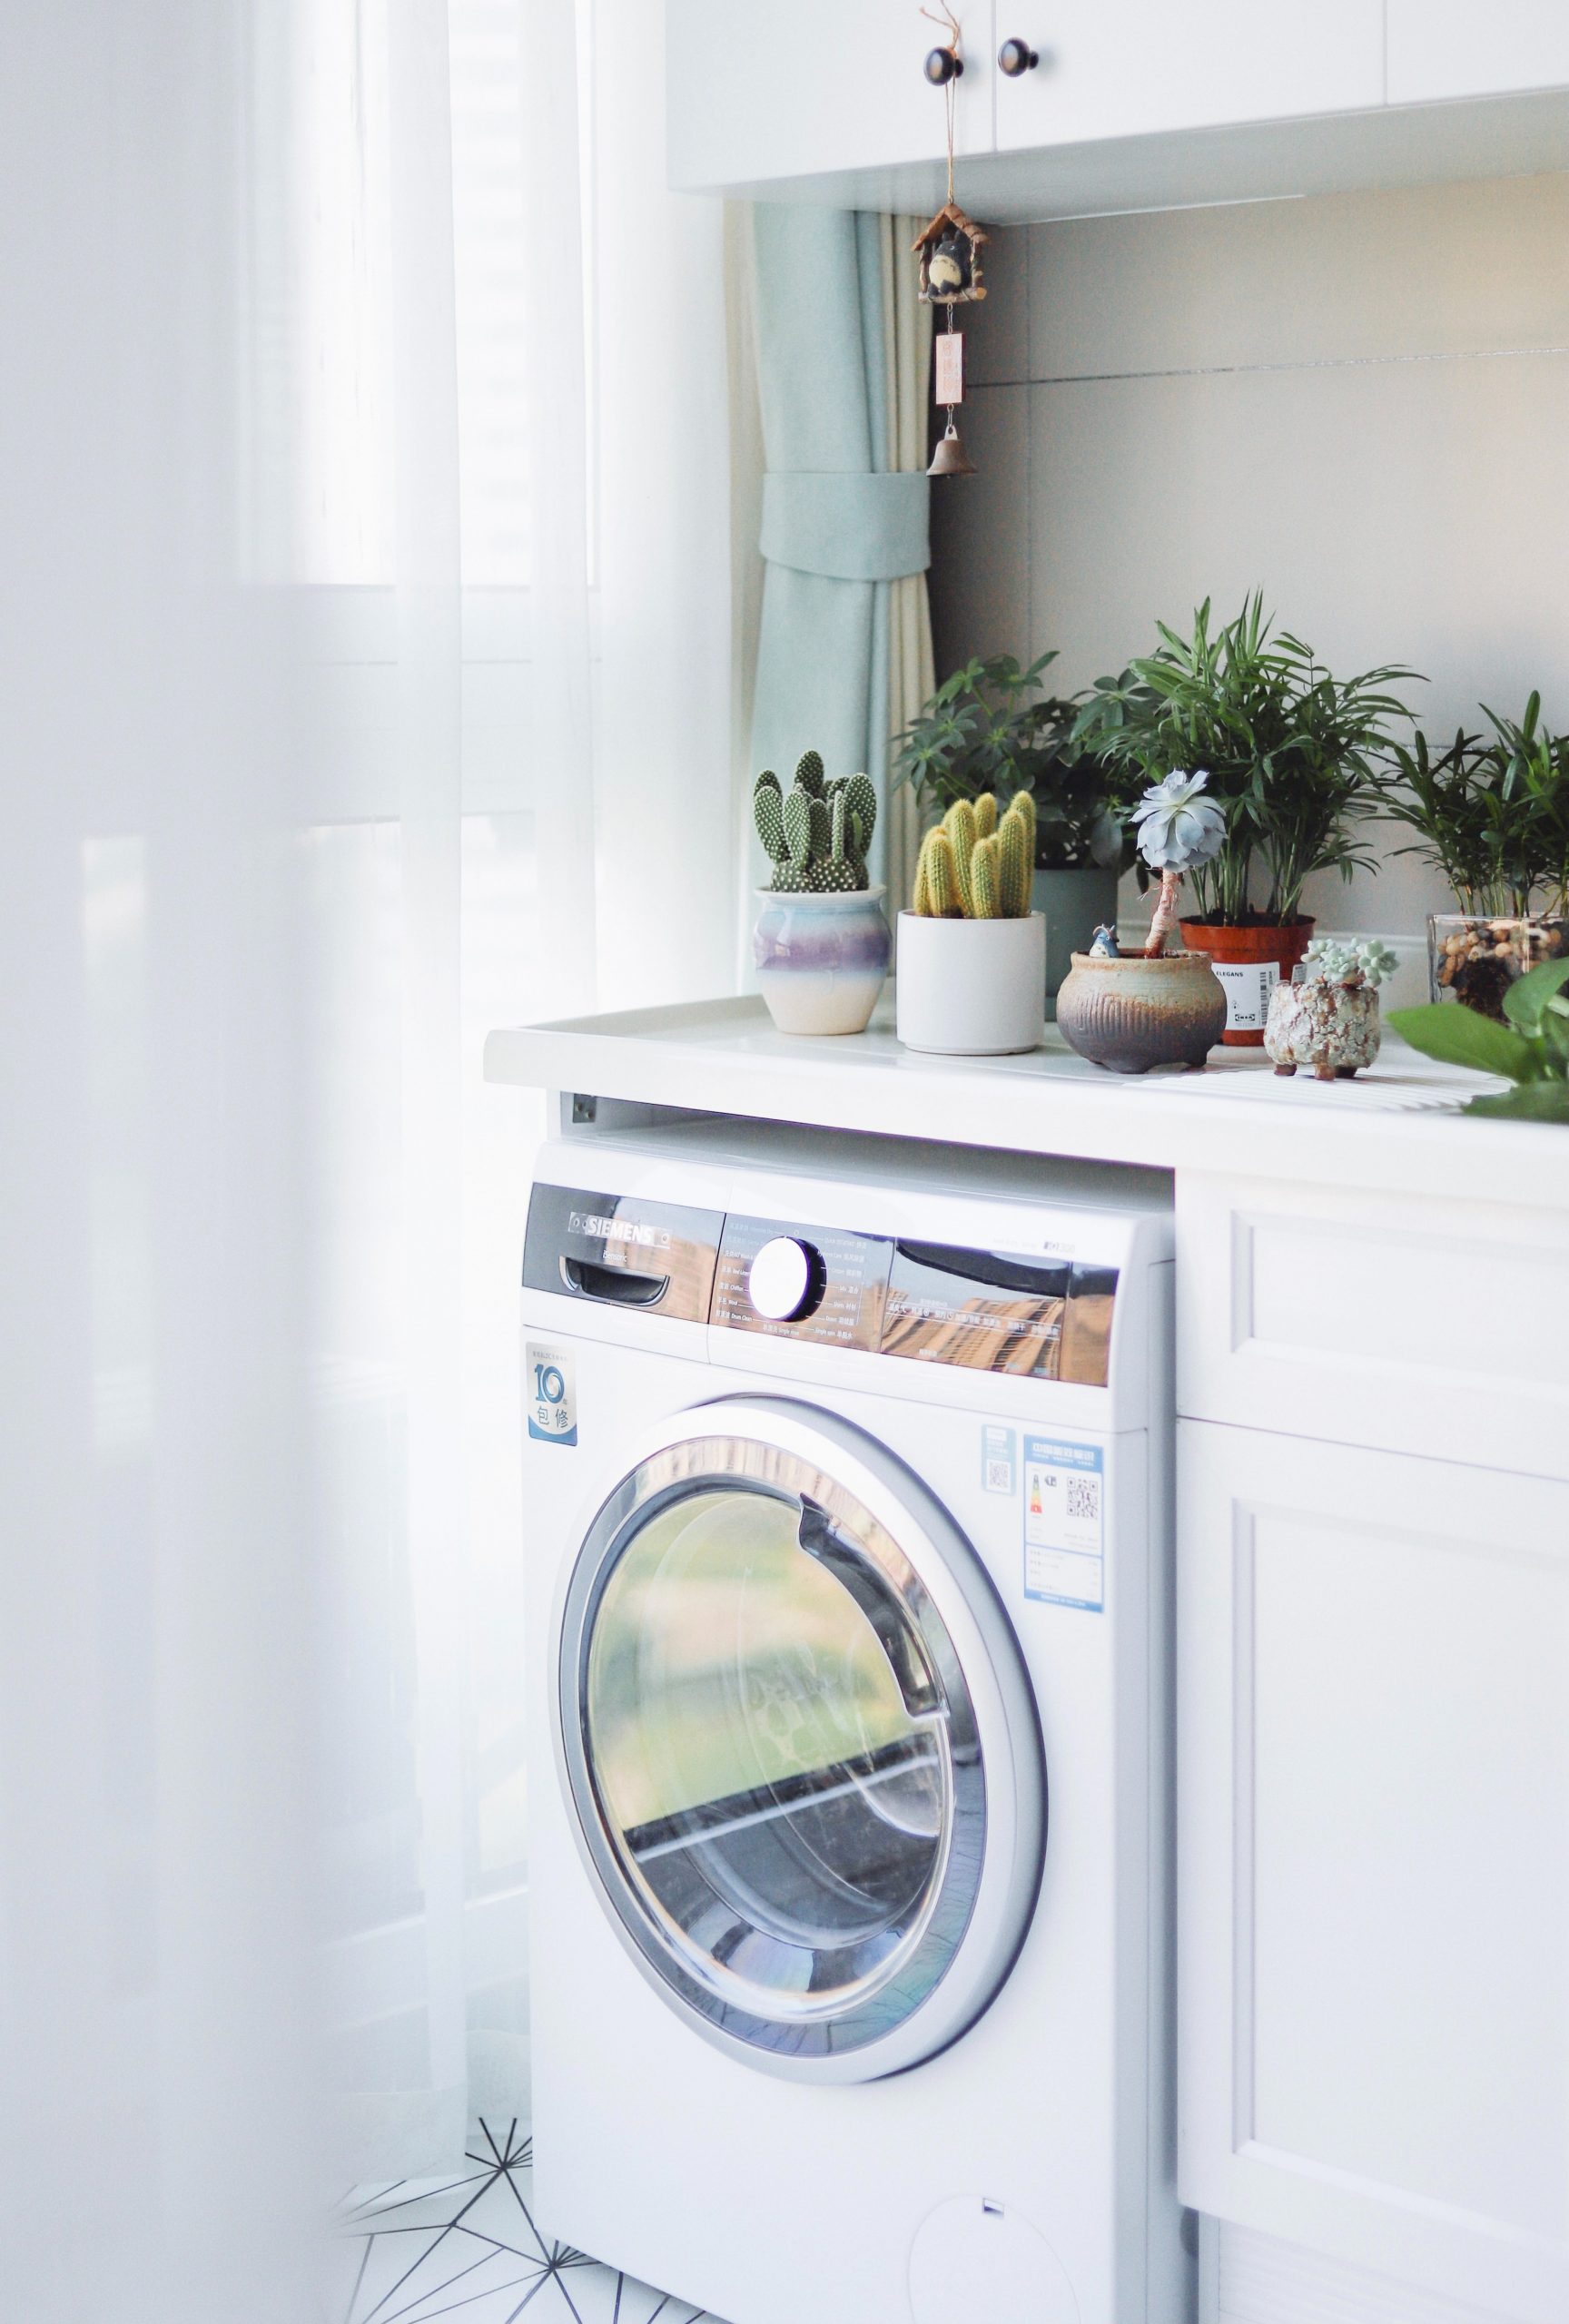
Living in the woods has certain advantages and disadvantages.  The scenery is gorgeous and trees filtering sunlight shields my home from excessive heat in the summer, but growing vegetables and drying clothes outdoors have not been successful!  When I bought my current dryer in 2017, I looked at all the available features and finally decided on a large, mid-grade version (I wanted to be able to wash and dry comforters at home instead of going to a laundromat or sending them to the cleaners).  Despite its “eco” settings, I generally use the accusensor at the “most dry” setting to be sure my clothes are dry, because they often sit in the dryer for 12-24 hours afterwards due to forgetfulness…

There is a “new” kid on the dryer appliance block.  I call it “new” because this type of dryer has apparently been used for a long time in Europe and other countries, but has only been in the US for less than 5 years.  Heat pump dryers are one of two types of ventless dryers; the other type is condenser dryers.  Of the two, heat pump dryers are the more energy efficient in terms of electric consumption and waste heat output into the laundry room.

This video is a good overview of how heat pump dryers work, and on a practical side, the video in this article shows the typical maintenance needed on a heat pump dryer.

Regular (electric or gas) dryers cause the following problems: 

  • using a lot of energy to heat air and then immediately exhaust the heat outdoors

  • Drawing conditioned air from your home to run through the dryer (resulting in negative pressure and energy loss on the order of 200 cfm of conditioned air)

  • Release of ultra-fine particles (UFPs) into the air of your home and outdoors

The heat pump dryer may solve these problems by:

  • Recycling heated air instead of dumping it

  • Causing little-no air draw from the rest of your home 

  • No dryer vent means no dusty air leaks inside, or dumping UFPs outside.

Pros:

  • Operating cost is at least 28% less (energystar.gov) and can be up to 50% less than regular vented dryers (nytimes.com).

  • Owners of more energy-efficient homes will appreciate that a heat pump dryer will not try to pull a negative pressure by dumping conditioned air through the vent.

  • Some models operate on 120v (Miele at least), which make them more versatile.

  • No vent needs to be installed!  They can be installed in very small spaces and operate well no matter what temperature or humidity conditions are present in the house.

  • Heat pump dryers are better at fabric care because the dryer temperature is typically lower than conventional dryers (greenbuildingcanada.ca)

Cons:

  • Not all heat pump dryers perform the same.  This review of the Whirlpool YWED7990FW in 2019 claimed that it significantly raised the temperature and humidity of the small laundry room and surrounding area, and took significantly longer to dry, but a respondent claimed that his Miele dryer (a widely known German manufacturer) only raised the temp by a few degrees with the same drying time as a conventional dryer.  Another owner of a Whirlpool WED99HEDW was quite happy with his purchase after 4 years.

  • More maintenance is needed to keep the heat pump dryer working efficiently; a vacuum with soft head may be needed to clean the heat exchanger coils every so often, and it may need professional deep cleaning to remove lint deep inside the machine every few years.

  • Some heat pump dryers need to be installed near a drain, to dispose of condensed water from the clothing.  Others have reservoirs that can be emptied every so often.

  • Heat pump dryers are still relatively uncommon, so if the unit does need servicing, it may be difficult to find a knowledgeable technician if you live outside a major metro area. 

  • There is a higher upfront cost for heat pump dryers vs. conventional dryers

  • Drum capacity is typically smaller (greenbuildingcanada.ca)

You can find some 2022 reviews for heat pump dryers here, which are compact (the review is for compact washers and dryers, and most compact dryers are ventless).  Is a heat pump dryer right for you and your family?  Here are two major topics for your consideration:

  • Financial standpoint: Heat pump dryers cost more upfront, typically from between $800-$1400.  However, they save money each load in operating cost, and they save money by not pulling unconditioned air into your home throughout the load.  Let’s breakdown the costs and savings. 

    • Here is a page I used to calculate how much it costs to operate my conventional electric dryer per load:

      • My electric cost is about 10 cents per KW (from my electric bill).  My dryer uses 6240 watts (26 amps x 240 volts) per hour.  One cycle takes about 45 minutes (0.75 hour), so cost per cycle is 0.10 x 6240 x 0.75 / 1000 = 47 cents per load.

    • If I purchased a heat pump dryer and it gave me the minimum 28% energy savings, then operating the dryer would cost 34 cents per load (47 x 72%). 

    • I do about 5 loads of laundry per week, so using a heat pump dryer may save me about $34 per year (0.13 x 5 x 52).

    • These savings translate to approx. 3 years payback time for every $100 more that a heat pump dryer may cost over my current dryer.  HOWEVER, more savings come in when you consider the conditioned air you are not exhausting through your dryer vent:

    • HVAC rule of thumb: there is approx 400 cfm per ton of cooling power, and 12,000 BTU/hr (British Thermal Units).  My AC unit is 3.5 tons, so this would be 1400 cfm and 42000 BTU/hr when the AC is running.  (learnmetrics.com)  Typical electric dryers suck 200 cfm of conditioned air out of the house while running.  That’s how much cfm we’re losing, so let’s translate that into a cost.  This article tells me (in table 3) it costs $0.56 per hour to run a 3.5 ton unit (halfway between a 3 ton and a 4 ton unit), for the average US electric cost of $0.1319/kwh.  I’m going to ratio that down to my electricity cost of $0.10 per kwh, which would be $0.42/kwh to run my 3.5 ton unit. If I lose 200 cfm from the dryer, then over 45 minutes this is 9000 cubic feet of conditioned air.  9000 cf/1400 cfm = run time of 6.4 minutes to make it up, which at a cost of $0.42/hr = $0.045 extra. If I run my heater or AC 8 out of 12 months, this is 67% of the year, so we’ll multiply the 4.5 cents by 0.67 to get 3 cents per load.  The real cost to run my regular electric dryer is 47 cents per load (calculated above) plus 3 cents per load due to excess heating/cooling costs, or 50 cents per load.  The adjusted savings for using a heat pump dryer is ($0.50-0.34)x 5 loads a week x 52 weeks a year, which is about $42/year.  This gets me to about a 2.4 year payback for every $100 over regular dryer cost all because the dryer is pulling all kinds of hot and humid air into my house in the summer, or cold damp air into the house during the winter.  Honestly, in a humid environment like the southeast US, I think the actual cost is higher because of the latent heat (humidity) that the AC unit struggles to remove from the air.

  • Air Quality standpoint:  The nature of ultra-fine particles allows them not only to penetrate the air barrier of most homes, it also allows them to penetrate deep into your lungs and into your bloodstream.  Broadcasting UFPs into the outside air via the dryer exhaust allows some of them to come back into your home through air leaks (because conventional dryers pull a negative pressure on your laundry room, if not your home), and if your dryer vent line has any leaks, they are coming into your laundry room in a more direct route anyway.  With a heat pump dryer, the air is moving in a closed loop through a filter, which is cleaned in the same way as a conventional dryer filter, but the rest of the UFPs are pulled out of the airstream via condensed water.  The good thing is that the UFPs going into the condensed water are not being broadcasted into the air to cause respiratory issues.  The other good thing is that pollen and pollution outside is not being sucked into the home by the negative pressure that regular dryers generate.

The issue that is not addressed by most dryer manufacturers is how UFPs are captured in the condensate drain line.  If your new heat pump dryer has a reservoir, then emptying the condensate through a filter is easy.  If it drains into a plumbed drain, you may want to invest in a drain filter (there are a variety of drain filters designed for washing machines that would work fine, especially since the dryer will produce a lot less condensate than a washing machine drain).  Here are some options:

  • PlanetCare Microfiber filter by Celsious ($98) is a top pick because it allows you to customize your drainhose size and will soon offer recycling of the filter cartridges.

  • If you have a reservoir type machine, you can pour the accumulated condensate through a coffee filter to any drain, and toss the coffee filter.

  • There are many other solutions that can be adapted to filtering drier condensate by searching “washing machine microfiber filter”.

The bottom line is that heat pumps and dryer electronics continue to improve every year.  Although many brands and models did not have great reviews in 2019, they look much better 3 years later.  If you are fastidious about building and keeping the best air quality in your home, a heat pump dryer should be something you consider the next time you need to purchase a dryer!

Photo by Raychan on Unsplash

To Vent or Not to Vent the Dryer Indoors?

To Vent or Not to Vent the Dryer Indoors?

This was a tricky question.  We understand that many people live in poorly planned homes where they are not allowed to make changes.  However, venting a dryer inside has a lot of disadvantages, even health dangers.  It all comes down to knowing that more than just “hot air” comes out of the dryer; this is why they are supposed to be vented to the outdoors.

First of all, NEVER EXHAUST A GAS (propane or natural gas) DRYER TO THE INDOORS.  This is absolutely a safety hazard, because the combustion gas exhaust (including carbon monoxide and NOx) are mingled with that hot air, and no filter is going to remove combustion gasses.  You would be poisoning your home air quality.  If you have a gas dryer and do not see a way to install a vent to outside, stop right here and either change out your dryer for an electric one (preferably a heat pump dryer, which does not require a vent), or move your gas dryer to a location where you can exhaust the vent outdoors (which would involve moving the gas line, too).  If your dryer is electric, you can keep reading.

So, let’s first talk about what is coming out of your dryer vent.  

  1. Obviously, warm air is coming out, because, after all, if your dryer is not heating your clothes, it’s likely not drying them.
  2. Water vapor:  This is where all the water from wet clothes goes–it evaporates and goes out the vent.  Majorly humid air here.
  3. Dust: You might collect some lint from your clothing on the dryer screen, but a lot of fine dust goes right through the screen into the vent line and outside.  This is why, when dryer vent lines are not sealed well, or they come loose, the laundry room suddenly starts to become very dusty!  And, vent lines should be cleaned of dust periodically so that they don’t become a fire hazard.  

In the wintertime, it might be tempting to redirect that hot humid air back into your home to save some money on heating and humidification!  However, most people who do vent inside either don’t care about the air quality or don’t keep up with the maintenance needed to do it right.  Here are the ways that venting inside can go wrong: (Clothes Dryer Moisture Activity)

  1. With no filtration, a lot of lint gets spread around in the laundry room (and surrounding rooms and even the rest of the home via the HVAC ducts).  If anyone in your home is sensitive to dust or prone to asthma, this is not acceptable.
  2. With filtration, you may be putting the dryer vent under too much pressure to keep the air flow up. Low air flow can cause the dryer to run longer.
  3. Low air flow and lint buildup in the dryer vent can cause a fire.
  4. The laundry room (and the surrounding rooms) can get too warm when you run the dryer in summer.
  5. The laundry room (and surrounding rooms) can get too humid and create a risk for mold when you run the dryer in summer, or anytime that the humidity in the home is already high.  For every load of laundry you dry, you are venting up to a gallon of water in condensation from your dryer. This will create a sauna in your laundry room, which can cause wood to swell, paint to peel, and mold to take hold.  (Eight Problems with Indoor Dryer Vent Kits)
  6. Venting a dryer indoors is against code (illegal) in most states.
  7. There have been documented complaints that the fine particulates of lint that escape from the reservoir can cause the smoke detector to go off.  This is proof that there are loads of  particulates coming through indoor drying vents. (Eight Problems with Indoor Dryer Vent Kits)

Needless to say, the problems with venting indoors are legion. 

We want to empathize with tough living situations.  Some people live in an apartment or home that has an improvised laundry cubby in the middle of the building, and the owners did not install a vent.  Unless the laundry room is sitting over a crawlspace or basement with an unfinished ceiling, it can be difficult to install a ventline to the outside, even if you have an agreeable landlord.  In many situations telling a landlord about the problem will not solve the issue.  Sure, there are lots of positive comments about “ventless dryer filters”, but many other users are not reporting the huge humidity problems in their laundry room after drying just one load.   For all these reasons and more, we want to be kind and say that indoor dryer venting is ok, but in the end the safety considerations outweigh it.

So, here are some options:

  1. If you have the budget, plan to stay in your home a long time or are able to take a dryer with you when you move, consider purchasing a heat pump dryer (which is ventless).  
  2. If the landlord is not willing to install a vent, but the room has a window that opens, explore the options of a Dryer Vent Window Kit ($30-37).  You may also want to add a window lock if you’re permanently installing it in a ground floor window.
  3. OR, move the dryer to a room that has a window and run an extension cord to it, which would have to be plugged/unplugged every time you do laundry. 
  4. Run an extra spin cycle on your wet clothing to wring out more moisture, and air dry clothing on a rack.
  5. Offer to trade services with a friend who has a properly vented dryer (meal prep, car wash, dog walk, use your imagination!)
  6. Take your laundry to a laundromat.  

Dryers and laundry rooms in general require more planning than you think!  We tried to be creative and make the most of a difficult situation.  If you have another alternative that works for you, we’d love to hear about it!

Photo by Raychan on Unsplash

Negative Pressure Ventilation can be dangerous in your home! Here’s how to prevent it.

Negative Pressure Ventilation can be dangerous in your home!  Here's how to prevent it.

You may have heard the saying “Build Tight, Ventilate Right” and thought, well, that’s for newbuild homes, I can’t go back and seal my house now, it’s been completed for 30 years!  (or 2 or 5 years for that matter).  This is partly true, but we’ve detailed some ways to seal finished homes in our post here.  The thing is, without the Build Tight, you can still get good air quality if you Ventilate Right for your home. 

There are basic “flows” in the universe that are true everywhere, because energy will seek to equalize, meaning move from areas of high energy to areas of low energy.  Heat will move naturally from hot to cold.  Water will flow from high elevation to lower elevation.  A liquid or gas will flow naturally from an area of high pressure to low pressure.  Let’s examine this third example.  In order for air to move in or out of your house, you will need to have an area of high pressure and an area of low pressure.  Otherwise, there will be no air flow!  Sure, wind blowing around the house will naturally generate pockets of high or low pressure, which may act locally on different external rooms.  For moderately sealed homes with all the windows and doors closed, however, the greatest chance for natural airflow to occur is when a chimney damper is open or poorly sealed, and wind flowing across the chimney draws air up out of your house.  Otherwise, no appreciable airflow is going on unless you turn on a mechanical system.  We discussed this in our post “Do Trickle Vents Really Work?”  This lack of airflow can be good and bad.

The good thing is that pollutants from outside, as well as humidity, are not actively flowing into your home when there are no mechanical systems operating.  This is good because you don’t want these things inside, anyway.  Here ends the good. 

The bad is that you are not getting fresh air from the outside (even semi-polluted air can be fresh if it is filtered), and you are not getting bad air from inside (CO2, VOCs and dust) out.  We need active ventilation and it’s mandated for healthy living!  So, we need mechanical systems (fans and the like) to draw fresh air in and get bad air out.

Mechanical systems will always create a pressure differential if they are one-way.  In other words, if you only have an exhaust fan going in your home, it is always pulling air out and there will be a slight negative pressure inside.  If you always have a fan in your open window pointed into the room, it will be bringing air in and pressurizing the room.  If you have fans working in both directions, pressure will be more balanced/neutral, but you will still accomplish the goal of getting fresh air in and bad air out.  In our post “How Does Indoor Air Pressure Affect Ventilation and Air Quality?”  we dove into the pros and cons of different pressure schemes–negative, positive, balanced and balanced with an HRV or ERV, and why we think balanced pressure is the way to go. 

Unfortunately, for most people “ventilation” causes them to think about getting the bad air out only, and this is a problem.  In such homes there is no fresh air supply, turning the house into a stagnant air pool.  When the kitchen and bathroom exhaust fans are turned on or the clothes dryer is started, a slight negative pressure is generated (yep-check out our article on heat pump dryers, where we disclose that regular dryers dump about 200 cfm of conditioned air outside!).  

For an eye-opening demonstration on toxins going into a negative pressure home, check out this video!  

Smoke going down the chimney: 5:45 minutes

Exhaust and fumes from the attached garage: 6:20 minutes

The most dramatic increase in negative air pressure came when the demonstrator closed two interior doors in the simulated house.  The pressure dove from -1.7 paschals to 5.7 paschals!  This is the force that will pull combustion gases, chimney smoke, and garage fumes right into your living space.  Air can be suctioned from cracks in the building perimeter or worse, from combustion gas exhaust flues.  Here are the main culprits that generate negative air pressure:

Dryers

  • Many people have gas or electric dryers in rooms within their home.  When running a load of laundry, the dryer will suck about 200 cubic feet per minute (cfm) from the conditioned air in your home, and exhaust it outdoors through the vent.  (see our post on heat pump dryers and how this type of dryer eliminates this problem).

  • The loss of 200 cfm of air during a 45 minute-1 hour drying cycle not only wastes money, it creates negative pressure in your home.

  • If you close the laundry room door while operating the dryer, as many people do for noise abatement, most of the negative pressure is confined to the laundry room.  However, this means that:

    • the dryer is being starved for fresh air, which causes a longer drying cycle, and 

    • the laundry room is pulling all kinds of contaminants through cracks and crevices from other places in order to feed the dryer.  Where are many dryers located?  In the garage or next to the garage, or in the basement, which means that you are pulling air from a space that has exhaust fumes and/or mold contamination to dry your freshly-washed clothes.  Yuck!

    • If your laundry room also contains your gas-fired furnace or hot-water heater, it’s likely that the exhaust fumes from the heater are backdrafting to fill the air need for the dryer.  This means that combustion gasses are being sucked into the laundry room and dryer over your freshly-washed clothes.  Danger AND yuck!

  • If you don’t close the laundry room door, the dryer is pulling that 200 cfm of air from the rest of your home.  Add to that your kitchen exhaust range, which is usually 300 cfm or more.   Since the average home is fairly leaky, where is that air coming from?  

    • The attached garage with its car exhaust and fumes from any paints and chemicals stored there: yuck!

    • Down the chimney past a leaky damper: yuck!

    • From the dusty attic through your unsealed attic door and can lights: yuck!

    • From the neighbor’s stinky apartment: yuck!

    • From the pollen-laden or pollution-laden outdoor air through unsealed holes in the wall around your pipes, outlets and switches on exterior walls and other penetrations: yuck!

Gas-burning appliances

If your home uses any type of gas appliance, a negative pressure environment can be very dangerous.  Carbon monoxide can quickly overwhelm people in the home, causing injury or death.  “Backflow” or backdraft is airflow going in the wrong direction; in this case, instead of going out the chimney or combustion gas vent, toxic combustion gases can be sucked into the room where the exhaust fan or dryer is located.  This video from Australia shows how to test for a backdraft situation, and correct it by opening a window.  Here are the steps mentioned:

  • Make sure your gas water heater, furnace or other appliance is shut down and cold.

  • Turn on the exhaust fan(s) and dryer in your home.

  • Hold a smoke pen or candle next to the combustion gas vent.  

    • If the smoke rises straight up or is drawn into the vent, then the exhaust fan is not making enough negative pressure to affect combustion gas venting (good).

    • If the smoke moves away from the combustion gas vent and toward the exhaust fan, then a negative pressure situation is developing.   Open a window until the smoke rises straight up or toward the combustion gas vent.  Take note of how far the window must be opened for this to happen. 

There is another device to help avoid combustion gas backdraft; it’s called a Power Vent for your water heater.  Essentially, a fan in the vent duct of the heater propels gasses outside, instead of just relying on a stack effect.  Typically, power vented water heaters are installed where it’s not possible to vent vertically.  These types of vent systems are less likely to backdraft because of the vent assist (empirestateplumbing.com), but at the same time, they also draw more air from the space, adding to the negative air pressure problem. 

Fireplaces

You don’t even have to be using the fireplace to get harmful combustion residues sucked into your home.  If the chimney damper is not closed or well-sealed, air can be drawn down your chimney across layers of soot and ash, bringing it into your living room.  

Kitchen Exhaust Hoods and Bathroom Exhaust Fans

These types of fans are super-helpful to exhaust odorous fumes (and required over cookstoves), but they should be balanced with a filtered intake in order to avoid generating negative air pressure! 

How do I prevent negative pressures inside my home?

To make it all clear, we wanted to summarize what happens unknowingly when certain exhaust appliances are operated, and how to avoid these dangerous situations.

If you only have exhaust fans in your home, open a window to balance that air flow, and keep doors open or install In-Door Return Pathways so that negative pressures don’t increase. 

The best solution for prevention of negative air pressure in our opinion is installation of a Heat Recovery Ventilator (HRV) or Energy Recovery Ventilator (ERV).  These devices can recover the heat or cool in a normal exhaust (like a bathroom vent), and will supply the fresh air needed so that pressure in the home remains close to neutral.  However, it’s not usually recommended to connect the dryer or kitchen exhaust to your HRV or ERV.  Why?  These are typically “dirty” exhausts that would quickly plug up a heat exchanger with lint (in the case of the dryer) or grease (in the case of the kitchen). (Sources: greenbuildingadvisor.com here and here).

In the first part of this Home Diagnosis video, the host shows a kitchen exhaust hood with remote fan and duct silencer (brilliant devices to minimize noise in the kitchen) and preheated and filtered make up air.  Even if you don’t have a preheater/cooler, just having make up air on demand in conjunction with the range hood is a great idea, not to mention it satisfies the International Residential Code (IRC) requirement that “Exhaust hood systems capable of exhausting in excess of 400 cubic feet per minute (0.19 m3/s) shall be mechanically or naturally provided with makeup air at a rate approximately equal to the exhaust air rate.” (IRC code M1503.4)

The same should go for the dryer.  In order not to pull a suction on the rest of the house, the HRV/ERV should supply fresh air to the laundry room.  

In mild climates where air conditioning or heating is not needed for much of the year, or the homeowner simply likes the idea of opening windows for fresh air, an HRV or ERV doesn’t make much sense.  Thankfully there are ways to get that “makeup air” so that your home air pressure will stay balanced no matter what appliances/vents are running.  Here are some of them:

  • Window screen filters are a great option to get that fresh makeup air by opening a window and passing it through a nanofilter to remove the smallest particles of pollution.

  • In-Door Return Air Pathways by Tamarack Technology bridge the inevitable: closed interior doors.  Simply install these in the bottom of your hollow-core or solid wood interior doors (door must be 1-3/8” thick to fit) so that you can have privacy AND ventilation at the same time.

  • Make up air for the kitchen or balanced kitchen exhaust vents (check out this video for an explanation on how a packaged balanced vent fan works). 

  • This healthy home consultant in NC has a “Clothes Dryer Intake” that supplies make up air to your dryer. 

One last source of negative pressure in the home is power attic roof vents.  Most people think that using a power attic roof vent will cool the attic by sucking out hot attic air, and drawing cooler air in from outside.  The attic does end up being cooler, however, this is not because of outside air being drawn into the attic; the vent is actually so powerful that it is sucking the air-conditioned air from your house up through large and small crevices, into the attic! (bobvila.com) If you have your gas water heater or furnace in the attic, it can also be backdrafting.  In most cases, unobstructed natural vents at the soffit and ridge, combined with a good layer of attic floor insulation, will be better than power attic roof vents.

Just like your budget, don’t let your house go “into the negative” zone when it comes to air pressure, and get that fresh air coming in when you need it.  Balanced or Make Up Air Systems (MUAs) not only avoid pulling all kinds of pollutants into your air space, they also dilute higher CO2 and VOC levels so that you’re feeling comfortable and energized (check out our post on CO2 here).  It’s a decision that can improve your home air quality with only a medium amount of effort and money!

Retrofitting with Radiant Cooling

Retrofitting with Radiant Cooling

Radiant cooling reduces or eliminates many of the faults of forced air systems: cost of operation, noise of air rushing through ducts or vents, drafty spots, allergens and dust being blown through your home, etc.

The need for a new cooling and heating system in my home has me looking at all the possibilities, now including radiant cooling and heating, also called “hydronics”.  I never thought that this would be possible because my house is, mostly, “finished”.  Radiant systems need to go in the floor before the floor goes down, right?  

Wrong!  It turns out that there are many options to installing radiant heating after the home is “finished”.  It just depends on how creative you can get with surface areas.  First, however, I’ll go over why radiant heating and cooling is superior to forced air systems, which encompass the majority of home heating and cooling systems today.

To me, this picture says it all.

Source : iapmo.org

The reason a tiny ¾” pipe can be equivalent to the big duct systems is because water is able to absorb more than 3,500 times the heat as the same volume of air!  Mind-blowing, right?  There’s a reason those big cast-iron radiators persisted in homes for all those years!  But instead of dealing with the thunk-crack-cluck of the radiators and boilers as they warm up, and being cold on the far-end of the room, now you can enjoy cool or warmth in silence as the room changes temperature from the floor up, ceiling down, or wall-out.  That’s right, you can install pre-made panels in the ceiling or on walls, which in general are way more accessible than floors.  For this reason, I’m going to focus on ceiling and wall panels and ways to work them into your existing home.  Also because I live in the southeast US, I’m going to focus on cooling, because radiant cooling is unconventional but very needed here! 

Messana is an Italian company focused on radiant cooling.  They have a number of high-end residences and office buildings portrayed as Projects on their website, and I can see why.  Their “Ray Magic” panels bridge the gap when figuring out how to place hydronics in the ceiling, because they have gypsum board (drywall) on the surface that faces the room, the tubing embedded in lightweight aluminum panels in the middle, and 1-½” of styrofoam on the side that faces the ceiling (yup, the same width as a 2x4).  Ray Magic panels are the “body” of the system, but a sophisticated “brain” is needed so that you can segment the home or office into different zones, sense the air in the different zones and control the temperature and speed of the circulating radiant fluid so that the zones stay comfortable and above dew point (to avoid condensation).  This is what the Messana Climate Control Platform does.  Although hydronics technically does not move air around, many times “air treatment” is needed so that the need for fresh, dehumidified air is met.  For this reason, Messana offers a range of Air Treatment Units (ATUs) for accompanying ventilation.  To see their products installed, check out these two videos here and here…and the system was installed in Austin, TX.  Austin can definitely speak to needing dehumification! 

Now, comparable with other things Italian, Messana installations are on the expensive side.  According to their FAQ page, the equipment costs between $15-20 per square foot, with prices of $40-45 per square foot installed (this is based on the total square footage of your home, although the panels typically cover only 60% of the ceiling).  For a renovation, this can add up to a lot of $$$, so following are some other alternatives.  As mentioned above, radiant floors can be installed over existing subfloors.  Here are some products to make the installation easier: 

  • Thermalboard is a ⅝” thick MDF board with aluminum coating and channels for 3/8” PEX tubing.  The company WarmZone uses your floor plan to create and ship the boards to you for a custom installation that looks to be fairly simple for the average DIY homeowner.  The boards are glued, then nailed down to wood subfloors, or only glued to concrete subfloors.  Costs are about 2x of a standard baseboard radiant heating system, but 30-40% savings in long run.  The pros: the product is lightweight and easy to install on the floor or on walls.  The downside: MDF absorbs water, which with a product that uses water, seems to be, well, not too smart.  Also, MDF is manufactured with significant glues, which emit VOCs.  Thermalboard specifically tested their product and it does not off-gas formaldehyde.  

  • Warmboard R, which uses slightly larger tubing (½”) with larger spacing and thicker aluminum, but costs approximately 2x as much. 

  • EcoWarm RadiantBoard is a similar product to Warmboard R but uses plywood as the substrate.  The aluminum thickness is comparable to Thermalboard, and it uses ½” PEX.  It costs approx. 35% less than Warmboard R.  It tends to discourage use of its product with radiant cooling, however.

  • Uponor has a variety of products in radiant flooring: Quik Trak, which is similar to the above products as a plywood and aluminim substrate for the PEX, Fast Trak, which is a knobbed mat that will secure the PEX in any configuration, and Joist Trak, which can be nailed to joists for sub-floor heating and cooling. 

  • Rehau, a German company which is one of the pioneers of radiant-floor heating, has products that allow direct installation of flooring over them (RauPanels), within a joist space (RauPlate) or within a concrete overpour. 

  • Heat-Sheet is a grid system for laying out your own radiant flooring made of high density expanded polystyrene (EPS). It can be used under poured concrete or gypcrete (see next).  The panels are lightweight and interlock to minimize movement.  The website shows it being used under driveways (no more ice!) and swimming pools.

Of course, installing the radiant tubing is only half the work, because it needs to be protected with a durable covering that is not too insulative.  Radiant flooring can be covered with any number of durable flooring options, including hardwoods, tile, carpet, finished cement, etc.  Here are some options:

  • Gypcrete: You can embed radiant tubing in a mixture of gypsum plaster, Portland cement, and sand, known as gypcrete.  Therma-Floor is a trade name of this product.  Installation takes significantly more time because it doesn’t come in a snap-grid, and takes time to cure.  It also must be installed by a professional crew. 

  • With tile, laminate and carpet systems, a plywood underlayment will be needed to help provide support over the tubing.  Here are some example installations from Thermalboard.  The article also gives R-values for sample materials.  Remember, when covering a radiant floor, you’ll want your R-Value to be as low as possible, so that you’re not “insulating” the heat or cold within the flooring material!  TheSpruce.com recommends that ceramic or porcelain tile is the best material for covering a radiant floor, as it conducts heat (and cool) most efficiently.  On the other end, carpet is the most insulative and worst choice for covering.

Finally, if you already have old radiators in your home, you can replace them with these modern radiators to add a modern touch in older homes.  The manufacturer says “The Ecostyle radiators will work in almost any closed loop hot water system regardless of the heat source.”  Unfortunately, the manufacturer says they cannot be used with radiant cooling (I asked). They are designed to be wall-hung, which even if only a few inches from the floor, eliminates the problem of trying to clean underneath them.  They come in a variety of sizes to fit a small bathroom to large rooms with multiple radiators.  White is the most widely-available color but other colors can be special ordered with a 100% price markup and shipping time of several more weeks.  


If you going to maximize your installation to provide cooling as well as heating, it’s necessary to make sure that the humidity in your home is well-controlled so that you don’t end up with condensation on the radiant surface, which can cause accidents, damage your expensive flooring or furniture, and create a habitat for mold.  This requires calculating the dewpoint temperature for the ambient temperature and humidity, and staying above that dewpoint temperature.  Higher-end systems provide sensors in every room to prevent this problem, but a whole-house dehumidifier can go a long way toward keeping the air safely above the dew point temperature.

These are just a sampling of radiant products on the market.  With new products and technologies released every day, don’t take your pre-existing home features as limits when it comes to the important decision of heating and cooling.  Research, ask, test and compare so you can find the most healthy, comfortable solution for your home!

Photo by Ronnie George on Unsplash

Is “noise pollution” a problem in your home?

Is "noise pollution" a problem in your home?

Many people who are used to having the TV, radio or other entertainment on all the time in their home and cars are used to this “background noise” as a part of their home.  Even appliances like noisy fans, the washing machine and the dishwasher, and outdoor noise like cars, airplanes, lawnmowers and sirens contribute to the soundtrack that is heard inside the home.   However, it’s not widely understood that noise pollution is also detrimental to our health, like other types of pollution (air, water).  The good news is that home noise pollution can be abated with immediate good effects and without negative long-term effects.   

“Second-hand noise” is noise experienced by people who did not make the noise.  Your apartment neighbor’s loud party or blaring music is an example, and according to Les Blomberg, executive director of the Noise Pollution Clearinghouse, an anti-noise advocacy group based in Montpelier, Vermont, it’s a civil rights issue.  (2005 study)  Whether it is the consistent noisy neighbors in your apartment building, booming car stereos rolling down your street, or the airport expansion plans that threaten to start flight noise an hour earlier in the morning, you need to speak up!  Communities in the US and all over the world have lobbied for and won changes to zoning laws and operating conditions in response to their complaints about noise.

Loud noise increases blood pressure, heart rates and stress levels. According to a 1982 study, increased blood pressure seems to be a “necessary” response in our bodies to loud noise, because if the receptors that signal vasoconstriction (constriction of vessels) are blocked, the body will increase heart rate to compensate for the lack of constriction. Loud noise can be experienced by many tradespeople in different industries on an ongoing basis (construction, factory work, warehouses, transport and service industries, civil workers, etc.), making it a chronic hypertension exacerbator.

Noise affects childrens’ learning.  In 1975 a study on a school located near elevated train tracks showed that the classrooms facing the tracks were consistently behind in test scores versus those in the quieter back side of the building, and by the end of the year, were a full grade point behind their peers in the quieter classrooms.  After acoustic tiles were installed in the classrooms and the train authority treated the tracks to make them less noisy, the childrens’ reading scores improved.  Feeling annoyed by noise can cause kids to lose focus on lessons.  For infants and children learning how to talk, a noisy environment can make it harder for them to understand speech.   It also affects how they play and sleep.  Children with special sensitivities—such as Autism Spectrum Disorder (ASD), Attention-Deficit Hyperactivity Disorder (ADHD), sensory processing disorders or learning differences are affected on a higher level by environmental noise. (healthychildren.org

Noise affects our sleep!  This seems like a no-brainer, but those who struggle to get sufficient quality sleep need to make a “sleep sanctuary” a priority.  Here are some suggestions:

  • Leave your phone outside the bedroom and use an electric or windup alarm clock.  If this is not possible, set a “Do Not Disturb” time, such as 10pm-8am, so that phone calls and message “dings” will not wake you.  If you are a caretaker, it’s also possible to have rule exceptions for people who most frequently call you.  

  • If you live in an multi-family building, you can block noise coming from below by adding thick rugs on the floors.  

  • Use acoustic foam on windows to dampen outside noise.  To make it removable, you can use glue or double-sided tape to apply these sound-proofing wedges to a foam board.  

  • Over the foam board, use blackout curtains as well.  Blackout curtains are typically made of several layers of fabric that will accomplish both your noise and light-blocking goals. 

  • Get accustomed to using comfy ear plugs.  Flents Foam Ear Plugs are highly rated for comfort and noise abatement–but they won’t stop you from hearing really important noises like an emergency phone call or a smoke alarm.  Personally, earplugs have been a staple of my sleeping habits since college, because they work!  

  • If you don’t like earplugs or still have significant environmental noise, add a white-noise machine to your bedroom.  Yogasleep Dohm UNO White Noise Sound Machine is highly rated for being easy to use, customizable, and travel-friendly.

  • What not to do: don’t listen to music!  "Almost everyone thought music improves their sleep, but we found those who listened to more music slept worse," Scullin said. "What was really surprising was that instrumental music led to worse sleep quality -- instrumental music leads to about twice as many earworms." (Michael Scullin, Ph. D, in his study on how earworms, those songs that replay in your head even when the music stops, affect sleep). 

  • For more tips on getting a good night’s sleep, check out our post on Maximizing Your Sleep.

There’s an App for That

Given some of the serious consequences of too much stress and too little sleep, as a health-conscious member of your household, it’s important to set limits on the level and duration of background noise in your home.  As we said in our post about sensors, you need to measure it so you can improve it! 

  • Measuring sound levels can be as easy as going to the “app store” on your phone and downloading an app to measure decibels; you don’t need a fancy meter.  Also, you need to log these levels and length of time that they persist, so that you can have a history to point to when advocating for change.  

  • You can use the above strategies for the bedroom to create other quiet places in your home for relaxing, reading, studying, etc.  You can also negotiate quiet times so that everyone in the home is winding down and resting during certain hours.

  • Try to schedule noisier activities while you are out of the home!  For example, you can start the dishwasher or washing machine when you leave for work or to run errands, or enable them to start remotely if you have smart appliances.  

  • Make a more peaceful oasis in your backyard: Acoustifence is an 1/8 “ thick material suited to outdoor installations that reduces sounds by 28 dB through the material.  It can be printed in all manner of beautiful and lifelike scenery, including brick, garden, stone veneer, etc. and comes in pre-cut and grommeted sections of 6’ x 30’.  These can be quickly installed over existing chain link fences to deaden sounds from generator enclosures, dog parks, parking lots, sports fields, construction sites, racetracks, airports, etc. If you want to create a quieter backyard, you can plant real plants in front of a printed screen to get a green, layered effect.

  • There are also apps for your phone to notify you when the selected audio level of playback is too loud.  According to 2018 data, the average adult is streaming audio content through mobile devices for about 1 hour per day. (ENT & audiology news).  Both of the following apps allow you to monitor your listening better to prevent hearing damage. 

    • The Apple Health App has the ability to measure sound levels from headphones so that listeners can monitor their noise exposure from their devices. The app uses guidelines from the World Health Organization (WHO) to clearly indicate to listeners when their noise exposure is within acceptable limits, or if it’s at a level that is potentially dangerous to their hearing. 

    • HearAngel is an Android app that compares your listening levels to a Daily Sound Allowance (DSA). A dose allowance of 85dBA (average level) for an eight-hour period is based on Health and Safety Executive (UK) recommendations.  It also allows you to monitor your children’s listening levels via a PIN code.


Noise pollution may be a new way of thinking about unwanted sound, but once you experience the bliss of quiet, it can be the new calming “background” to your home. 

Photo by Andre Benz on Unsplash

Less Coffee, More Fresh Air!

Less Coffee, More Fresh Air!

At some point in most peoples’ lives, fatigue is a fact of daily life.  We can chalk it up to too much work and not enough sleep, or poor quality sleep, or a virus that seems to be “going around”.  But what if it could be as simple as not enough fresh air?  Simple…yet sometimes not easy to fix, when opening the windows lets in more harmful air than good.  Let’s dig into this “simple” cause…

Different regulations regarding ventilation have been around for a long time, way longer than the American Society for Heating, Refrigerating and Air-Conditioning Engineers (ASHRAE) published its first Standard 62 for ventilation. The first, ANSI/ASHRAE Standard 62-1973, Standards for Natural and Mechanical Ventilation, presented minimum and recommended ventilation rates for 266 applications and became the basis for most state codes.(ASHRAE.org)

This standard has been revised several times since 1973, and the current standard calls for homes to “receive 0.35 air changes per hour  but not less than 15 cubic feet of air per minute (cfm) per person.” (epa.gov)  Why?  According to Britannica.com, Clean, dry air consists primarily of nitrogen and oxygen—78 percent and 21 percent respectively, by volume. Without any other contaminants such as carbon monoxide (from combustion) or radon (from the earth) entering a building, humans change the composition because we take in oxygen and breathe out carbon dioxide.  Our lungs can still rebreathe this air “safely” until it decreases below 19.5% (OSHA threshold for oxygen in atmosphere), but increaseing levels of carbon dioxide (CO2) may cause occupants to grow drowsy, get headaches, or function at lower activity levels.  (healthybuildingscience.com)  What’s the threshold of CO2?  

  • NIOSH (National Institute for Occupational Safety and Health): 1,000 ppm (parts per million in air) are a marker suggesting inadequate ventilation.  

  • ASHRAE recommends that carbon dioxide levels not exceed 700 ppm above outdoor ambient levels.   (Normal range for outdoor levels are typically in the 350-450 ppm range). 

  • OSHA (the Occupational Safety and Health Administration) limits carbon dioxide concentration in the workplace to 5,000 ppm for prolonged periods, and 35,000 ppm for 15 minutes.  

Taking the most conservative route, 1000 ppm is only 0.1%.  Wow, it doesn’t take a lot of CO2 to make stale air!  If this is the gold standard, why are we suffering in stale air?   The answer is that  many places in the US do not require building permits in order to build or renovate a home.  For this reason, it’s up to the homeowner to know what is needed and make sure it’s installed.  If the HVAC technician does not design fresh air into the system, and the homeowner does not know about the need for it, the home won’t have it and the air will be stale.  Case in point: my 1982 home in the country.  It cools, heats, and circulates stale air.  

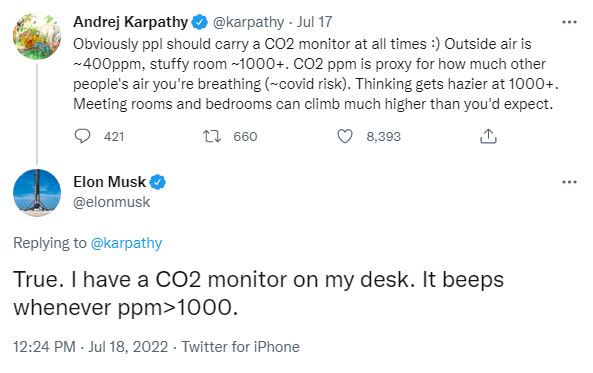
Take this tweet from Andrej Karpathy and Elon Musk, who know a bit about technology: 

And then the public chimed in: a Stanford professor used to take CO2 measurements in a lecture hall before packing 100+ students in for 1.5 hours, because some halls did not have enough ventilation to sustain deep thought!  Then a restaurant worker began to think, oh, so that’s maybe why I got dizzy sometimes during peak hours of a restaurant?  And another: his son used to wake up crying but since increasing ventilation in his room, the child sleeps a lot more peacefully.  

So if you want to measure your air, lethargy, unclear thinking and headaches don’t have to be part of your day!  There are lots of CO2 monitors on the market, with most starting about $65-70.   This monitor by INKBIRDPLUS shows temperature, humidity and CO2, and also allows you to customize an alarm for different levels of CO2 (they recommend normal (400-700 ppm), warning (700-1500 ppm), and dangerous (1500-5000 ppm)).  

Can you imagine measuring the CO2 while sitting in a conference room or in a lecture hall?  With such technology at your fingertips, there’s no reason to be ashamed to say “I need a break”.   Your brain and body will thank you!

Photo by Call Me Fred on Unsplash

Getting the Basement Dried Out

Getting the Basement Dried Out

In our post on how the basement affects our whole home’s air quality, we discussed how mold and mildew form and are sustained in the basement.  Active water leaks (flowing down the walls and pooled on the floor) are not required to make the basement a musty place.  Here are some sources of moisture coming into the basement:

  • Concrete is not a moisture barrier on its own!  Water will permeate concrete walls and floors and simply evaporate, increasing humidity.  
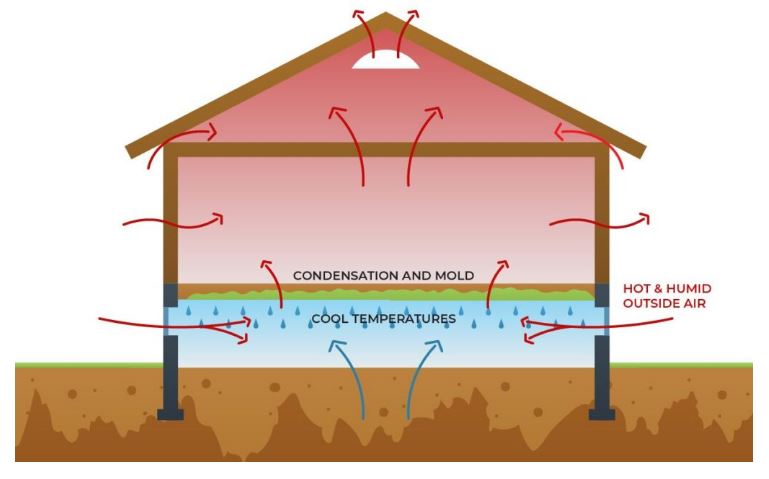
  • Open or broken windows allow moist air from the outside to come in and upon encountering cool walls and surfaces in the basement, condensation will form or just increase relative humidity in the air.  
  • Air leaks around windows, entry doors, unsealed wall penetrations and penetrations into the first floor above allow air to come in, in an uncontrolled way. 

Ideally the basement is inside your building envelope, whether you decide to finish it or not.  This is because it can be a suitable place for mechanical systems like HVAC air handlers and furnaces, hot water heaters, and also for storage.  To house these systems, however, the basement needs to be dry, with good air quality.  We argue that the basement air quality needs to be as good as any other floor in the home, because it will mingle with the atmosphere of the rest of your home!  There will be small leaks in the basement ceiling that make it permeable to the rest of your home.

The way to control humidity is to control:

  • Water flow into the space,
  • Airflow into the space, and
  • Air circulation within the space.

Let’s tackle each problem individually.

Water flow into the basement

Water flowing down walls in streams and puddling on the floor is a major problem– in this case, it is like living above a lake!  It will be difficult to “dehumidify” the air when open water is present, because the water will be continually vaporizing into the air as fast as a dehumidifier can take it out.  Although many basements exist like this, walls and storage of home goods in such environments can accumulate mildew rapidly.  Painting on a “waterproofing coating” will usually just act as a band-aid, because the pressure behind the wall, forcing it into your basement (called hydrostatic pressure) will eventually break through the paint and even degrade the foundation if it’s not drained away properly using interior and/or exterior drains. (basement waterproofing)  It’s best to contract several reputable basement remediation contractors in order to get their recommendations and quotes on stopping the inflow of water.  

If the water is only causing dampness on the walls but not visible condensation, then it’s possible to allow the walls to continually “dry” to the inside by doing the following:

  • Cracks and damage to the walls need to be repaired first.
  • Install rigid foam board with a “perm” rating of 1 or greater.  This allows the moisture to move through the foam and dry out, but still insulate the basement for greater thermal comfort and avoid condensation on the cold wall. Keep the foam insulation up about an inch from the floor to allow any condensation to drain.  If desired, the walls can be framed with treated wood to hang drywall inside.  An excellent cutaway diagram of the installation can be found here (page 24). Below is a picture of rigid foam board insulation from the same document (page 32).
  • An alternative to applying rigid foam board is to paint concrete walls with a waterproofer such as UGL’s Extreme Latex Masonry Waterproofer.  This product has a perm rating of less than 1 (according to this manufacturer’s video), so it is vapor semi-impermeable, but it does not have any insulating properties, like the foam board, so the walls will still be cold to the touch and allow condensation if the air inside is too warm and humid.  
  • Use dehumidification to dry things out.  
  • Decrease relative humidity by increasing the temperature slightly (the dehumidifier may raise the temperature a few degrees, but if not, you can add a small heater).
  • Increase circulation with fans so that air is evenly dehumidified.

Some notes on Vapor Permeability: A material’s permeability is measured in units called perms, which assess how much moisture can pass through a barrier in a 24-hour period according to standardized industry tests. Materials are separated into four general classes based on their permeance:

  • Vapor impermeable: 0.1 perms or less

  • Vapor semi-impermeable: 1.0 perms or less and greater than 0.1 perm

  • Vapor semi-permeable: 10 perms or less and greater than 1.0 perm

  • Vapor permeable: greater than 10 perms

Materials with lower perm ratings are better at stopping the movement of water vapor. If the perm rating is low enough, the material is a vapor retarder. If it’s really low, it is a vapor barrier. (Barricade Building Products)


Air flow into the basement

Sometimes it’s difficult to know what to do: open the windows or not?  Many reputable websites advocate “airing out the basement” (such as thisoldhouse.com), and we at HypoAir always advocate for ventilation to dilute stale air, but here’s the problem: when you don’t know the dewpoint of the air coming in or leaking in, it can cause major mold problems in the basement!  Dewpoint is the controlling factor of whether fresh-air ventilation alone can prevent mold.  As we wrote in another post

The best way to explain this (per this great article) is to find out the dewpoints of the indoor and outdoor conditions.  If the outdoor dewpoint is lower, you can ventilate with fresh air and still dry out your house!  For example on July 26, 2002, here are the conditions inside and outside my house (a relatively “dry” hot day outside!):

Inside: 76 deg F, 67% humidity = 63 deg F dewpoint (check out this easy calculator on dpcalc.org)

Outside: 91 deg F, 54% humidity = 72 deg F dewpoint (dpcalc.org)

See, in this case even though the relative humidity outdoors is lower, if I open my windows, that hot air coming inside would be cooled and relative humidity would increase, working against my humidity goals.

In the case of the basement, the air temperature could easily be lower, like 68 deg F.  If you cool 91 deg air with 54% relative humidity down to 68 degrees, water vapor in the air is going to condense, making your humidity problem worse!   Therefore we want to control all sources of air inflow and only let in drier air for ventilation.  Here is a diagram showing the problem of leaving windows open, and how to solve it:

source: bayareaunderpinning.com

  1. Close windows, block off vents, and seal the window frames with caulk, spray foam or adhesive tape made for the purpose.  Make sure exterior doors have weatherstripping. 

  2. Check for unsealed penetrations in the walls.  If you have to use a flashlight and look behind appliances such as water heaters or furnaces, be prepared with gloves and pest spray to get it done!  The best sealant for wall penetrations in the basement would be sprayfoam, because it conforms to the shape of the hole.  You may want to shove in a wad of steel wool first, because it deters animals from chewing through the foam and re-opening the hole.

  3. Look up–check the ceiling.  If there is a false ceiling in the basement, you may need to remove ceiling tiles and/or insulation in order to see the underside of the subfloor, but this is where big problems can hide!  The photo below shows the underside of a tub.  Plumbers often cut BIG holes to make their jobs easier, but this can really hurt air quality when these holes let lots of moldy air up (if there’s a negative pressure generated in the space above, this is easily done with a bathroom vent fan), or warm air down (if you are using any type of air extractor in the basement).  It’s best to seal big holes like this one by framing in a box to the surrounding joists, and using spray foam to seal the resulting cracks and holes.  It’s not recommended to insulate the ceiling of the basement (see this definitive guide, page 25) to try to separate it from the rest of the building, as this will only cause more mold problems in the basement.

Source: energyvanguard.com

Where does fresh-air ventilation come from if you’ve sealed outside access off?  According to energyvanguard.com, there are 6 ways to supply fresh air to your home in a humid climate, and for the purpose of a basement that is outside the building envelope, only one makes sense since you’re probably already using a dehumidifier: a fresh air fan that purposely pulls in outside air.  Here are some options to make it happen: 

  • Air King’s QUFresh, 120 cfm, $413 at ecomfort.com
  • Broan’s FreshIn, 180 cfm, $239 at sylvane.com
  • ACInfinity’s AIRTITAN T3 6-In Ventilation Fan, 120 cfm, $69.99, sylvane.com

The AirTitan is a good option where windows are available, because it can be retrofitted to fit in an open window more easily than the other ducted models.  Each of these models have temperature and humidity settings you can adjust so that the fan will only operate when it meets those specifications.  These may need to be set higher in hot and humid climates, but the dehumidifier should be able to handle moderate inflows of fresh air.  When you control the airflow into the basement, you can control the humidity.

And finally, Air Circulation Within the Space

Your basement may be one wide-open area, or several rooms separated by walls and doors, but in each case, good air quality requires that air is moving constantly.  Here are some tips to get the best circulation:

  • Leave doors within the basement open as much as possible
  • Leave dedicated fans running all the time.  Floor fans work great for this purpose, as you can move them around/adjust direction and speeds until you find the optimum circulation.
  • Move boxes and furnishings away from walls and up from floors so that air will circulate to dry them.  Don’t stack boxes to the ceiling.  Separate boxes by several inches to get air moving between them. 
  • Remember, the less absorbent material stored in a non-conditioned space, the better (less cardboard, less fabric, and less wood).

I hope these suggestions help you to dry out your basement so that your whole-house air quality improves, from the ground up!

1 13 14 15 16 17 26